ChevyParts
My Garage
My Account
Cart
OEM Saturn Clutch Fork
Release Fork- Select Vehicle by Model
- Select Vehicle by VIN
Select Vehicle by Model
orMake
Model
Year
Select Vehicle by VIN
For the most accurate results, select vehicle by your VIN (Vehicle Identification Number).
1 Clutch Fork found

Saturn Release Fork Part Number: 21001145
Product Specifications- Other Name: Fork, Engine Clutch Release; Clutch Fork
Saturn Clutch Fork
Choose OEM Clutch Fork, you're making the optimal decision for superior quality and perfect performance. You can feel confident because each component goes through stringent quality checks. Every part is carefully built to comply with Saturn's factory specifications. You'll enjoy a smooth, worry-free installation that fits just right. At ChevyPartsGiant.com, you'll find it easy to get top-quality OEM Saturn Clutch Fork. You can shop at highly competitive prices and protect your budget. All our genuine Saturn parts include a dependable manufacturer's warranty. You'll also appreciate our straightforward return policy and swift delivery services for extra convenience.
Saturn Clutch Fork allows the driver to de-engage the pressure plate in order to keep the gear changes sharp. In 1985, Saturn was the new project by General Motors and in 1991, it constructed its own plant and attracted the attention, due to a new design and marketing approach. Owners lauded Saturn because of dent resistant plastic body panels that shrug off dents in parking lot and longevity of vehicles. The brand also employed lost foam casting within its engines to trim down weight; supported the metal with a resistant multicolor painting procedure that remained glossy over the years forming a loyal community that continues to appreciate Saturn cars up to date. Drivers also had basic interior design, visibility of instrument cluster, and customer-friendly pricing which corresponded to the innovative construction quality. A Clutch Fork is a lever that pushes the release bearing on the pressure plate, and this particular Clutch Fork has been designed to fit in the brand bellhousing. When putting on a Clutch Fork, ensure that you place the vehicle on stands, loosen and drop the transmission, and thoroughly clean the bellhousing. Grease the pivot ball and bearing groove lightly and mount the fork on its pivot, connect the release bearing, and wiggle the fork, to ensure it is free centered on its pivot. Determine a fit between the clutch disc and an arbor, and push the transmission forward until the input shaft pushes into place, and install the bolts in the crisscross pattern. Once again reconnect the hydraulic line or cable, fine-tune the pedal free play, remove any air, re-mount and brace, check leaks and finish by performing a quiet road test to ensure smooth engagement.
Related Saturn Parts
 Saturn Shift Cable
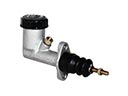 Saturn Clutch Master Cylinder
 Saturn Flywheel
 Saturn Automatic Transmission Shift Levers
 Saturn Automatic Transmission Shifter
 Saturn Clutch Disc
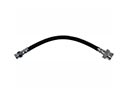 Saturn Clutch Hose
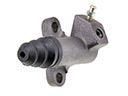 Saturn Clutch Slave Cylinder
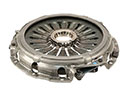 Saturn Pressure Plate
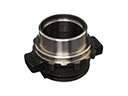 Saturn Release Bearing
 Saturn Transfer Case
 Saturn Transmission Assembly