
Popular OEM GMC Parts
- Body & Hardware Parts View More >
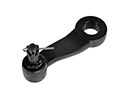
- Steering Parts View More >
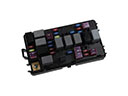
- Electrical Parts View More >
- Air & Fuel Delivery Parts View More >
- Charging & Starting Parts View More >
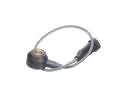
- Engine Parts View More >
- Belts & Cooling Parts View More >
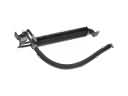
- Suspension Parts View More >
- Driveline & Axles Parts View More >
- Emission Control & Exhaust Parts View More >
- Transmission Parts View More >
- Brakes Parts View More >


Why Buy Genuine GMC Parts From ChevyPartsGiant.com
At ChevyPartsGiant.com, we offer only original equipment manufacturer (OEM) GMC parts that are designed to the same specifications that are utilized at the factory. Each part is provided directly from authorized GMC dealers and is covered by the manufacturer's warranty. This sourcing helps preserve vehicle integrity after service and reduces the risk of rework. Our catalog is organized to help you identify the correct component quickly for your specific model, which improves ordering accuracy and keeps repairs on schedule. Because these parts match original dimensions and materials, installation aligns with design tolerances and restores consistent performance. Whether you are replacing worn items or addressing a more involved repair, dealer-supplied components maintain the standards the vehicle was built to meet. Selecting OEM parts provides predictable results and a clear path to professional quality in every repair.
ChevyPartsGiant.com offers competitive pricing to help maintain control of cost, while maintaining product quality. The checkout process is safe and simple and you can complete your order from home in a few steps. Orders are dealt with promptly and there are expedited shipping choices for getting you started with repairs sooner. If plans change, convenient returns add flexibility. Online discounts make routine service more affordable than typical retail while maintaining parts that are consistent with your vehicle's requirements. The site is designed for easy shopping from home so that you can check your cart and make the purchase without additional steps. The goal is to reduce time and effort of sourcing, from selection through fulfillment, so you can keep projects moving without interruption. Select the parts you need, pay with confidence, and be certain of rapid shipment so that your schedule will stay on track.
GMC makes pickup trucks and SUVs for work and daily use. It started in 1901 as the Rapid Motor Vehicle Company and became a complete vehicle manufacturing unit under General Motors. GMC builds strong frames and powertrains to handle heavy loads. GMC adds safety aids like surround vision and hitch guidance so drivers stay alert. GMC fits professional-grade suspension, quiet cabins, and a MultiPro tailgate with flexible settings for easy bed access. GMC tests each model to keep reliability high. GMC keeps improving its technology while focusing on capability. GMC earns trust with their solid designs.
GMC stands for strength, craft, and real-world grit. GMC focuses on trucks and utility vehicles for your lifestyle. GMC owners count on bright lighting, steady control, and dependable use. The LED Headlamp cuts through dark nights and helps road visibility. The Sport Shock Absorber keeps the body steady over rough ground and fast turns. The Spark Plug fires consistently, so engine starts feel quick and smooth. Choose OEM parts to keep that promise. GMC engineers shape each piece to strict factory rules and check fitment with precise tools. They run hard tests for heat, impact, and long miles. You get solid safety, sharp response, and fewer shop trips. Keep your GMC strong today, and keep your GMC ready for tomorrow.
GMC Parts and Q&A
- Q: How to replace the camshaft on the right side on GMC Acadia?A:To remove the right-side camshaft, assemble the required tools and disassemble the lower intake manifold, camshaft cover, sensors and actuator solenoid. Turn the crankshaft and frame the camshafts in place and fasten the timing chain using the retention tool. Then take out the actuator bolt and camshaft and install the new components and camshaft.
- Q: How to replace the alternator in a V6 engine on GMC Sierra 1500?A:In order to change a generator in V6 engine, one has to disconnect a negative battery cable, take off the air cleaner outlet resonator and drive belt and take out the engine wiring harness clip. Take off the generator bolts and re-lay the hoses. To install, position the generator behind, position hoses and fix all connections.
- Q: How to replace the water pump on GMC Yukon?A:In order to drain the cooling system, remove the air cleaner outlet duct to change the water pump. Disassemble: Take out a number of hoses, accessory drive belt. When water pump and gaskets are removed, check the coolant. Attach the new water pump and gaskets and reconnect hoses and clamps. Lastly, pour in the cooling system and fit the duct back.


