
Popular OEM GMC Jimmy Parts
- Body & Hardware Parts View More >
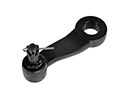
- Steering Parts View More >
- Electrical Parts View More >
- Air & Fuel Delivery Parts View More >
- Charging & Starting Parts View More >
- Engine Parts View More >
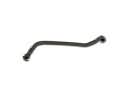
- Belts & Cooling Parts View More >
- Suspension Parts View More >
- Driveline & Axles Parts View More >
- Emission Control & Exhaust Parts View More >
- Transmission Parts View More >
- Brakes Parts View More >


Why Buy Genuine GMC Jimmy Parts From ChevyPartsGiant.com
Looking for real GMC Jimmy parts? ChevyPartsGiant.com may be a better choice to find genuine parts at wallet-friendly prices. We sell only OEM GMC Jimmy parts, ensuring perfect fit, reliability, and long-term performance. With our website, you can easily get access to the same parts found at local GMC stores. All components are produced by GMC and are exclusively fitted on GMC Jimmy automobiles. By shopping at our store, you can enjoy the quality of the GMC factory without the high prices of brick-and-mortar facilities. We achieve this because we are an online store operating at lower costs, which we pass on to you. We also have a user-friendly platform where you can find and order genuine GMC Jimmy parts swiftly. We are here to make your process of restoring a GMC Jimmy or dealing with simple repairs quick and inexpensive. We also make it easy to obtain GMC Jimmy parts at competitive shipping prices and a team of knowledgeable staff ready to take your order. Choose ChevyPartsGiant.com to save time and money, as well as keep your GMC Jimmy in the good condition.
The GMC Jimmy entered the market in 1984 as a Chevrolet Blazer rebadged model from General Motors. During production at Pontiac Michigan and Shreveport Louisiana from 1984 to 2005 the GMC Jimmy entered the market. In 1991 GMC Jimmy received a makeover by adding a wagon version to its existing two-door model specification. The Jimmy featured a front-engine, four-wheel-drive layout, offering solid off-road capability and all-weather traction for varied driving conditions. A succession of engine power options changed from initial 1.9 and 2.0 L gasoline power to 2.5 L Iron Duke power or increased strength which achieved higher output levels. A power upgrade to 160 hp (120 kW) happened during 1989 before GMC Jimmy started using the 4.3 L Vortec 4300 V6 engine to boost performance levels further. Drivers could choose between a 4-speed automatic transmission and a 5-speed NV3500 manual transmission to change their driving experience. The GMC Jimmy's mechanics have received multiple generations of improvements for both performance and quality standards. Genuine GMC Jimmy parts, such as grilles and wheels, are factory-designed to ensure durability, proper fit, and to preserve the vehicle's proven reliability and efficiency.
GMC Jimmy issues cluster into braking electronics, fuel delivery, and fuel level sensing. In the brake system, the ABS control module can fail on a GMC Jimmy. The ABS light turns on and modulation stops. Inspect power and grounds, verify wheel sensor signals, then replace the ABS control module and clear codes. For fuel delivery, a GMC Jimmy may stall or crank without starting. A weak fuel pump and a restricted fuel filter reduce pressure under heat. Confirm with a gauge at the rail. Renew the fuel filter, replace the fuel pump module, and clean connectors on the Jimmy. For instrumentation, a GMC Jimmy can show an erratic gauge that drops or sticks. The fuel level sensor inside the pump module wears and sends false data to the cluster. Replace the fuel pump assembly or service the level sensor on the Jimmy, then reset the trip and verify operation. Perform a voltage drop test on the pump circuit to confirm clean power. Relearn brake module settings and ensure no wheel speed faults return. Finish with scan data review, a leak check, and a hot road test. That ensures the GMC meets stable starting, smooth fueling, and reliable brake response.
GMC Jimmy Parts Questions & Answers
- Q: How to replace the distributor in an engine on GMC Jimmy?A:The replacement process for a Distributor starts by turning off the ignition point while pulling off the air cleaner and Distributor Cap sparks through each wire boot turn half a turn and suction on the wire boot. First disconnect the electrical connector from the Distributor base before removing two screws holding the Distributor Cap in place and discarding those screws. Before installing new marks on the Distributor housing use a grease pencil to indicate the Distributor rotor position and Distributor housing alignment and Intake Manifold position. Pull out the Distributor while keeping an eye on the rotor's counter-clockwise movement that reaches about 42 degrees after bolt removal. Home engine repair begins with Distributor assembly mark duplicates on new equipment then rotor allocation to second mark before Distributor insertion followed by base hole alignment at Intake Manifold hole. When installing the Distributor the rotor rotates in a clockwise direction approximately 42 degrees until it settles and the rotor segment should position itself against the first mark. The Distributor needs removal followed by reinstallment if the marks between original housing and new one do not match. Use a 25 n.m torque wrench to tighten the Distributor clamp bolt after installing new screws that require 2.4 n.m torque to tighten into the Distributor Cap. Then restore the electrical connection before installing Spark Plug Wires and the ignition coil wire properly oriented to their boots. The vehicle's malfunction indicator lamp turns on when dtc p1345 triggers and indicates the Distributor has an installation problem. You should position the number 1 cylinder at top dead center (TDC) compression stroke while ensuring the crankshaft balancer marks match with the engine front cover tabs during installation procedure 2. Install the Distributor by aligning its white paint mark on the stem bottom with the pre-drilled indent hole in the gear. This alignment marks the Distributor driven gear, shaft, and rotor holes to prevent misalignment. Position the gear correctly before inserting the Distributor into the engine while maintaining spark plug tower alignment to the center of the engine. The Distributor base pointer needs the rotor segment to reach alignment before fully seating into position. The gear mesh alignment requires correction through re-execution of the procedure when the Distributor base points are not aligned properly. Secure the clamp bolt at 25 n.m (18 lb ft) torque before attaching the Distributor Cap with new screws set to 2.4 n.m (21 lb in). Reattach the electrical connector then place the Spark Plug Wires and ignition coil wire with correct wire orientation. Repeating installation procedure 2 becomes necessary when the malfunction indicator lamp remains lit after completion of installation.
- Q: How to Service and Repair a Steering Column and Steering Wheel with Tilt on GMC Jimmy?A:For servicing and repairing of a steering wheel and column with tilt, the following tools are needed: steering wheel puller (J 1859-A). First, deactivate the sir and remove the inflator module. Next, removing the horn plunger from the steering column, you have to press it inward to the stop, and then turn it 90 degrees backwards, then disconnect the steering wheel electric connector. Remove the nut, which holds the steering wheel to the steering wheel shaft and make the mark on the steering wheel to the steering wheel shaft for proper alignment. To remove the steering wheel, remove it using the steering wheel puller (J 1859-A). Do not hammer the end of the steering column shaft to avoid the loosening of the plastic injection, which is responsible for the maintenance of rigidity. If installing it, make sure the turn signal on the multifunction switch is in the neutral position, line the mark on the steering wheel to the Steering Shaft, and install the steering wheel. Tighten the retaining nut to a torque of 41 nm (30 ft. Lbs), reconnect the steering wheel electrical connector, install stearing wheel horn plunger, and then lastly install the inflator module and then only enable the sir system.
- Q: How to replace the alternator on GMC Jimmy?A:To replace the generator, you need disconnect the negative Battery Cable as well as the Drive Belt. Next, unbolt the heater hose brace situated on the generator and remove the bolts for mounting the generator. Carefully remove the generator from the mounting bracket and the generator electrical connector. Performance figures: supply generator output (BAT) terminal retaining nut. For installation, use the terminal wire of the generator output (BAT), where it is necessary to cover it with insulating boot and tighten the terminal nut to 17 n.m (12 lb ft). Then, connect the generator electrical connector and then reinstall the generator on the mounting bracket using the mounting bolts tighten to 50 n.m (37 lb. Ft). Install the heater hose bracket bolt back to the generator with the torque tightened to 25 n.m (18 lb ft), followed by the installation of the Drive Belt. Lastly, reattach the negative batter cable.
- Q: How to replace the front center console (Full Length (Manual Trans)) on GMC Jimmy?A:To remove the front floor console (full Length (manual trans)), remove the shift control lever, Cup Holder insert and screws that secure the trim plate to the console, then remove that trim plate. Slide open the cover of the storage compartment and take off the storage compartment. Then remove nuts that attach the console to the vehicle and if it is equipped disconnect electrical connector, you can pull the console out. For installation, set the console back into the vehicle and reconnect the electrical connector if provided. Install the nuts to fasten the console, torque it up to 10 n.m (88 lb in), then the storage compartment. Reattach the trim plate to the console and screw fix it making sure it is tight at 1.9 n.m (17 lb in). Lastly, reinstall the Cup Holder insert and the shift control lever.


