Popular OEM Buick Parts
- Body & Hardware Parts View More >
- Steering Parts View More >
- Electrical Parts View More >
- Air & Fuel Delivery Parts View More >
- Charging & Starting Parts View More >
- Engine Parts View More >
- Belts & Cooling Parts View More >
- Suspension Parts View More >
- Driveline & Axles Parts View More >
- Emission Control & Exhaust Parts View More >
- Transmission Parts View More >
- Brakes Parts View More >
Why Buy Genuine Buick Parts From ChevyPartsGiant.com
At ChevyPartsGiant.com, your one-stop destination for genuine Buick parts, our commitment to manufacturer standards helps your Buick receive the care it deserves. For years, customers have trusted us for authentic Buick parts, provided at manufacturer standards to maintain durability and performance. ChevyPartsGiant.com stands out for authentic Buick parts: We only deal in OEM Buick parts designed for a perfect fit and factory performance, with delivery directly from authorized Buick dealers. With our knowledgeable team, finding the right Buick part is quick and hassle-free, and easy shopping through our site streamlines selection. Centering authenticity, fitment and clear guidance reduces guesswork before you order, ChevyPartsGiant.com makes choosing correct components straightforward. The result is a professional, confidence-building experience focused on proper fit and lasting durability.
ChevyPartsGiant.com promises great value with genuine Buick parts at unbeatable pricing that deliver high-quality parts that will keep your vehicle at peak performance without stressing your pocket. Explore a unique, cost-effective solution to repairs or upgrades only at ChevyPartsGiant.com, where unmatched quality meets affordability. For Buick owners, ChevyPartsGiant.com helps you skip the high prices at local stores, and all purchases come with fast shipping, a manufacturer's warranty and straightforward returns. Orders are processed promptly so you can start to fix your Buick right away, and service support remains available if you need assistance after purchase. By combining everyday discounts, warranty-supported fast fulfillment, and more from ChevyPartsGiant.com, you get a smooth, value-driven path from checkout to installation, helping you maintain performance, control costs, and get back on the road quickly.
Buick is a very old brand in the United States car production industry that is reputed to offer a comfortable and smooth ride. It started its business in 1903, and it was among the early vehicles to leave a mark in vehicle history. In the course of time, Buick has come up with new ideas like quiet tuning and driver-oriented features. The brand blended tradition with newer upgrades that fit modern lifestyles. Buick also displayed the bold Wildcat EV concept in 2022, showing its future design and all-electric direction. Buick continues with its long, responsible history and stylish designs.
Trust is Buick's advantage. The precise fuel injector brings easy starts and smooth passing. A high-strength subframe keeps the cabin quiet and straight over bumps. The headlamp assembly makes night driving clear and low stress. A tight, leak-free exhaust manifold keeps torque ready without harshness or fumes. Choose genuine Buick OEM parts to keep that calm feel. The factory fit prevents rattles before they begin and withstands performance in summer heat and winter cold. You'll spend less on repeat repairs and enjoy controls that respond the way you expect. Select OEM Parts help preserve the Buick character you bought the car for: quiet, steady, and confident.
Buick Parts and Q&A
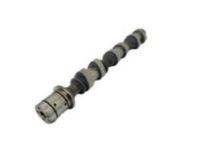
- Q: How to replace the camshaft on the right side (LP1, LY7) on Buick LaCrosse?A:To change the camshaft on the right side, take out the intake manifolds, upper and lower, camshaft cover and sensors. Turn the crankshaft balancer until the camshafts are in neutral. It is then necessary to secure the camshaft actuators using EN-48313 Timing Chain Retention Tool and remove the camshaft, and bearing caps. Installation To install, position marks, mount parts, and reassemble all.
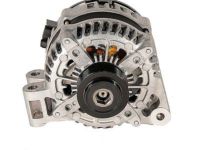
- Q: How to replace the alternator on Buick Enclave?A:In order to change the generator, detach the negative battery cable, drive belt, and engine mount strut bracket. The coolant recovery reservoir, engine wiring harness, and the generator can be pulled out. Install the generator and ensure all the parts, and reconnect the negative battery cable.
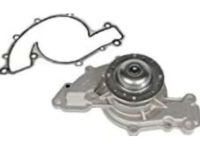
- Q: How to replace a water pump on Buick Regal?A:In order to change the pump in the cooling system, drain the system and move the source of the auxiliary wiring junction block. Take out the water pump gasket, water pump, water pump pulley and power steering pump. Clean the surfaces, install new gasket and water pump and re- install components then fill up the cooling system.


