
Popular OEM Buick Century Parts
- Body & Hardware Parts View More >
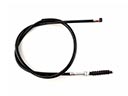
- Steering Parts View More >
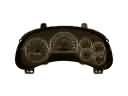
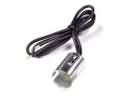
- Electrical Parts View More >
- Air & Fuel Delivery Parts View More >
- Charging & Starting Parts View More >
- Engine Parts View More >
- Belts & Cooling Parts View More >
- Suspension Parts View More >
- Emission Control & Exhaust Parts View More >
- Transmission Parts View More >
- Brakes Parts View More >
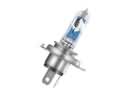
- Headlights & Lighting Parts View More >


Why Buy Genuine Buick Century Parts From ChevyPartsGiant.com
Looking for real Buick Century parts? ChevyPartsGiant.com may be a better choice to find genuine parts at wallet-friendly prices. We sell only OEM Buick Century parts, ensuring perfect fit, reliability, and long-term performance. With our website, you can easily get access to the same parts found at local Buick stores. All components are produced by Buick and are exclusively fitted on Buick Century automobiles. By shopping at our store, you can enjoy the quality of the Buick factory without the high prices of brick-and-mortar facilities. We achieve this because we are an online store operating at lower costs, which we pass on to you. We also have a user-friendly platform where you can find and order genuine Buick Century parts swiftly. We are here to make your process of restoring a Buick Century or dealing with simple repairs quick and inexpensive. We also make it easy to obtain Buick Century parts at competitive shipping prices and a team of knowledgeable staff ready to take your order. Choose ChevyPartsGiant.com to save time and money, as well as keep your Buick Century in the good condition.
Since its first launch in 1936 the Buick Century has experienced major developmental changes through its history. When Buick launched the Century it included a robust 320-cubic-inch inline eight-cylinder powertrain that provided 165 hp at 3,200 rpm making it a top performer among its contemporaries. The engine received its power delivery enhancement through a sturdy transmission system that also optimized driving dynamics. When reintroduced in 1973 the model received a revamped A-type rear-wheel-drive chassis together with 150 hp and 175 hp engines that provided stronger performance characteristics. HEI ignition made its debut in the 1974 model year which brought enhanced reliability together with better efficiency to the vehicle. The Buick Century came with a solid roof structure combined with large trunk space and the Luxus trim featured an elegant roof design. In 1977 Buick added a performance-enhancing 6.6 L V8 engine as a new option Buick Century manufacturers dedicated their production to quality by using original Century parts which optimized both performance quality and lifespan. Using genuine Century OEM parts remains essential since they follow strict Buick specifications when the manufacturer develops these components. Quality dedication from Buick leads to improved vehicle performance while simultaneously sustaining the automotive value of the Buick Century for future generations.
Problems at Buick Century tend to include the electrical, fuel evaporative, and cooling systems. In the Buick electrical system, a failing window regulator motor causes slow or stuck windows. On many Century models, heat builds in the motor, and the glass stops. Replacement of the window regulator motor restores smooth movement and lowers current draw. The Buick fuel and emissions area centers on a loose or worn gas cap. Century EVAP monitors flag leaks and store small or large leak codes. Inspect sealing surfaces, install a new gas cap, then clear codes and retest. The Buick cooling system concern involves a leaking water pump and falling coolant level. Century vehicles may show overheating, coolant odor, or residue near the pump weep hole. Pressure test the Century system, confirm flow, and replace the water pump and gasket. After repairs, bleed air on the Century, verify fan operation, and check for leaks. Regular inspections keep Buick charging, cooling, and body electronics reliable across Century mileage. Confirm window tracks are lubricated to reduce motor load and heat. Finish with a coolant concentration check and cap pressure test. Recheck charging voltage and grounds to ensure stable electrical performance.
Buick Century Parts and Q&A
- Q: How to replace the engine flywheel on Buick Century?A:In order to change the engine flywheel, one must unbolster the automatic transaxle and connect the flywheel. Unscrew the bolts of the flywheel, unscrew five of them and take out the last one with care. After taking out the flywheel and retainer, clean the threads and then install flywheel and bolts and reglue the transaxle.
- Q: How to replace the air filter on Buick Century?A:The air cleaner can be replaced by turning off the ignition. Eliminate air intake duct and housing cover clamps. Remove the air filter and the air cleaner cover. Examine the housing cover, seal assembly, and air duct to confirm that they are not damaged and change broken parts. Install back the air filter and housing cover in place.
- Q: How to replace the water pump on Buick Century?A:Replacing the water pump will require draining of the cooling system, removing the drive belt shield and the loosening of the water pump pulley bolts. Take the drive belt out, the water pump and gasket. Wipe the surfaces, fit in the new gasket and water pump, and screw the bolts. Install the drive belt and shield again and fill the cooling system.


