ChevyParts
My Garage
My Account
Cart
OEM Buick Century Ball Joint
Control Arm Joint- Select Vehicle by Model
- Select Vehicle by VIN
Select Vehicle by Model
orMake
Model
Year
Select Vehicle by VIN
For the most accurate results, select vehicle by your VIN (Vehicle Identification Number).
2 Ball Joints found

Buick Century Ball Joint, Front Lower Part Number: 17983075
$49.15 MSRP: $98.73You Save: $49.58 (51%)
Buick Century Ball Joint Part Number: 88965333
$51.99 MSRP: $82.54You Save: $30.55 (38%)Ships in 1-2 Business Days
Buick Century Ball Joint
Want to cut long-term maintenance and repair costs? Choose OEM Ball Joint. Those parts deliver top durability you can trust. On our site, you'll find a huge catalog of genuine Buick Century parts. Prices are unbeatable, so you can keep more in your pocket. Every OEM Buick Century Ball Joint includes a manufacturer's warranty. You can also get an easy return policy that keeps buying risk free. Fast delivery, get your car on the road quickly. It's simple to search, compare, and order. Stop guessing about quality or fit. Order today and save with parts that last.
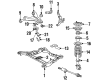
The Ball Joint is used in Buick Century vehicles, it interfaces the control arms and the steering knuckles and is part of the suspension and steering mechanisms. This component can rotate freely in two planes and helps the car to react to road surface and to steer. Usual material is steel and it consists of the bearing stud and socket with rubber boot for enclosing the ball joint from dirt and to hold the lubricant. In the models of Buick Century may be different kinds of Ball Joints: loaded or non-loaded. Loaded Ball Joints support Vehicle weight whereas unloaded are responsible for positioning without having to bear weight. Periodically, Ball Joints may wear out due to usage and other conditions may include lack of lubrication hence producing noise and misalignment. Available replacement parts include Ball Joints that are adjustable and guarantee that the Buick Century as the right handling symmetry as well as ride comfort.
Buick Century Ball Joint Parts Questions & Experts Answers
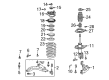
- Q: How to replace the lower ball joint on Buick Century?A:A replacement of the lower Ball Joint requires a raised vehicle and tire and wheel removal. Start by drilling a pilot hole through each rivet before drilling all other rivets. Use a hammer together with a chisel to remove all rivet heads that stayed on the piece. Start by taking off the cotter pin from the ball stud then loosen the ball stud nut. The Ball Joint/stud separator (J 41820) fits over the ball stud and lower Control Arm allowing you to turn the ball stud nut counterclockwise for separation from the Steering Knuckle. Remove the j 41820 tool from its position before you detach the lower Control Arm's ball stud bolt and its linked ball stud. To install the ball stud begin by pointing its new bolts downward while positioning it onto the lower Control Arm; tighten the new ball stud nuts to 68 nm (50 ft. Lbs.). Screw the ball stud onto the Steering Knuckle before installing the ball stud castle nut. Torque the nut to 20 nm (15 ft. Lbs.) with an additional 120 degree angle. Reinstall your tire and wheels after you complete the process by lowering your vehicle inspected for wheel alignment.

Related Buick Century Parts
 Buick Century Control Arm
 Buick Century Wheel Hub
 Buick Century Coil Spring Insulator
 Buick Century Coil Springs
 Buick Century Control Arm Bolt
 Buick Century Control Arm Bushing
 Buick Century Shock Absorber
 Buick Century Steering Knuckle
 Buick Century Sway Bar Bracket
 Buick Century Sway Bar Bushing
 Buick Century Sway Bar Kit
 Buick Century Wheel Seal