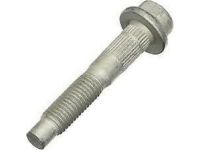
Make sure this part fits

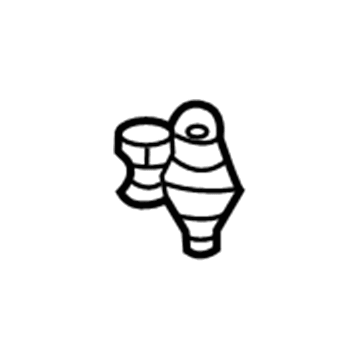
GM 88965333
Ball Joint

1997-2016 GM

Customer Questions & Expert Answers (36)
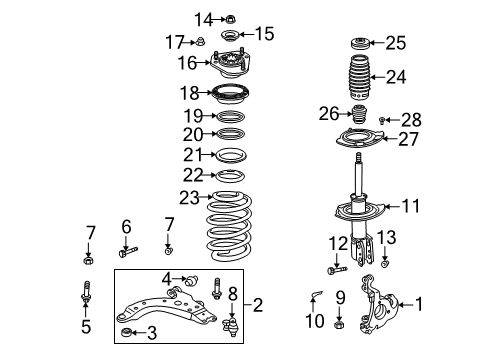
GM 88965333 Ball Joint
  • Part Description
    Stud Kit, Front Lower Control Arm Ball; Suspension Ball Joint
  • Position
    Front Lower
  • Replaces
    88955451, 22157089
  • Manufacturer
    General Motors
Make sure this part fits
$50.97 MSRP: $80.93
You Save: $29.96 (38%)
Ships in 1-2 Business Days
1
ADD TO CART
  • Related Parts
  • Product Specifications
  • Vehicle Fitment
  • Customer Questions & Expert Answers
  • Product Specifications

    BrandGenuine GM
    Manufacturer Part Number88965333
    Part DescriptionStud Kit, Front Lower Control Arm Ball; Suspension Ball Joint
    Other NamesLower Ball Joint; Stud Kit, Steering Knuckle Lower Control Arm Pivot; Stud Kit, Front Wheel Lower Control Arm
    Item Dimensions7.1 x 4.3 x 4.3 inches
    Item Weight1.80 Pounds
    PositionFront Lower
    ConditionNew
    Fitment TypeDirect Replacement
    Replaces88955451, 22157089
    ManufacturerGeneral Motors
    SKU88965333
    WarrantyThis genuine GM part is guaranteed by GM's factory warranty.
    Shipping & ReturnShipping Policy Return Policy
    Warning: California's Proposition 65
  • Vehicle Fitment

    Year Make Model Trim Engine
    1997-2005 Buick CenturyCustom, Limited, Special Edition6 Cyl 3.1 L GAS
    2005-2009 Buick LaCrosseCX, CXL, CXS, Super6 Cyl 3.6 L GAS, 6 Cyl 3.8 L GAS, 8 Cyl 5.3 L GAS
    1997-2003 Buick Regal25th Anniversary Edition, GS, GSE, LS, LSE6 Cyl 3.8 L GAS
    2002-2007 Buick RendezvousCX, CX Plus, CXL, CXL Plus, Ultra6 Cyl 3.4 L GAS, 6 Cyl 3.5 L GAS, 6 Cyl 3.6 L GAS
    2005-2007 Buick TerrazaCX, CXL6 Cyl 3.5 L GAS, 6 Cyl 3.9 L FLEX, 6 Cyl 3.9 L GAS
    2012-2015 Chevrolet Captiva SportLS, LT, LTZ4 Cyl 2.4 L FLEX, 6 Cyl 3.0 L FLEX
    2005-2009 Chevrolet EquinoxLS, LT, LTZ, Sport6 Cyl 3.4 L GAS, 6 Cyl 3.6 L GAS
    2000-2013 Chevrolet Impala50th Anniversary Edition, Base, LS, LS Sport, LT, LTZ, Police, SS6 Cyl 3.4 L GAS, 6 Cyl 3.5 L FLEX, 6 Cyl 3.5 L GAS, 6 Cyl 3.6 L FLEX, 6 Cyl 3.6 L GAS, 6 Cyl 3.8 L GAS, 6 Cyl 3.9 L FLEX, 6 Cyl 3.9 L GAS, 8 Cyl 5.3 L GAS
    2014-2016 Chevrolet Impala LimitedLS, LT, LTZ, Police6 Cyl 3.6 L FLEX
    2000-2007 Chevrolet Monte CarloLS, LS Competition, LS Sport, LT, LTZ, SS, SS 35th Anniversary Edition, SS Dale Earnhardt Signature Edition, SS High Sport, SS Pace Car6 Cyl 3.4 L GAS, 6 Cyl 3.5 L FLEX, 6 Cyl 3.5 L GAS, 6 Cyl 3.8 L GAS, 6 Cyl 3.9 L GAS, 8 Cyl 5.3 L GAS
    View More
  • Customer Questions & Expert Answers

    Q:
    Is 88965333 compatible with my car? Posted by ChevyPartsGiant Specialist
    A:
    Please Select Your Vehicle model to see if part number 88965333 is suitable before ordering.
    Posted by ChevyPartsGiant Specialist
    Q:
    How to replace the lower ball joint on Buick LaCrosse? Posted by Customer
    A:
    Begin by lifting and supporting the car before starting work. Take out the tire and wheel before piercing a pilot hole through the rivet with a drill and continuing to drill through the rest of the open rivets. Strike the rivet heads away with a hammer and a chisel tool. Unthread the ball stud nut after you remove its cotter pin from the ball stud. Rest the Ball Joint/stud separator (J 41820) over the ball stud and lower Control Arm before you twist the ball stud nut in a counterclockwise direction. Force out the ball stud by taking off its stud and nut from the lower Control Arm following Ball Joint/stud separator (J 41820) removal. To install the new ball stud apply it first onto the lower Control Arm and thread down the new ball stud bolts in their installed direction away from the stud. Secure the new ball stud nuts to 68 nm force through 50 foot-pounds of torque. Connect the ball stud to the Steering Knuckle then put on and torque the ball stud castle nut to 20 nm. Include an extra 120 degree torque after reaching the specified torque value. Replace the new cotter pin after bending its ends and put back the tire and wheels. Then lower the vehicle and test the wheel alignment.
    Posted by ChevyPartsGiant Specialist
    Q:
    How to replace the lower control arm ball joint on Buick LaCrosse? Posted by Customer
    A:
    Before replacing the lower Control Arm Ball Joint, lift and support the vehicle first. Further remove the tire and wheel. Drill pilot hole through the rivets, then drilled the rest of the rivets. With the help of a hammer and a chisel, get rid of the rest of the rivet heads. Left-hand thread for robertson nut - 7 mm, 26 mm.substring(143, 224). Mount the Ball Joint/stud separator (J 41820) to the ball stud and Control Arm, rotate ball stud nut in a counterclockwise direction to disengage the ball stud from the Steering Knuckle. Remove the Ball Joint/stud separator (J 41820) as well and remove the ball stud nut and remove the ball stud from the lower Control Arm. During installation, attach the ball stud to the lower Control Arm; screw the new ball stud bolts at the top with the bolts facing down away from the ball stud. Put on the new ball stud nuts and tighten to 68 n.m (50 lb ft). Put the ball stud to the Steering Knuckle and install the ball stud castle nut then tighten it to 20 n.m (15 lb ft) and an additional 120 degree. Finally, attach another new cotter pin and bend it and install the tire and wheels back and lower your car as well as check the wheel alignment.
    Posted by ChevyPartsGiant Specialist
    Q:
    How to service and repair the ball joint on Buick Regal? Posted by Customer
    A:
    The service and repair of the Ball Joint first require removing the lower Control Arm that needs to be secured in a vice. Remove the heads of the ball stud rivets with either drill or grind, and use a hammer and a drift punch to remove the rivets and get rid of the ball stud from the lower Control Arm. For installing, insert the ball stud into the lower Control Arm and install the new ball stud bolts in the direction downwards, away from the ball stud. Make sure that the fastener and it counterpart are free from rust and clean; make sure that fastener develops 2 nm (18 inch lbs) of torque (drag) against its counterpart before seating. If not, replace the fastener. Next, mount the new ball stud nuts and torque to 68 nm (50 ft. Lbs.). Lastly, install the lower Control Arm again.
    Posted by ChevyPartsGiant Specialist
    Q:
    How to replace the lower ball joint on Buick Century? Posted by Customer
    A:
    A replacement of the lower Ball Joint requires a raised vehicle and tire and wheel removal. Start by drilling a pilot hole through each rivet before drilling all other rivets. Use a hammer together with a chisel to remove all rivet heads that stayed on the piece. Start by taking off the cotter pin from the ball stud then loosen the ball stud nut. The Ball Joint/stud separator (J 41820) fits over the ball stud and lower Control Arm allowing you to turn the ball stud nut counterclockwise for separation from the Steering Knuckle. Remove the j 41820 tool from its position before you detach the lower Control Arm's ball stud bolt and its linked ball stud. To install the ball stud begin by pointing its new bolts downward while positioning it onto the lower Control Arm; tighten the new ball stud nuts to 68 nm (50 ft. Lbs.). Screw the ball stud onto the Steering Knuckle before installing the ball stud castle nut. Torque the nut to 20 nm (15 ft. Lbs.) with an additional 120 degree angle. Reinstall your tire and wheels after you complete the process by lowering your vehicle inspected for wheel alignment.
    Posted by ChevyPartsGiant Specialist
    Q:
    How to replace the lower ball joint on Buick Rendezvous? Posted by Customer
    A:
    A technician should first lift and stabilize a vehicle while removing its wheels and tires before starting the lower Ball Joint replacement. Position the lower Control Arm onto a vice for the replacement process. Set up a hammer and drift punch then hit and tap away the rivet heads from the lower Control Arm until they come out. After removal complete the job by taking out the Ball Joint from the lower Control Arm. You should fit the new Ball Joint into the lower Control Arm before securing the lower Ball Joint bolts in their proper positions which point away from the ball stud. Fasten the new Ball Joint retaining nuts with a torque of 68 nm using proper tools. Insert the lower Control Arm into its proper position and restore the wheels on the tires before lowering the vehicle to align its suspension system.
    Posted by ChevyPartsGiant Specialist
    Q:
    How to replace the lower ball joint on Buick Regal? Posted by Customer
    A:
    Begin replacing the lower Ball Joint by installing the lower Control Arm into a vice for safety during work. Use a grinder to remove the ball stud rivet heads before hitting the rivets with a punch and hammer to free the ball stud from the lower Control Arm. Insert the ball stud into the lower Control Arm and apply new ball stud bolts that face down toward the ball stud. Establish correct installation by first cleaning the fastener parts and making sure it reaches 2 nm (18 inch lbs.) torque against its fitment before final position; replace the fastener when this condition is not met. After putting back the lower Control Arm, fit new ball stud nuts and secure them to 68 nm (50 ft. Lbs.).
    Posted by ChevyPartsGiant Specialist
    Q:
    How to replace the lower ball joint on Buick Terraza? Posted by Customer
    A:
    Placing the lower Control Arm into a vice is the first step before replacing the lower Ball Joint. First use a drill or grinder to take off the ball stud rivet heads before using a hammer and a drift punch to pull out the lower Control Arm rivets and remove the ball stud. During installation connect the ball stud to the lower Control Arm while making certain the new ball stud bolts point downwards towards the ball stud. It is important to note that this is a prevailing torque type fastener, which may be reused only if the fastener and its counterpart are clean and free from rust, and if the fastener develops 2 nm (18 inch lbs.) a prevailing torque/drag value must measure 2 nm (18 inch lbs.) between the ball stud and its mating component before installation. Maintenance professionals must replace fasteners when they do not meet specified criteria. Install the new ball stud nuts and tighten them to 68 nm (50 ft. Lbs.)you should replace the lower Control Arm afterwards.
    Posted by ChevyPartsGiant Specialist
    Q:
    How to replace the lower ball joint on Chevrolet Monte Carlo? Posted by Customer
    A:
    The vehicle must lift up and get supported before starting replacement of the lower Ball Joint. The tire/wheel needs removal before drilling a pilot hole through rivets then moving onto the complete drilling of rivets. A combination of hammer and chisel enables users to eliminate rivet heads from the system. Begin by taking off the ball stud's cotter pin before turning the ball stud nut. You should fit the Ball Joint/stud separator (J 41820) between ball stud and lower Control Arm before turning the ball stud nut clockwise to split the ball stud from the Steering Knuckle. To proceed further remove the j 41820 device and detach both the ball stud nut and ball stud from the lower Control Arm. Install the ball stud onto the Control Arm then secure the new bolts underneath with the ball stud directed downward followed by new nuts fastened to 68 nm torque (50 ft. Lbs.). Operating on the ball stud you must install it to both the Steering Knuckle and then tighten the ball stud castle nut to 20 nm (15 ft. Lbs.) followed by an additional 120° angle. Finish the installation by adding a new cotter pin then bending the ends while reinstalling tires and wheels followed by lowering the vehicle before conducting a wheel alignment check.
    Posted by ChevyPartsGiant Specialist
    Q:
    How to replace the lower ball joint on Chevrolet Equinox? Posted by Customer
    A:
    Before installing the new joint on the lower Control Arm you must first remove the component and anchor it in either a vise or appropriate fixture. Drill through the Ball Joint rivets using an 8 mm drill bit and continue drilling through the hole with a 12 mm drill bit. Use a standard drill bit to clean the Control Arm then take out the Ball Joint and note its position while preparation for reinstallation. Set the replacement Ball Joint onto its clean Control Arm according to the marked position. You must recognize the two ball stud types present to apply the right nut torque since selecting the wrong torque will harm the ball stud. Stick to the hardware included with your new Ball Joint and install all bolts with their heads facing upwards. You must adjust the nut torque to 60 n.m (44 lb-ft) when dealing with the lower Control Arm ball stud nut that has a silver cup at its bottom while adjusting the nut torque to 40 n.m (30 lb-ft) for the lower Control Arm ball stud nut with a black and flat base. Afterward install the lower Control Arm back.
    Posted by ChevyPartsGiant Specialist
    Q:
    How to replace the lower control arm ball joint on Chevrolet Impala? Posted by Customer
    A:
    To start working on the lower Control Arm Ball Joint you need to lift and stabilize the vehicle. First lift the vehicle then unload wheels and tires to access and take down the lower Control Arm. Place the lower Control Arm into a strong holding tool. Use the correct size drill to remove the rivets from the Control Arm bottom. Use a standard hammer and an appropriate drift punch to knock out all remaining rivets from the Control Arm until the Ball Joint can come out. Install the new joint into the lower Control Arm with new bolts facing downwards toward the wheel axle. Mount the new Ball Joint retaining nuts onto their sockets then fasten them to 68 nm (50 lb ft). Replace the lower Control Arm before putting back the wheels and tires. Lower the vehicle after taking away all support components.
    Posted by ChevyPartsGiant Specialist
    Q:
    How to replace the lower control arm ball joint on Chevrolet Uplander? Posted by Customer
    A:
    You need to take out the lower Control Arm to replace its Ball Joint. Place the lower Control Arm in a heavy tightening tool before drilling away the ball stud rivets. Hammer and drift punch methods allow you to remove rivets from the lower Control Arm while extracting the ball stud. Place the ball stud onto the lower Control Arm with new bolts facing down towards the opposite end of the ball stud. The bolt may be refitted but needs new parts if surfaces and fasteners show rust plus it hits resistance less than 2 n.m (18 lb in) while finalizing installation. Connect the new ball stud nuts and tighten them to 50 lb ft torque. Reinsert the whole Control Arm structure last.
    Posted by ChevyPartsGiant Specialist
    Q:
    How to service and repair a ball joint on Chevrolet Venture? Posted by Customer
    A:
    Start by detaching the lower Control Arm and fixing it in a vice for the Ball Joint service. Pry off the rivet heads on the ball stud then hit them with a hammer and drift punch to take out the ball stud from the lower Control Arm. To mount the assembly insert the new ball stud onto the lower Control Arm with nuts facing downward toward the Control Arm away from the Ball Joint. This is a torque type fastener that you may use again as long as the fastener's counterpart maintains its proper condition and produces at least 2 nm of force (18 inch lbs.) when seated. A new fastener needs replacement when both quality standards are not achieved. Install new ball stud nuts before fitting the lower Control Arm and tightening them to 68 nm (50 ft. Lbs.).
    Posted by ChevyPartsGiant Specialist
    Q:
    What is the installation process for the new ball stud for the 2003 Buick Century? Posted by Customer
    A:
    Attach the ball stud to the lower control arm, ensuring the NEW ball stud bolts are installed facing down, away from the ball stud, followed by the installation of the NEW ball stud nuts.
    Posted by ChevyPartsGiant Specialist
    See expert answers on similar Ball Joint
    Q:
    What should be done after separating the ball stud for the 2005 Buick LaCrosse? Posted by Customer
    A:
    Remove the J41820, followed by the ball stud nut, and take out the ball stud from the lower control arm.
    Posted by ChevyPartsGiant Specialist
    See expert answers on similar Ball Joint
    Q:
    What is the final step after installation for the 2007 Buick LaCrosse? Posted by Customer
    A:
    Install a new cotter pin and bend the ends, reinstall the tire and wheels, lower the vehicle, and check the wheel alignment.
    Posted by ChevyPartsGiant Specialist
    See expert answers on similar Ball Joint
    Q:
    How do you remove the rivets from the lower control arm for the 2000 Buick Regal? Posted by Customer
    A:
    Use a hammer and a drift punch to remove the rivets and take out the ball stud from the lower control arm.
    Posted by ChevyPartsGiant Specialist
    See expert answers on similar Ball Joint
    Q:
    What is the first step to replace the lower ball joint for the 2006 Buick Rendezvous? Posted by Customer
    A:
    Raise and support the vehicle, then remove the tires and wheels.
    Posted by ChevyPartsGiant Specialist
    See expert answers on similar Ball Joint
    Q:
    What should be done after removing the tires and wheels for the 2003 Buick Rendezvous? Posted by Customer
    A:
    Remove the lower control arm and secure it in a vice.
    Posted by ChevyPartsGiant Specialist
    See expert answers on similar Ball Joint
    Q:
    What is the installation process for the ball stud for the 2007 Buick Terraza? Posted by Customer
    A:
    Attach the ball stud to the lower control arm, ensuring the NEW ball stud bolts are installed facing down, away from the ball stud.
    Posted by ChevyPartsGiant Specialist
    See expert answers on similar Ball Joint
    Q:
    What are the final steps after installing the new ball joint for the 2007 Buick Rendezvous? Posted by Customer
    A:
    Reinstall the lower control arm, followed by the tires and wheels, then lower the vehicle and align the front suspension.
    Posted by ChevyPartsGiant Specialist
    See expert answers on similar Ball Joint
    Q:
    What is the torque specification for tightening the bolts and nuts for the 2007 Chevrolet Equinox? Posted by Customer
    A:
    Tighten the bolts and nuts to 68 N.m (50 lb ft).
    Posted by ChevyPartsGiant Specialist
    See expert answers on similar Ball Joint
    Q:
    What should be noted when removing the ball joint for the 2008 Chevrolet Equinox? Posted by Customer
    A:
    Carefully take out the ball joint, noting its position for reassembly.
    Posted by ChevyPartsGiant Specialist
    See expert answers on similar Ball Joint
    Q:
    What size drill bit should be used to drill through the ball joint rivets for the 2006 Chevrolet Equinox? Posted by Customer
    A:
    Use an 8 mm (5/16 inch) drill bit.
    Posted by ChevyPartsGiant Specialist
    See expert answers on similar Ball Joint
    Q:
    How should the ball stud be attached during installation for the 2000 Chevrolet Monte Carlo? Posted by Customer
    A:
    Attach the ball stud to the lower control arm, ensuring the NEW ball stud bolts are installed facing down, away from the ball stud.
    Posted by ChevyPartsGiant Specialist
    See expert answers on similar Ball Joint
    Q:
    How do you install the new ball stud for the 2005 Chevrolet Monte Carlo? Posted by Customer
    A:
    Place the ball stud onto the lower control arm and install the new ball stud bolts facing down, away from the ball stud.
    Posted by ChevyPartsGiant Specialist
    See expert answers on similar Ball Joint
    Q:
    What is the torque specification for the new ball joint retaining nuts for the 2008 Chevrolet Impala? Posted by Customer
    A:
    Tighten them to 68 N.m (50 lb ft).
    Posted by ChevyPartsGiant Specialist
    See expert answers on similar Ball Joint
    Q:
    What is the next step after removing the tires and wheels for the 2009 Chevrolet Impala? Posted by Customer
    A:
    Remove the lower control arm.
    Posted by ChevyPartsGiant Specialist
    See expert answers on similar Ball Joint
    Q:
    What is the torque specification for the new ball stud nuts for the 2007 Chevrolet Impala? Posted by Customer
    A:
    Tighten them to 68 N.m (50 lb ft).
    Posted by ChevyPartsGiant Specialist
    See expert answers on similar Ball Joint
    Q:
    What is the procedure for tightening the ball stud castle nut for the 2006 Chevrolet Impala? Posted by Customer
    A:
    Tighten it to 20 Nm (15 ft. lbs.) plus an additional 120 degrees.
    Posted by ChevyPartsGiant Specialist
    See expert answers on similar Ball Joint
    Q:
    What is the next step after attaching the ball stud for the 2001 Chevrolet Impala? Posted by Customer
    A:
    Install the NEW ball stud nuts and tighten them to 68 Nm (50 ft. lbs.).
    Posted by ChevyPartsGiant Specialist
    See expert answers on similar Ball Joint
    Q:
    What is the torque specification for the new ball stud nuts for the 2002 Chevrolet Monte Carlo? Posted by Customer
    A:
    Install the NEW ball stud nuts and tighten them to 68 Nm (50 ft. lbs.).
    Posted by ChevyPartsGiant Specialist
    See expert answers on similar Ball Joint
    Q:
    What is the next step after ensuring the fastener is properly seated for the 2002 Chevrolet Venture? Posted by Customer
    A:
    Install the NEW ball stud nuts and tighten them to 68 Nm (50 ft. lbs.).
    Posted by ChevyPartsGiant Specialist
    See expert answers on similar Ball Joint
    Q:
    What should be done to the ball stud rivet heads for the 2005 Chevrolet Venture? Posted by Customer
    A:
    Drill or grind off the ball stud rivet heads.
    Posted by ChevyPartsGiant Specialist
    See expert answers on similar Ball Joint
    Q:
    Why is it important for the fastener and its counterpart to be clean for the 2005 Chevrolet Uplander? Posted by Customer
    A:
    It is crucial that they are clean and free from rust, and that the fastener develops 2 Nm (18 inch lbs.) of torque/drag against its counterpart before seating; otherwise, the fastener must be replaced.
    Posted by ChevyPartsGiant Specialist
    See expert answers on similar Ball Joint
    Q:
    What is the torque specification for the new ball stud nuts for the 2000 Chevrolet Venture? Posted by Customer
    A:
    Tighten the NEW ball stud nuts to 68 Nm (50 ft. lbs.).
    Posted by ChevyPartsGiant Specialist
    See expert answers on similar Ball Joint
    If you have any questions about this product, please don't hesitate to ask us. We will be happy to help you!

OEM GM 88965333, Excellent Performance and Perfect Fitment

To ensure reliability, purchase GM part # 88965333 Ball Joint. It is sometimes referred to as GM Ball Joint. Choosing OEM parts is the optimal decision for guaranteeing superior quality and perfect performance. These components undergo stringent quality checks and are carefully constructed to comply with GM's factory specifications, ensuring a smooth installation process.

ChevyPartsGiant.com is a leading supplier of genuine GM parts such as GM 88965333 Ball Joint. Our website boasts an extensive inventory of OEM GM parts, available at highly competitive prices in the market. Should you require any new genuine GM parts, rest assured we will deliver them swiftly and efficiently to your doorstep. Furthermore, all our parts come with the assurance of a manufacturer's warranty. For detailed Chevy parts information, click here.
Choose ChevyPartsGiant for discounted prices, exceptional service and fast delivery