
Popular OEM Chevrolet Impala Parts
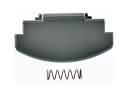
- Body & Hardware Parts View More >
- Steering Parts View More >
- Electrical Parts View More >
- Air & Fuel Delivery Parts View More >
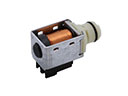
- Charging & Starting Parts View More >
- Engine Parts View More >
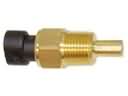
- Belts & Cooling Parts View More >
- Suspension Parts View More >
- Driveline & Axles Parts View More >
- Emission Control & Exhaust Parts View More >
- Transmission Parts View More >
- Brakes Parts View More >


Why Buy Genuine Chevrolet Impala Parts From ChevyPartsGiant.com
Looking for real Chevrolet Impala parts? ChevyPartsGiant.com may be a better choice to find genuine parts at wallet-friendly prices. We sell only OEM Chevrolet Impala parts, ensuring perfect fit, reliability, and long-term performance. With our website, you can easily get access to the same parts found at local Chevrolet stores. All components are produced by Chevrolet and are exclusively fitted on Chevrolet Impala automobiles. By shopping at our store, you can enjoy the quality of the Chevrolet factory without the high prices of brick-and-mortar facilities. We achieve this because we are an online store operating at lower costs, which we pass on to you. We also have a user-friendly platform where you can find and order genuine Chevrolet Impala parts swiftly. We are here to make your process of restoring a Chevrolet Impala or dealing with simple repairs quick and inexpensive. We also make it easy to obtain Chevrolet Impala parts at competitive shipping prices and a team of knowledgeable staff ready to take your order. Choose ChevyPartsGiant.com to save time and money, as well as keep your Chevrolet Impala in the good condition.
Through eight generations spanning from 1958 until today the Chevrolet Impala represents a life cycle of engineering advancement focused on creating vehicles with superior performance capabilities. During the eighth-generation run (2000–2005) the Chevrolet Impala used a 3.4L LA1 V6 engine which generated 180 horsepower at 5200 rpm alongside 205 lb-ft of torque at 4000 rpm. A 3.5L V6 engine became standard during the ninth generation between 2006 and 2013 offering 211 horsepower together with 214 lb-ft of torque. At the start of its tenth run (2014–2020) the Impala offered a 2.4L LUK Ecotec inline-4 engine that yielded 182 horsepower and 172 lb-ft torque mostly in LS eAssist trims yet higher trims used a standard 3.6L V6. Chevrolet Impala series vehicles operate with standard six-speed automatic transmission and the 2020 model achieves 22 combined MPG ratings alongside 19 city MPG and 28 highway MPG ratings. The Impala achieves steady handling through its configuration which places the drive wheels at the front. Chevrolet Impala has succeeded in keeping its comfortable ride and roomy cabin design which draws buyers from various segments since its inception. At present Chevrolet Impala owners can acquire authentic car parts which pass through extensive testing protocols to guarantee their quality and durability. The precise specification requirements of Chevrolet Impala guide the development of components as well as panels and suspension parts which bring comfort to vehicle owners.
Chevrolet Impala concerns group into engine sealing, engine sensing, and steering linkages for clear diagnosis. In the engine, the Impala can leak oil or coolant at the intake manifold gasket. External seepage stains the block, while internal leakage risks overheating and contaminated oil. Replace the intake manifold gasket, torque evenly, and refill, then bleed air and recheck levels. Engine sensing on the Impala often fails with a crankshaft position sensor that intermittently drops signal as it heats. Symptoms include stalls, no start until cool, and stored misfire or sync codes. Verify power and ground, watch RPM during cranking, and replace the crankshaft position sensor when dropout appears. Steering noise on the Impala commonly traces to an upper intermediate steering shaft. Clunks occur on slow turns or after speed bumps, felt in the column and wheel. Lubricate the splines to confirm the source, then replace the steering shaft and verify alignment. Functionally, these groups align with leak control, stable ignition timing, and precise steering for the Chevrolet Impala. Prioritize sealing first on the Chevrolet Impala, then sensor reliability, then steering service. Finish with a road test, hot soak verification, and a cold start on the Chevrolet Impala.
Chevrolet Impala Parts and Q&A
- Q: How to replace the water pump in a 3.8L engine on Chevrolet Impala?A:In order to change the water pump of a 3.8L engine, drain the cooling system, loosen the water pump pulley bolts, and undo the drive belt. Take off the water pump, the bolts, the pump of the power steering, and the pump of the water. Wipe the mating surfaces, put the new gasket and pump in place and reconnect components.
- Q: How to replace the alternator for RPOs LZE/LZ4/LGD on Chevrolet Impala?A:In order to substitute the generator on the RPOs LZE/LZ4/LGD, the negative battery cable is to be disconnected, the drive belt is to be removed and the generator output BAT terminal is to be detached. Take off the generator and place the new one with all connections being tight. Install the drive belt and the negative battery cable again.
- Q: How to replace the lower intake manifold on Chevrolet Impala?A:Unhook the battery, unscrew both the upper intake manifold and the valve covers and pull off the fuel lines to replace the lower intake manifold. Removal of the fuel injector rail and lower intake manifold bolts. Clean and wipe, fit new gaskets, reassemble parts, and fix and make sure there are the right torque requirements and all fitted.


