Popular OEM Chevrolet Equinox Parts
- Body & Hardware Parts View More >
- Steering Parts View More >
- Electrical Parts View More >
- Air & Fuel Delivery Parts View More >
- Charging & Starting Parts View More >
- Engine Parts View More >
- Belts & Cooling Parts View More >
- Suspension Parts View More >
- Driveline & Axles Parts View More >
- Emission Control & Exhaust Parts View More >
- Transmission Parts View More >
- Brakes Parts View More >
Why Buy Genuine Chevrolet Equinox Parts From ChevyPartsGiant.com
Looking for real Chevrolet Equinox parts? ChevyPartsGiant.com may be a better choice to find genuine parts at wallet-friendly prices. We sell only OEM Chevrolet Equinox parts, ensuring perfect fit, reliability, and long-term performance. With our website, you can easily get access to the same parts found at local Chevrolet stores. All components are produced by Chevrolet and are exclusively fitted on Chevrolet Equinox automobiles. By shopping at our store, you can enjoy the quality of the Chevrolet factory without the high prices of brick-and-mortar facilities. We achieve this because we are an online store operating at lower costs, which we pass on to you. We also have a user-friendly platform where you can find and order genuine Chevrolet Equinox parts swiftly. We are here to make your process of restoring a Chevrolet Equinox or dealing with simple repairs quick and inexpensive. We also make it easy to obtain Chevrolet Equinox parts at competitive shipping prices and a team of knowledgeable staff ready to take your order. Choose ChevyPartsGiant.com to save time and money, as well as keep your Chevrolet Equinox in the good condition.
Chevrolet released the Equinox crossover as a 2005 model, marking the beginning of its production in 2004. The initial Chevrolet Equinox ran on Theta architecture while offering 3.4L and 3.6L V6 gasoline engines during its first generation to provide excellent power capabilities. Gasoline direct injection technology appeared in the second generation since it boosted the vehicle's fuel efficiency. The Equinox's third generation added three new powertrain choices that included a 1.5-liter turbocharged four-cylinder and 2.0-liter turbocharged I4 and 1.6-liter turbo-diesel I4 options since V6 engines no longer continued. The Chevrolet Equinox transmission system first used a five-speed Aisin AF33 automatic and GM-Ford 6T70 automatic transmission during its first generation but upgraded to a single six-speed automatic transmission in the second generation until it offered two transmission options including a 6-speed and a 9-speed automatic for 2018. The newest Chevrolet Equinox integrates automatic drvsrfdtr flshtrnc mchms that disable the drivershaft when all-wheel-drive is not required hence improving efficiency. All Chevrolet Equinox vehicles attain their reputation for quality because they use genuine parts shipped by manufacturer partners from original equipment manufacturers for reliable high-performance features. The Chevrolet Equinox gained market success by maintaining an engineering excellence standard.
Chevrolet Equinox groups these concerns into climate control, emissions EVAP, and engine timing control. In climate control, Equinox may blow warm air. A weak AC compressor slips, then cooling fades at idle. Replace the AC compressor, evacuate, recharge, and verify fan command. For emissions, Equinox can show a check engine light after refueling. A worn gas cap breaks the seal and sets small leak codes. Inspect the neck, install a new gas cap, and run monitors. In engine timing control, Equinox V6 models can post P0011 style codes. Sludged oil and cam end play disturb phasing and sensor readings. Update the PCM, confirm oil quality, and test actuator response. Replace a failed camshaft position sensor only after base faults are corrected. Perform a full scan on every Chevrolet and record freeze frames. Road test the Chevrolet Equinox under varied loads and temperatures. Confirm charging voltage, grounds, and module sleep current. Verify stable idle, no warning lights, and steady fuel trims. These steps keep Chevrolet diagnostics clear and service efficient. With careful checks, the Chevrolet Equinox stays reliable and comfortable year round.
Chevrolet Equinox Parts Questions & Answers
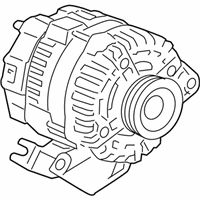
- Q: How to replace an alternator on Chevrolet Equinox?A: To replace the generator, first disconnect battery ground (negative) cable from the battery, then remove generator b+ terminal nut and generator b+ lead, and finally take off the generator electrical connector. Then take out the Drive Belt from the generator, unscrew the bolts to remove it from the car. To install, place the generator on the generator bracket and fix with generator bolts and tighten to 50 n.m (37 lbs.ft). Then, fit the Drive Belt, plug the generator electrical connector and affix the generator b+ lead. Finally, tighten the generator b+ terminal nut to 20 n.m (15 lb ft) and reconnect the battery ground (negative) cable to the battery.
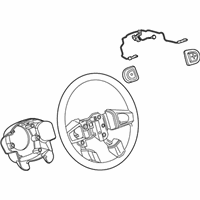
- Q: How to replace the steering wheel on Chevrolet Equinox?A: You need to turn off sir and remove the inflatable restraint component before replacing the wheel. Cruise control systems require users to disconnect their Steering Column connector before proceeding. Use the Steering Wheel puller legs (J 42578) and Steering Wheel puller (J 1859-A) when required to remove first the Steering Wheel nut and then the Steering Wheel. The Steering Wheel installation process requires fluid alignment with the Steering Column after which the wheel should be fitted then tightened to a torque of 41 n.m (30 lb ft). Complete the installation process by restoring connection to cruise control switch in case of equipment availability and installing both the inflatable restraint Steering Wheel module and enabling the sir system.
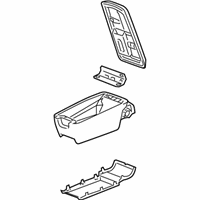
- Q: How to replace the Center Console on Chevrolet Equinox?A: A proper replacement of the console begins with moving the front seats to the rear position followed by accessing screws beneath the front seats. Start by removing the console screws before lifting the rear edge of the center floor console and disconnecting its auxiliary power outlet electrical connector. Reach behind the center floor console through its rearward sliding motion to access upper bolts then remove the console bolts which secure it to the center stack. Position the console with its mounting bracket first then install all console screws using a torque of 2.5 n.m (22 lb in). Reconnect the electrical connector to the auxiliary power outlet and put the Center Console back in place while installing lower screws with 2.5 n.m of torque (22 lb in). Position the front seat into its normal position.
- Q: How to replace the liftgate emblem/nameplate on Chevrolet Equinox?A: Before putting on the new Equinox liftgate emblem/nameplate you need to tape the installation surface and set up alignment markers. Hold a heat gun at about 152 mm (6 inches) from the part and move the heat over the emblem/nameplate for 30 seconds in circular patterns. Insert a plastic scraper under the emblem/nameplate to pry it off from the panel. Use the 3M(TM) Scotch Brite Molding Adhesive Remover Disk (3M(TM) P/N 07501) for body panels and a Varnish Makers and Painters (VMP) Naphtha solution or water/isopropyl alcohol mixture for plastic panels to remove all leftover adhesive. Use the identical cleaning solution to wipe the installation site before fully drying it. Use tape to mark the area when there is no specified placement for the emblem. Fix the EQUINOX emblem/nameplate at the top left edge which should measure 11 mm (0.043 inches) from the liftgate and bottom center line must be placed exactly 160 mm (6.30 inches) below it. Install the CHEVROLET emblem/nameplate 31 mm (1.22 in) from the right liftgate edge with its dimension (b) matching at 160 mm (6.30 in). Use heat to raise the application area temperature between 80-105°F (80-105°F), then prep the emblem/nameplate surface for installation at 85-90°F. Stay away from touching the adhesive coating and pull off the protective material to put the emblem/nameplate at the marked spots by pressing it hard against the surface. Press evenly on all parts of the badge to seal it to the surface before taking off the tape at the rear end.


