
Popular OEM Chevrolet Monte Carlo Parts
- Body & Hardware Parts View More >
- Steering Parts View More >
- Electrical Parts View More >
- Air & Fuel Delivery Parts View More >
- Charging & Starting Parts View More >
- Engine Parts View More >
- Belts & Cooling Parts View More >
- Suspension Parts View More >
- Driveline & Axles Parts View More >
- Emission Control & Exhaust Parts View More >
- Transmission Parts View More >
- Brakes Parts View More >


Why Buy Genuine Chevrolet Monte Carlo Parts From ChevyPartsGiant.com
Looking for real Chevrolet Monte Carlo parts? ChevyPartsGiant.com may be a better choice to find genuine parts at wallet-friendly prices. We sell only OEM Chevrolet Monte Carlo parts, ensuring perfect fit, reliability, and long-term performance. With our website, you can easily get access to the same parts found at local Chevrolet stores. All components are produced by Chevrolet and are exclusively fitted on Chevrolet Monte Carlo automobiles. By shopping at our store, you can enjoy the quality of the Chevrolet factory without the high prices of brick-and-mortar facilities. We achieve this because we are an online store operating at lower costs, which we pass on to you. We also have a user-friendly platform where you can find and order genuine Chevrolet Monte Carlo parts swiftly. We are here to make your process of restoring a Chevrolet Monte Carlo or dealing with simple repairs quick and inexpensive. We also make it easy to obtain Chevrolet Monte Carlo parts at competitive shipping prices and a team of knowledgeable staff ready to take your order. Choose ChevyPartsGiant.com to save time and money, as well as keep your Chevrolet Monte Carlo in the good condition.
The Chevrolet Monte Carlo issued from Chevrolet facilities as a two-door coupe between 1969 and 1987 and from 1994 to 2007 while undergoing multiple engine and transmission system developments. From its initial release up until its third generation the Chevrolet Monte Carlo used V8 engines while V6 engine options entered production for the third time. Three different engines made an appearance in the fifth generation Monte Carlo between 1995 and 1999: the 3.1 L L82 V6 and the 3.4 L LQ1 DOHC V6 and the 3.8 L L36 V6. During its final period of manufacturing the Chevrolet Monte Carlo had six different engine options with the LS4 V8 model as its highlight. The transmission technology progressed from 2/3-speed automatics and 3/4-speed manuals into a 4-speed automatic transmission in the 1995 model known as 4T60-E or 4T65-E that underwent a replacement with 4T65E-HD in newer generations. From its first production run until its final edition the Chevrolet Monte Carlo grew in length and its wheelbase evolved between 116 inches and 110.5 inches. The length of the 1995 model stood at 200.7 inches but the 2000 edition reduced to 197.9 inches. The Chevrolet Monte Carlo stands as a historical testament of personal luxury because owners can sustain its driving experience through availability of authentic replacement parts.
Chevrolet Monte Carlo clusters issues into engine management, shifter interlock, and cooling. In engine management, the Monte Carlo may stall without warning. Heat can disable the mass air flow sensor or the crankshaft position sensor. The Chevrolet model restarts only after a cool down in many cases. Confirm stall data, check sensor power and ground, and review waveform with a scope. Replace a failing mass air flow sensor, then retest the Monte Carlo in traffic. In body and driveline controls, the Monte Carlo can trap the key in the lock cylinder. A worn transmission shifter or a broken shifter wire defeats the park switch. Inspect the transmission shifter detent, repair wiring, and verify brake switch input. Confirm release within the Chevrolet anti theft and shift interlock sequence. For cooling, the Monte Carlo may overheat due to a leaking water pump. Look for crusted coolant at the vent hole and pulley wobble. Pressure test, replace the water pump, and bleed air from the system. After repairs, road test the Chevrolet Monte Carlo on city streets and highway. Verify smooth idle, stable temperature, and quick restarts on the Monte Carlo.
Chevrolet Monte Carlo Parts Questions & Answers
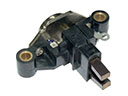
- Q: How to service the Delphi CS130D (K43) 102 ampere alternator on Chevrolet Monte Carlo?A:The delphi cs130d (K43) 102 ampere generator requires service by following these steps: disconnect the negative Battery Cable and remove the engine compartment cross vehicle brace. First remove the Drive Belt from the generator and then move the coolant recovery reservoir to the side to allow access. First remove bolts (1,2,3) from the generator and then disconnect its electrical connector before placing the protective boot from the generator output bat terminal to the side. Prior to removing the generator remove its positive battery lead while also taking out the generator output bat terminal nut. Installation requires mounting the generator to the engine followed by connecting the positive battery lead and tightening the generator output bat terminal nut to 20 n.m (15 lb ft). Reinstall the protective boot onto the generator output bat terminal before connecting the electrical connector and finally installing the generator bolts (2,3) followed by the generator pivot bolt and the generator rear brace nut. Screw the generator pivot bolt to 50 n.m (37 lb ft), while tightening the generator bolt to 50 n.m (37 lb ft) and the nut to 25 n.m (18 lb ft). Install the coolant recovery reservoir followed by the Drive Belt while reattaching the engine compartment cross brace before reconnection of the negative Battery Cable.
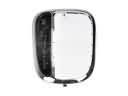
- Q: How to replace the steering wheel on Chevrolet Monte Carlo?A:Disengage the sir system and set the ignition position to off in order to replace the Steering Wheel. Deinstall the inflatable restraint Steering Wheel module and employ a scribe in order to mark the alignment on the Steering Wheel hub and align it with the slash mark on the Steering Shaft. Relax the nut on the Steering Wheel, and place it against the end of the Steering Shaft. Mount the j 1859-a with j 42578 legs to the Steering Wheel and assemble them together to use to pull off the Steering Wheel from the Steering Shaft. Disconnect the sir connector from the Steering Wheel and remove the Steering Wheel out of the vehicle after removal. For installation, mount the new Steering Wheel to the Steering Column, feed the sir connector through it and align the scribe mark with the slash mark on the Steering Shaft before putting the Steering Wheel. Install Steering Shaft nut and tighten to 45 nm (33 ft. Lbs.); install inflatable restraint Steering Wheel module and enable sir system. Lastly, test the operation of the Horn, Steering Wheel, and the Steering Wheel controls.
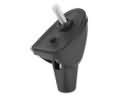
- Q: How to replace the front Center Console on Chevrolet Monte Carlo?A:A Monte Carlo's front floor console replacement process starts by removing the trim plate then disconnecting the wiring harness connector and its retainer. First remove the storage compartment mat from its position within the console storage compartment. Follow this step order: first remove storage compartment bottom bolts then console bolts located before shift control lever before extracting the front floor console. Your first step for installation must include positioning the front floor console before securing all console bolts forward of the shift control lever and at the storage bin base at 12 N.m (106 lb in). First close the storage compartment then put the trim plate on the front floor console before reattaching the wiring harness connector and its retainer and finally replacing the storage compartment mat.
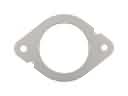
- Q: How to replace the quarter panel emblem and nameplate on Chevrolet Monte Carlo?A:Start the quarter panel replacement by adding alignment tape first. Use this tape both to install the parts and to shield the mount area from damage during emblem removal. Heat the emblem/nameplate on the Monte Carlo quarter panel with J 25070 for about 30 seconds using circular motions. Use a plastic flat blade to safely take the emblem/nameplate off the panel surface. Use a 3M(TM) Scotch Brite molding adhesive remover disk according to 3M(TM)'s P/N 07502 or find an equivalent tool, and employ a clean lint-free cloth with VMP naptha solution for plastic panels. Clean the area where the emblem/nameplate will go by removing all dust and dirt before starting your installation work. Place masking tape at the specific positions where you will mount the nameplates and emblems on the right and left side of the Monte Carlo quarter panel. Bring the mounting surface temperature to 27-41°C (80-105°F) through J 25070 heat application and maintain the emblem/nameplate at 29-32°C (85-90°F). Carefully peel off the liner on the back of the emblem/nameplate and avoid handling its adhesive area. Place the emblem at the marked spots and push down with balanced force until it sticks to the surface. Take off the protective tape from where you will mount the emblem.


