Popular OEM Buick Regal Parts
- Body & Hardware Parts View More >
- Steering Parts View More >
- Electrical Parts View More >
- Air & Fuel Delivery Parts View More >
- Charging & Starting Parts View More >
- Engine Parts View More >
- Belts & Cooling Parts View More >
- Suspension Parts View More >
- Driveline & Axles Parts View More >
- Emission Control & Exhaust Parts View More >
- Transmission Parts View More >
- Brakes Parts View More >
Why Buy Genuine Buick Regal Parts From ChevyPartsGiant.com
Looking for real Buick Regal parts? ChevyPartsGiant.com may be a better choice to find genuine parts at wallet-friendly prices. We sell only OEM Buick Regal parts, ensuring perfect fit, reliability, and long-term performance. With our website, you can easily get access to the same parts found at local Buick stores. All components are produced by Buick and are exclusively fitted on Buick Regal automobiles. By shopping at our store, you can enjoy the quality of the Buick factory without the high prices of brick-and-mortar facilities. We achieve this because we are an online store operating at lower costs, which we pass on to you. We also have a user-friendly platform where you can find and order genuine Buick Regal parts swiftly. We are here to make your process of restoring a Buick Regal or dealing with simple repairs quick and inexpensive. We also make it easy to obtain Buick Regal parts at competitive shipping prices and a team of knowledgeable staff ready to take your order. Choose ChevyPartsGiant.com to save time and money, as well as keep your Buick Regal in the good condition.
Since its introduction in 1973 as a luxury coupe model the Buick Regal has experienced significant transformations. Buick downsized the 1978 models to include smaller body proportions and standardized V6 engines for base models but maintained V8 engine options from previous versions. Buick demonstrated its performance innovation with the Regal Sport Coupe by providing a turbocharged V6 engine compatible with both two-barrel and four-barrel carburetors. The Buick Regal from GM featured a W-body chassis design in 1988 and offered front-wheel-drive using only a 2.8-liter V6 engine which produced 125 horsepower. Luxury-focused market demands led to the inclusion of standard ABS and driver-side airbags in 1993. The development of transmission systems alongside engine technology permitted automated transmissions to deliver improved handling control and smooth shifting which increased the driving experience. Owners of the Buick Regal have access to exceptional original parts which go through extensive quality evaluations to ensure outstanding lifespan and precise installation results. ChevyPartsGiant.com hosts a complete selection of original Buick Regal parts which meet the established quality criteria set by Buick for this famous vehicle.
Common problems are organized in the Buick Regal by category into shifter interlock, engine management and body electrics. In some Regal models, the ignition key becomes stuck after parking. Failure of the shifter or broken wiring at the shifter prevents release. Check the brake switch position at the input, examine the wiring and replace the shifter assembly, in case of confirmation. To control the engine, a Regal will only stall and can restart when it cools down. A stuck mass airflow sensor or a crankshaft position signal problem modifies the delivery of fuel and timing. Monitor live data, test outputs of the sensors, and replace the defective ones, where necessary. A Regal can lose a window operation on either a single door or multiple doors on the body of the electronics. A stuck power window switch interrupts orders to the regulator motor. Ground and power, test the circuitry and then replace it with a new switch. In all these systems, the diagnostics of Buick start with the full scan and visual inspection. Scan trouble codes, inspect fuses and learned after repair. Conclude with a verification drive to make sure the Buick Regal starts reliably. Examine stored codes, verify the release of the shifter and verify the idling quality. Such a design makes Buick ownership simple enough and keeps the Regal reliable.
Buick Regal Parts Questions & Answers
- Q: How to replace or repair the Radiator Grille Emblem on Buick Regal?A: Heat the emblem/nameplate with a tool while placing tape on the surface to protect it as you put alignment marks on the panel. Use the Heat Gun (J 25070) to heat the emblem/nameplate in circles for 30 seconds. The plastic flat tool helps you separate the emblem/nameplate gently from its panel placement without damaging the paint. You should employ either the 3M(TM) Scotch Brite molding adhesive remover disk (3M(TM) P/N 07502) for plastic body panels or a lint-free cloth dampened with either VMP naphtha or a water-based alcohol mixture to wipe away adhesive. Prepare the area by wiping it with a lint-free cloth using the same solution before completely drying it. Place tape marks on top of the mounting spot then warm the background surface to 80-105°F while ensuring the emblem/nameplate reaches 85-90°F range. Remove the protective liner without handling the adhesive surface and place the emblem/nameplate at the marked spots by applying strong pressure to secure it. Complete the process by pressing equally on all parts of the badge and slowly removing the tape that covered the mounting area.
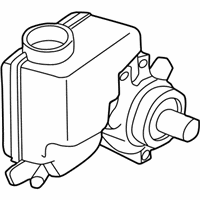
- Q: How to replace the power steering pump on Buick Regal?A: Vehicle maintenance starts with accessory Drive Belt removal before vehicle lifting and supporting while removing tire and wheel assembly. The vehicle requires a drain pan which should be placed below it while detaching the power steering pressure line and return hose from the pump. After removing the mounting bolts proceed with removing the Power Steering Pump assembly from the vehicle. You should remove the power steering pulley together with the reservoir from the pump assembly. Installation of the power steering system begins with reservoir attachment to the pump and completion using the power steering pulley. After installation of the Power Steering Pump reinstall its mounting bolts and apply torque force at 34 nm (25 ft. Lbs.). You should connect the power steering pressure line as well as the return hose before reattaching the tire and wheel assembly. You should lower the vehicle before putting on the accessory Drive Belt. Add power steering system fluid before removing air from the system then examine for leakage before taking out the drain pan located underneath the car.
- Q: How to replace the upper intake manifold on Buick Regal?A: Begin the replacement process by disconnecting the negative Battery Cable followed by removing the fuel injector sight shield and air cleaner intake duct. Release the cooling system fluid before you remove the right Spark Plug Wires from the Ignition Control Module and relocate them. First drain fuel pressure then remove the Fuel Rail assembly and afterward break the booster hose from the vacuum source manifold. Begin by removing the egr valve wiring harness heat shield nut followed by disassembly of its bolt before removing both the egr heat shield and Throttle Body support bracket upper bolt. Unplug the electrical connectors from the evap purge solenoid, throttle position (T/P) sensor, idle air control (IAC) valve, manifold absolute pressure (MAP) sensor, and mass air flow (MAF) sensor. Evacuate the Throttle Body by removing its vacuum line for the purge solenoid followed by the bracketed cruise control and accelerator cables. Clean all upper intake bolts before pulling the upper manifold backwards from its position at the Throttle Body support bracket. Remove the upper-to-lower Intake Manifold carrier gasket that exists on the upper Intake Manifold. When performing upper Intake Manifold replacement it becomes necessary to also take off Throttle Body together with manifold absolute pressure (MAP) sensor and vacuum source manifold and positive crankcase ventilation (PCV) valve. When installing new parts replace the vacuum source manifold before installing the PCV Valve followed by the MAP Sensor and Throttle Body. The upper-to-lower Intake Manifold carrier gasket should be placed on top of the upper Intake Manifold before carefully installing the upper Intake Manifold to the lower Intake Manifold where alignment pins enter their proper holes. Use thread lock compound gm part number 12345382 (Canadian part number 10953489) on the bolt threads before installation while you tighten the upper Intake Manifold bolts (1-10) in sequence to 10 nm (89 inch lbs.). Fasten the Throttle Body accelerator and cruise control cables through their bracket before installing the evap purge solenoid vacuum line. You must connect electrical connectors to the maf sensor alongside the MAP Sensor, the iac valve and t/p sensor followed by the evap purge solenoid. After putting the Throttle Body upper support bracket bolt in place, tighten it to 10 nm (89 inch lbs.) and then install and tighten the egr valve wiring harness heat shield components to 10 nm (89 inch lbs.). Reattach the brake booster hose so it connects to the vacuum source manifold and the Fuel Rail assembly and to right Spark Plug Wires which lead to the Ignition Control Module. To finish installation you must secure the air cleaner intake duct and reattach the fuel injector sight shield before filling the cooling system and reconnecting the negative Battery Cable and performing fluid and vacuum leak checks.
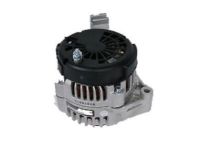
- Q: How to replace the alternator on Buick Regal?A: The generator replacement process starts with disconnecting the negative Battery Cable before removing the Drive Belt. Uninstall the generator rear brace before removing bolts (1 and 3) alongside the stud from the generator. Access to the generator output bat terminal requires the protective boot to be set aside while disconnecting the electrical connector. First disconnect the generator output bat terminal nut and extract both the positive battery lead and generator from its position. Position the generator onto the engine space before installing the positive battery lead. Tighten the generator output bat terminal nut to reach 20 n.m (15 lb ft). After maintaining the generator output bat terminal with its protective boot you must connect the electrical connector. First install the generator stud without applying torque to the generator bracket then add tension to bolts (1, 3) while retaining bracket looseness. The generator bolt should be tightened first until it reaches 50 n.m (37 lb ft) while the generator stud must reach 50 n.m (37 lb ft) followed by the generator rear bracket bolt being tightened to 50 n.m (37 lb ft). To finalize installation replace the generator rear brace, add the Drive Belt, and reflect the negative Battery Cable.


