ChevyParts
My Garage
My Account
Cart
OEM Buick Regal Center Console
Floor Console Assembly- Select Vehicle by Model
- Select Vehicle by VIN
Select Vehicle by Model
orMake
Model
Year
Select Vehicle by VIN
For the most accurate results, select vehicle by your VIN (Vehicle Identification Number).
13 Center Consoles found

Buick Regal Upper Trim Part Number: 22831976
$65.08 MSRP: $96.87You Save: $31.79 (33%)Ships in 1-2 Business Days
Buick Regal Center Console Part Number: 22742366
$30.35 MSRP: $45.18You Save: $14.83 (33%)Ships in 1-3 Business DaysBuick Regal Cup Holder Part Number: 22742330
$105.43 MSRP: $156.91You Save: $51.48 (33%)Ships in 1-3 Business DaysBuick Regal Cup Holder, Black Part Number: 22742329
$75.92 MSRP: $113.01You Save: $37.09 (33%)Ships in 1-3 Business DaysBuick Regal Upper Trim, Black Part Number: 22831975
Buick Regal Center Console Part Number: 13221926


Buick Regal Console, Red Part Number: 10409035
Buick Regal Console, Blue Part Number: 10409034
Buick Regal Console, Dark Gray Part Number: 10332460
Buick Regal Console Part Number: 10332459
Buick Regal Console, Gray Part Number: 10332458

Buick Regal Console Base Part Number: 10207938

Buick Regal Console Body Part Number: 10195735
Buick Regal Center Console
Want to cut long-term maintenance and repair costs? Choose OEM Center Console. Those parts deliver top durability you can trust. On our site, you'll find a huge catalog of genuine Buick Regal parts. Prices are unbeatable, so you can keep more in your pocket. Every OEM Buick Regal Center Console includes a manufacturer's warranty. You can also get an easy return policy that keeps buying risk free. Fast delivery, get your car on the road quickly. It's simple to search, compare, and order. Stop guessing about quality or fit. Order today and save with parts that last.
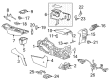
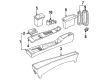
The Buick Regal Center Console is in fact an interior console design inside Buick Regal that provides a storage place inside the car to encourage the driver or any occupant within the car to store their items in an ergonomic order that will provide easy access while he or she is driving. Depending on the model, this center console between the driver seat and the passenger seat can contain useful utilities such as storage tray or compartment, cup holders, or modern advance models may contain refrigerator. In the long run, the permanent use of this item results in such signs as hinged cracks and less shiny parts that affect the looks and performance of the interior. Replacing the console part of the car can also contribute to the general aesthetics of the car and thus, the comfort of the passengers and drivers.
Buick Regal Center Console Parts Questions & Experts Answers
- Q: How to replace the front center console on Buick Regal?A:To change the front floor console, park the machine and turn the transaxle shift lever into the low. Remove the floor console trim panel, rear compartment mat, rear compartment bolts, bracket bolts rearward of the actuator shift lever, and horizontal bolts near the instrument panel (I/P). Next, pry off the power accessory port, pry off the light in the floor console hasp; disconnect the wiring harness from the floor console. Pull the floor console back and release the retainers from the i/p and press down on the front edge of the shifter trim plate and remove floor console from vehicle. For installation, place floor console in the vehicle, attach the electrical connectors, align console over the transaxle shifter, and push console forward into the retainers in the i/p until fully seated. Mounting the horizontal bolts close to the i/p and tightening them to the value of 5 n.m (44 lb in), then the bracket bolts on the rear of the transaxle shift lever: also tighten those to the value of 5 n.m (44 lb in). Re-install the rear compartment bolts with 5 n.m (44 lb. In.) torque, and re-install the rear compartment mat and the floor console trim plate, the power accessory port, and the floor console lighter. Lastly, turn the transaxle shift lever to the park position and unlock the parking brake.

Related Buick Regal Parts
 Buick Regal Cup Holder
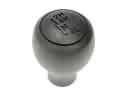 Buick Regal Shift Knob
 Buick Regal Car Speakers
 Buick Regal Center Console Base
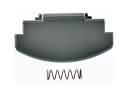 Buick Regal Center Console Latch
 Buick Regal Door Hinge
 Buick Regal Door Latch Assembly
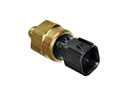 Buick Regal Power Steering Pressure Switch
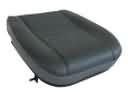 Buick Regal Seat Cushion Pad
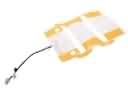 Buick Regal Seat Heater Pad
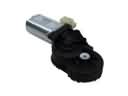 Buick Regal Seat Motor
 Buick Regal Weather Strip