Make sure this part fits

GM 24503488
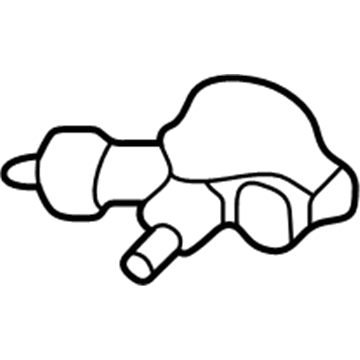
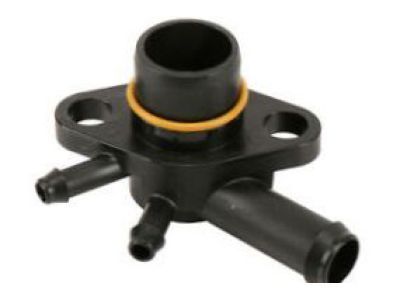
Manifold

1997-2005 GM

Customer Questions & Expert Answers (14)
GM 24503488 Manifold
  • Part Description
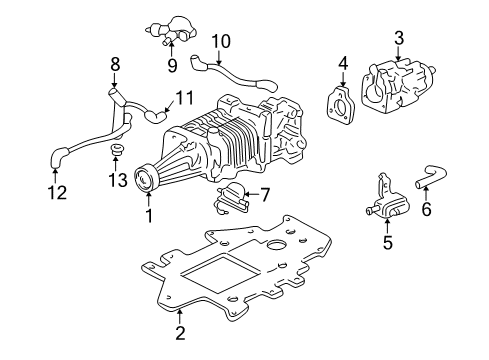
    Manifold-Vacuum Source; Intake Manifold
  • Manufacturer
    General Motors
Make sure this part fits
$7.29 MSRP: $11.44
You Save: $4.15 (37%)
Ships in 1-3 Business Days
1
ADD TO CART
  • Related Parts
  • Product Specifications
  • Vehicle Fitment
  • Customer Questions & Expert Answers
  • Product Specifications

    BrandGenuine GM
    Manufacturer Part Number24503488
    Part DescriptionManifold-Vacuum Source; Intake Manifold
    Other NamesManifold, Intake Manifold Vacuum
    Item Dimensions3.3 x 2.2 x 2.2 inches
    Item Weight0.40 Pounds
    ConditionNew
    Fitment TypeDirect Replacement
    ManufacturerGeneral Motors
    SKU24503488
    WarrantyThis genuine GM part is guaranteed by GM's factory warranty.
    Shipping & ReturnShipping Policy Return Policy
    Warning: California's Proposition 65
  • Vehicle Fitment

    Year Make Model Trim Engine
    1998-2005 Buick Park AvenueBase, Ultra6 Cyl 3.8 L GAS
    1997-2004 Buick Regal25th Anniversary Edition, GS, GSE6 Cyl 3.8 L GAS
    1999 Buick RivieraBase6 Cyl 3.8 L GAS
    1998-1999 Pontiac BonnevilleSSE, SSEi6 Cyl 3.8 L GAS
  • Customer Questions & Expert Answers

    Q:
    Can you help me check if this 24503488 is the right part for my car? Posted by ChevyPartsGiant Specialist
    A:
    Please Select Your Vehicle model to see if part number 24503488 is suitable before ordering.
    Posted by ChevyPartsGiant Specialist
    Q:
    How to replace the upper intake manifold on Buick Park Avenue? Posted by Customer
    A:
    The upper Intake Manifold then needs to be unbolted from the top of the engine and removed. Remove the fuel injector sight shield, air cleaner intake duct, and the Spark Plug Wires from the right side of the engine, placing the wires aside. Next, take off the manifold vacuum source, depressurise the fuel lines and take out the Fuel Rail. Always remove the egr heat shield, the cable bracket to the cylinder head mounting bolt and plug, accelerator cable and throttle body support bracket. After that, undo the bolts of the upper Intake Manifold, then remove the upper Intake Manifold. For installation, reconnect the upper Intake Manifold in position and tighten the upper Intake Manifold bolts in sequence to 10 nm (89 inch lbs.). Install the throttle body support bracket, accelerator cable, cable bracket to cylinder head mounting bolt, egr heat shield, Fuel Rail, manifold vacuum source, and reconnect the spark plug wire (s) to the right side of engine. Lastly install the air cleaner intake duct and the fuel injector sight shield before reconnecting the negative cable of the battery.
    Posted by ChevyPartsGiant Specialist
    Q:
    How to replace the lower intake manifold (L36) on Buick Regal? Posted by Customer
    A:
    The procedure starts by taking out the upper Intake Manifold then continuing with the generator brace followed by drive belt tensioner with mounting bracket and heater water bypass inlet pipe. Detach the exhaust gas recirculation (EGR) outlet pipe from the lower Intake Manifold before removing the radiator inlet hose from the water outlet housing and disconnecting the engine coolant temperature (ECT) sensor electrical connector. Start by removing the generator brace bracket bolts then the bracket before moving onto the evaporative emissions canister purge solenoid valve. Using this sequence remove each bolt holding the lower Intake Manifold in place followed by its complete removal along with teardown of seals and gaskets. The water outlet housing bolt and stud needs removal along with the water outlet housing and gasket when replacing the manifold. The ect sensor must also be removed during this process. Check the width alignment of inlet surfaces on the lower Intake Manifold and clean both mating surfaces together with all bolt holes and bolts before any adhesive application. Reinstall the ect sensor only if removed during the process then secure it tightly to 25 nm (18 ft. Lbs.). Next install the Thermostat followed by the gasket and water outlet housing while torqueing bolts and stud to 27 nm (20 ft. Lbs.). Follow up with lower Intake Manifold gasket installation after applying gm p/n 12346286 sealer or equivalent material to the Intake Manifold seal ends. Position the seals for installation. Before bolting down the lower Intake Manifold install gm p/n 12345382 or equivalent thread locking compound to both hidden bolts then follow a bolt-specific torque sequence up to 15 nm (11 ft. Lbs.). Reinstall the evaporative emissions canister purge solenoid valve followed by the generator brace bracket and its bolts. Torque the bolts to 50 nm (37 ft. Lbs.). The procedure includes hooking up the ect sensor electrical connector while you attach the radiator inlet hose to the water outlet housing and then install the egr outlet pipe onto the lower Intake Manifold with a bolt torque of 29 nm (21 ft. Lbs.). Reinstall the drive belt tensioner followed by the generator brace then finish with the upper Intake Manifold.
    Posted by ChevyPartsGiant Specialist
    Q:
    How to Access and Replace the Lower Intake Manifold on a Buick Regal? Posted by Customer
    A:
    The process begins with upper Intake Manifold removal followed by generator brace then drive belt tensioner with mounting bracket and heater water bypass inlet pipe extraction. The installation sequence begins by first removing the exhaust gas recirculation (EGR) outlet pipe from both the lower Intake Manifold and afterward removing the radiator inlet hose from its water outlet housing position and disconnecting the engine coolant temperature (ECT) sensor electrical connection. Starting with the generator brace brackets' bolts and bracket removal, move to remove the evaporative emissions canister purge solenoid valve. First remove all bolts from the lower Intake Manifold while also taking out the manifold and gaskets and seals. Manifold replacement requires complete water outlet housing bolt and stud removal together with the housing, gasket, and Thermostat, and ect sensor removal. Evaluate the uniformity of inlet flange surfaces then clean both bolted surfaces and Intake Manifold attachment points from adhesive remnants. The ect sensor installation requires 25 nm torque (18 ft. Lbs.) following reinstallation. You should mount the water outlet housing and its bolts and stud while maintaining a torque of 27 nm (20 ft. Lbs.). Prior to installing the lower Intake Manifold gaskets apply gm p/n 12346286 sealer or equivalent to their ends then install the gaskets and manifold. Use thread lock gm p/n 12345382 or equivalent on the two concealed bolts and tighten each of the 12 lower Intake Manifold bolts in sequential order to 15 nm (11 ft. Lbs.). Reroute the evaporative emissions canister purge solenoid valve followed by the generator brace bracket connected with bracket bolts tightened to 50 nm (37 ft. Lbs.). Reconnect the ect sensor electrical connector and install the radiator inlet hose onto the water outlet housing. You should then attach the egr outlet pipe to the lower Intake Manifold and tighten the bolt to 29 nm (21 ft. Lbs.). To complete the repair install the drive belt tensioner and generator brace and upper Intake Manifold.
    Posted by ChevyPartsGiant Specialist
    Q:
    How to replace the upper intake manifold on Buick Regal? Posted by Customer
    A:
    Begin the replacement process by disconnecting the negative Battery Cable followed by removing the fuel injector sight shield and air cleaner intake duct. Release the cooling system fluid before you remove the right Spark Plug Wires from the Ignition Control Module and relocate them. First drain fuel pressure then remove the Fuel Rail assembly and afterward break the booster hose from the vacuum source manifold. Begin by removing the egr valve wiring harness heat shield nut followed by disassembly of its bolt before removing both the egr heat shield and Throttle Body support bracket upper bolt. Unplug the electrical connectors from the evap purge solenoid, throttle position (T/P) sensor, idle air control (IAC) valve, manifold absolute pressure (MAP) sensor, and mass air flow (MAF) sensor. Evacuate the Throttle Body by removing its vacuum line for the purge solenoid followed by the bracketed cruise control and accelerator cables. Clean all upper intake bolts before pulling the upper manifold backwards from its position at the Throttle Body support bracket. Remove the upper-to-lower Intake Manifold carrier gasket that exists on the upper Intake Manifold. When performing upper Intake Manifold replacement it becomes necessary to also take off Throttle Body together with manifold absolute pressure (MAP) sensor and vacuum source manifold and positive crankcase ventilation (PCV) valve. When installing new parts replace the vacuum source manifold before installing the PCV Valve followed by the MAP Sensor and Throttle Body. The upper-to-lower Intake Manifold carrier gasket should be placed on top of the upper Intake Manifold before carefully installing the upper Intake Manifold to the lower Intake Manifold where alignment pins enter their proper holes. Use thread lock compound gm part number 12345382 (Canadian part number 10953489) on the bolt threads before installation while you tighten the upper Intake Manifold bolts (1-10) in sequence to 10 nm (89 inch lbs.). Fasten the Throttle Body accelerator and cruise control cables through their bracket before installing the evap purge solenoid vacuum line. You must connect electrical connectors to the maf sensor alongside the MAP Sensor, the iac valve and t/p sensor followed by the evap purge solenoid. After putting the Throttle Body upper support bracket bolt in place, tighten it to 10 nm (89 inch lbs.) and then install and tighten the egr valve wiring harness heat shield components to 10 nm (89 inch lbs.). Reattach the brake booster hose so it connects to the vacuum source manifold and the Fuel Rail assembly and to right Spark Plug Wires which lead to the Ignition Control Module. To finish installation you must secure the air cleaner intake duct and reattach the fuel injector sight shield before filling the cooling system and reconnecting the negative Battery Cable and performing fluid and vacuum leak checks.
    Posted by ChevyPartsGiant Specialist
    Q:
    What should be done after removing the fuel injector sight shield for the 2002 Buick Park Avenue? Posted by Customer
    A:
    Disconnect the right spark plug wires from the ignition module and set them aside, then remove the MAP sensor and the engine wiring harness heat shield fasteners before taking off the heat shield itself.
    Posted by ChevyPartsGiant Specialist
    See expert answers on similar Intake Manifold
    Q:
    What is the final step in the process for the 2005 Buick Park Avenue? Posted by Customer
    A:
    Reinstall the MAP sensor, connect the right spark plug wires to the ignition module, install the evaporative emission canister purge valve, reconnect the manifold vacuum source, and finish by installing the fuel injector sight shield.
    Posted by ChevyPartsGiant Specialist
    See expert answers on similar Intake Manifold
    Q:
    What components need to be removed next for the 2000 Buick Park Avenue? Posted by Customer
    A:
    Remove the generator and the drive belt tensioner, followed by the EGR valve outlet pipe.
    Posted by ChevyPartsGiant Specialist
    See expert answers on similar Intake Manifold
    Q:
    How do you install the new upper intake manifold for the 2001 Buick Park Avenue? Posted by Customer
    A:
    Place a new upper intake manifold gasket and position the upper intake manifold onto the lower intake manifold, then install the upper intake manifold bolts, tightening them in sequence (1-10) to 10 Nm (89 inch lbs.).
    Posted by ChevyPartsGiant Specialist
    See expert answers on similar Intake Manifold
    Q:
    What gasket needs to be removed from the upper intake manifold for the 2001 Buick Regal? Posted by Customer
    A:
    The upper-to-lower intake manifold carrier gasket.
    Posted by ChevyPartsGiant Specialist
    See expert answers on similar Intake Manifold
    Q:
    What should be connected after installing the throttle body for the 2004 Buick Regal? Posted by Customer
    A:
    Connect the electrical connectors to the MAF sensor, MAP sensor, IAC valve, T/P sensor, and EVAP purge solenoid.
    Posted by ChevyPartsGiant Specialist
    See expert answers on similar Intake Manifold
    Q:
    What is the torque specification for the ECT sensor during installation for the 2003 Buick Regal? Posted by Customer
    A:
    Tighten it to 25 Nm (18 ft. lbs.).
    Posted by ChevyPartsGiant Specialist
    See expert answers on similar Intake Manifold
    Q:
    What should be done after removing the lower intake manifold for the 2003 Buick Park Avenue? Posted by Customer
    A:
    Clean and inspect the manifold.
    Posted by ChevyPartsGiant Specialist
    See expert answers on similar Intake Manifold
    Q:
    What should be done when removing the intake manifold for the 2000 Buick Regal? Posted by Customer
    A:
    Ensure the coolant bypass tube releases as the manifold is taken out, and then remove the intake manifold gaskets.
    Posted by ChevyPartsGiant Specialist
    See expert answers on similar Intake Manifold
    If you have any questions about this product, please don't hesitate to ask us. We will be happy to help you!

OEM GM 24503488, Excellent Performance and Perfect Fitment

To ensure reliability, purchase GM part # 24503488 Manifold. It is sometimes referred to as GM Intake Manifold. Choosing OEM parts is the optimal decision for guaranteeing superior quality and perfect performance. These components undergo stringent quality checks and are carefully constructed to comply with GM's factory specifications, ensuring a smooth installation process.

ChevyPartsGiant.com is a leading supplier of genuine GM parts such as GM 24503488 Manifold. Our website boasts an extensive inventory of OEM GM parts, available at highly competitive prices in the market. Should you require any new genuine GM parts, rest assured we will deliver them swiftly and efficiently to your doorstep. Furthermore, all our parts come with the assurance of a manufacturer's warranty. For detailed Buick parts information, click here.
Choose ChevyPartsGiant for discounted prices, exceptional service and fast delivery