ChevyParts
My Garage
My Account
Cart
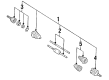
OEM Buick Regal Axle Shaft
Car Axle Shaft- Select Vehicle by Model
- Select Vehicle by VIN
Select Vehicle by Model
orMake
Model
Year
Select Vehicle by VIN
For the most accurate results, select vehicle by your VIN (Vehicle Identification Number).
27 Axle Shafts found


Buick Regal Axle Assembly, Front Passenger Side Part Number: 23191340
$252.52 MSRP: $474.22You Save: $221.70 (47%)Ships in 1-2 Business Days
Buick Regal Axle Assembly, Front Driver Side Part Number: 84402744
$434.41 MSRP: $843.12You Save: $408.71 (49%)Ships in 1-2 Business Days

Buick Regal Axle Assembly, Front Passenger Side Part Number: 19256583

Buick Regal Axle Assembly, Front Driver Side Part Number: 20859642

Buick Regal Axle Assembly, Front Part Number: 26019844
Buick Regal Axle Assembly, Passenger Side Part Number: 26008321

Buick Regal Axle Assembly, Front Part Number: 26019842
Buick Regal Axle Assembly, Front Part Number: 22796269
Buick Regal Axle Assembly, Front Part Number: 13348258


Buick Regal Axle Shaft, Rear Part Number: 22512850
Buick Regal Axle Assembly, Front Driver Side Part Number: 26008328
Buick Regal Axle Assembly, Front Passenger Side Part Number: 26019841

Buick Regal Axle Assembly, Front Driver Side Part Number: 26047918

Buick Regal Axle Assembly, Front Driver Side Part Number: 26054579
Buick Regal Axle Assembly, Front Part Number: 26040719
Buick Regal Axle Assembly, Front Passenger Side Part Number: 26019843
Buick Regal Axle Assembly, Front Passenger Side Part Number: 26047914
Buick Regal Axle Assembly, Front Part Number: 26040718
Buick Regal Axle Assembly, Front Passenger Side Part Number: 26045773

Buick Regal Axle Assembly, Rear Driver Side Part Number: 22823297
$180.86 MSRP: $284.58You Save: $103.72 (37%)
| Page 1 of 2 |Next >
1-20 of 27 Results
Buick Regal Axle Shaft
Want to cut long-term maintenance and repair costs? Choose OEM Axle Shaft. Those parts deliver top durability you can trust. On our site, you'll find a huge catalog of genuine Buick Regal parts. Prices are unbeatable, so you can keep more in your pocket. Every OEM Buick Regal Axle Shaft includes a manufacturer's warranty. You can also get an easy return policy that keeps buying risk free. Fast delivery, get your car on the road quickly. It's simple to search, compare, and order. Stop guessing about quality or fit. Order today and save with parts that last.
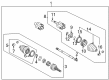
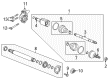
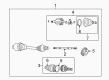
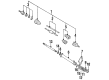
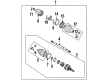
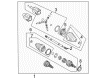
Axle Shaft of Buick Regal vehicles is one of the vital power transmitting mechanism from the differential to the drive wheels with an independent rotation to increase the tractive force. These steel shafts are of different types including the solid axles that are applicable for trucks and older rear wheel drive vehicles, half shaft for the independent suspended vehicles. Differentials are contained by solid axles and slightly by axle shafts while half shafts transmit power from the transaxle to the wheels. Both types can wear out and hence victims of noise, vibration and possibly loss of lubricating material can be from the two types. Some key functions of the axle shafts are to bear the load of the car weight, transfer the torque and ensure proper orientation of the wheels thus making it crucial for the Buick Regal.
Buick Regal Axle Shaft Parts Questions & Experts Answers
- Q: What tools are required to service and repair the axle shaft on Buick Regal?A:The tools necessary for the servicing and repairing of the Axle Shaft are: slide hammer (J 2619-01), Axle Shaft remover extension (J 29794), Axle Shaft remover (J 33008-A), and hub spindle remover (J 42129). Start by raising the vehicle and supporting it properly, then take off the wheel and tire. Next, remove the stabilizer shaft link and the front wheel drive shaft nut, by using a drift or flat-bladed tool to stop the rotor from spinning. Loosen and remove the prix nut from the tie rod and have the assembly disconnected from the Steering Knuckle. At the same time, separate the Ball Joint from the knuckle. Use the hub spindle remover (J 42129) to disengage the front wheel drive axle from the front wheel drive shaft bearing, which will allow the nut to be partially re-installed to protect the threads. If needed, take out the left or right front wheel drive axle from the transaxle using the Axle Shaft remover (J 33008-A), Axle Shaft remover extensiont (J 29794) and the slide hammer (J 2619-01), to remove the axle from the transaxle. For installation, trace the front wheel drive axle through the transaxle making sure the retaining ring is in place. Mount the front wheel drive axle into the front wheel drive shaft bearing, reconnect the bottom joint and outside tie rod assembly, and mount a new front wheel drive shaft nut, tighten to 215 nm (159 ft. Lbs.) while generating use of a raft-bladed tool refusal to the rotor movement. Finally, install the stabilizer link bits, wheel, tire, lower the vehicle, and check the transaxle fluid and wheel alignment.

Related Buick Regal Parts
 Buick Regal Axle Beam Mount
 Buick Regal Axle Support Bushings
 Buick Regal Ball Joint
 Buick Regal Control Arm
 Buick Regal Control Arm Bushing
 Buick Regal Spindle
 Buick Regal Spindle Nut
 Buick Regal Sway Bar Bushing
 Buick Regal Sway Bar Kit
 Buick Regal Sway Bar Link
 Buick Regal Trailing Arm
 Buick Regal Trailing Arm Bushing