ChevyParts
My Garage
My Account
Cart
OEM Buick CV Boot
Axle Boot- Select Vehicle by Model
- Select Vehicle by VIN
Select Vehicle by Model
orMake
Model
Year
Select Vehicle by VIN
For the most accurate results, select vehicle by your VIN (Vehicle Identification Number).
87 CV Boots found


Buick Inner Boot Part Number: 95908486
$54.83 MSRP: $90.31You Save: $35.48 (40%)Ships in 1-2 Business DaysProduct Specifications- Other Name: Boot Kit-Front Wheel Drive Shaft CV Joint Inner; CV Boot; Boot Kit, Rear Axle Universal Joint
- Position: Front Inner

Buick Boot Kit Part Number: 42756982
$39.42 MSRP: $64.93You Save: $25.51 (40%)Ships in 1-3 Business DaysProduct Specifications- Other Name: Boot Kit-Front Wheel Drive Shaft Tri-Pot & CV Joint; CV Boot; Boot Kit, Front Wheel Drive Axle Shaft
- Position: Front
- Replaces: 42721962

Buick Boot Kit, Rear Passenger Side Part Number: 42722017
$35.75 MSRP: $56.00You Save: $20.25 (37%)Ships in 1-3 Business DaysProduct Specifications- Other Name: Boot Kit-Rear Wheel Drive Shaft CV & Tri-Pot Joint; CV Boot; Boot Kit, Rear Axle Universal Joint
- Position: Rear Passenger Side

Buick Boot Kit Part Number: 84930204
$70.45 MSRP: $110.35You Save: $39.90 (37%)Ships in 1-3 Business DaysProduct Specifications- Other Name: Boot Kit-Front Wheel Drive Shaft Tri-Pot & CV Joint; CV Boot; Boot Kit, Front Wheel Drive Axle Shaft
- Position: Front
- Replaced by: 85634569

Buick Inner Boot, Rear Part Number: 15855657
$107.06 MSRP: $175.24You Save: $68.18 (39%)Ships in 1-2 Business DaysProduct Specifications- Other Name: Boot Kit, Rear Axle Universal Joint; CV Boot; Boots
- Position: Rear
Buick Boot Kit Part Number: 84945203
$75.86 MSRP: $118.82You Save: $42.96 (37%)Ships in 1-3 Business DaysProduct Specifications- Other Name: Boot Kit-Front Wheel Drive Shaft Tri-Pot & CV Joint; CV Boot; Boot Kit, Front Wheel Drive Axle Shaft
- Position: Front
- Replaced by: 86585864

Buick Boot Kit Part Number: 42721984
$40.32 MSRP: $63.15You Save: $22.83 (37%)Ships in 1-3 Business DaysProduct Specifications- Other Name: Boot Kit-Front Wheel Drive Shaft Tri-Pot & CV Joint; CV Boot; Boot Kit, Front Wheel Drive Axle Shaft
- Position: Front

Buick Outer Boot, Front Part Number: 38026971
$87.96 MSRP: $137.80You Save: $49.84 (37%)Ships in 1-3 Business DaysProduct Specifications- Other Name: Boot Kit, Front Wheel Drive Axle Shaft; CV Boot
- Position: Front

Buick Inner CV Joint Boot, Front Part Number: 15855655
$20.23 MSRP: $32.12You Save: $11.89 (38%)Ships in 1-2 Business DaysProduct Specifications- Other Name: Boot Kit, Front Wheel Drive Axle Shaft; CV Boot; Inner Boot; Boot Kit, Front Axle
- Position: Front

Buick Inner Boot Part Number: 95908489
$43.62 MSRP: $68.32You Save: $24.70 (37%)Ships in 1-3 Business DaysProduct Specifications- Other Name: Boot Kit-Front Wheel Drive Shaft CV Joint Inner; CV Boot; Boot Kit, Front Wheel Drive Axle Shaft
- Position: Front

Buick Inner Boot, Front Part Number: 38026972
$191.12 MSRP: $300.73You Save: $109.61 (37%)Ships in 1-3 Business DaysProduct Specifications- Other Name: Boot Kit, Front Wheel Drive Axle Shaft; CV Boot
- Position: Front
- Replaced by: 84282537

Buick Outer Boot Part Number: 95908464
$49.24 MSRP: $78.18You Save: $28.94 (38%)Ships in 1-2 Business DaysProduct Specifications- Other Name: Boot Kit, Front Wheel Drive Axle Shaft; CV Boot; Boot Kit, Rear Axle Universal Joint
- Position: Front Outer

Buick Outer Boot, Rear Part Number: 22855573
$84.46 MSRP: $134.08You Save: $49.62 (38%)Ships in 1-2 Business DaysProduct Specifications- Other Name: Boot Kit-Rear Wheel Drive Shaft CV Joint; CV Boot; Boots; Boot Kit, Rear Axle Universal Joint
- Position: Rear
- Replaces: 19258587
Buick Outer Boot, Front Part Number: 84282541
$42.67 MSRP: $66.82You Save: $24.15 (37%)Ships in 1-3 Business DaysProduct Specifications- Other Name: Boot Kit, Front Wheel Drive Axle Shaft; CV Boot
- Position: Front


Buick Boot Kit, Driver Side Part Number: 42871670
$37.39 MSRP: $58.56You Save: $21.17 (37%)Ships in 1-2 Business DaysProduct Specifications- Other Name: Boot Kit-Rear Wheel Drive Shaft CV & Tri-Pot Joint; Boot Kit, Rear Axle Universal Joint
- Position: Driver Side
Buick Boot Kit, Rear Driver Side Part Number: 42722013
$40.21 MSRP: $62.98You Save: $22.77 (37%)Ships in 1-3 Business DaysProduct Specifications- Other Name: Boot Kit-Rear Wheel Drive Shaft CV & Tri-Pot Joint; CV Boot; Boot Kit, Rear Axle Universal Joint
- Position: Rear Driver Side
Buick Inner Boot, Front Driver Side Part Number: 84282536
$53.00 MSRP: $83.00You Save: $30.00 (37%)Ships in 1-3 Business DaysProduct Specifications- Other Name: Boot Kit, Front Wheel Drive Axle Shaft; CV Boot
- Position: Front Driver Side
Buick Outer Boot, Rear Part Number: 23218688
$107.12 MSRP: $176.46You Save: $69.34 (40%)Ships in 1-2 Business DaysProduct Specifications- Other Name: Boot Kit-Rear Wheel Drive Shaft CV Joint; CV Boot; Inner Boot; Boots; Boot Kit, Rear Axle Universal Joint
- Position: Rear
Buick Inner Boot, Front Passenger Side Part Number: 84282545
$45.64 MSRP: $71.48You Save: $25.84 (37%)Ships in 1-3 Business DaysProduct Specifications- Other Name: Boot Kit, Front Wheel Drive Axle Shaft; CV Boot
- Position: Front Passenger Side
Buick Boot Kit, Passenger Side Part Number: 42871671
$35.83 MSRP: $56.13You Save: $20.30 (37%)Product Specifications- Other Name: Boot Kit-Rear Wheel Drive Shaft CV & Tri-Pot Joint; Boot Kit, Rear Axle Universal Joint
- Position: Passenger Side
| Page 1 of 5 |Next >
1-20 of 87 Results
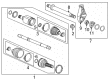
Buick CV Boot
Want to cut long-term maintenance and repair costs? Choose OEM CV Boot. Those parts deliver top durability you can trust. On our site, you'll find a huge catalog of genuine Buick parts. Prices are unbeatable, so you can keep more in your pocket. Every OEM Buick CV Boot includes a manufacturer's warranty. You can also get an easy return policy that keeps buying risk free. Fast delivery, get your car on the road quickly. It's simple to search, compare, and order. Stop guessing about quality or fit. Order today and save with parts that last.
Buick CV Boot Parts Questions & Experts Answers
- Q: How to Replace a CV Boot and CV Joint on a Wheel Drive Shaft on Buick LaCrosse?A:To service and repair the constant velocity joint boot, the following tools are essential for the exercise: j 8059 snap ring pliers (Parallel Jaw), j 35910 drive axle seal clamp pliers, and j 41048 drive axle swage ring clamp. To begin with, de-clip the swage ring from the halfshaft bar using a hand grinder without damaging the halfshaft bar. Finally, remove the big seal holding clamp from the tripot joint and side cutters and toss it out. Disengage the inboard seal from the trilobal tripot bushing of the large diameter and move the seal away from the joint on the halfshaft bar. Take off the tripot joint spider and the halfshaft bar housings. Spread the spacer ring using j 8059 and remove the spacer ring, spider, and tripot boot and discard the boot and rings. Use a wire brush to clean the halfshaft bar from rust in the boot mounting area and check out the needle rollers, needle bearings, and trunnion and replace damaged parts with the necessary kit. When installing use a vise for attachment to eared clamp: put the new small swage ring or eared clamp on the small end of the joint seal and slide it onto the halfshaft bar. Using the small end of the joint seal push it into the joint seal groove on the halfshaft bar. For swage ring installation, mount the j 41048 onto a vise, position the inboard end of the halfshaft assembly into the tool, align the top of the seal neck on the bottom die, and position the top half of j 41048 onto the lower half. Check for pinch points on the halfshaft inboard seal, insert the bolts and tighten by hand only. After that, install the halfshaft inboard seal, the halfshaft bar, and swage ring and tightening each bolt j 41048 180 degrees at a time using a ratchet wrench alternately between each bolt until both sides are bottomed. Crimp the eared clamp using j 35910 torque wrench, and a breaker bar. If available, fit the spacer ring into the groove of halfshaft bar with j 8059 and slide the tripot joint spider assembly along the halfshaft bar as far as possible. Add roughly half of the grease from the service kit into the great from the service kit into the halfshaft inboard seal while retaining the rest of it to pack the housing, leaving that trilobal tripot bushing straight on the side of the housing. Mount the trilobal tripot bushing to the housing, apply the larger new seal retaining clamp to the halfshaft inboard seal, and slide the housing over the tripot joint spider assembly to the halfshaft bar. Slide the large diameter of the halfshaft inboard seal over the tripot bushing and align the lip of the seal in the groove. Mount the joint assembly at the correct vehicle dimension of 106 mm (4.00 inch) while carefully inserting a smooth flat blunt tool between the large seal opening and the trilobal tripot bushing to even out the pressure and withdraw the tool as well as it. Reposition the halfshaft inboard seal, tripot housing, and grip the large seal retaining clamp while latching and experiencing a tool with skid ejector j35910 (if need be add the breaker bar and note wrench assist), crank down the seal retaining clamp with j 35910 to 176 n.m (130 lb ft). Make sure the gap dimension on the clamp ear and tighten until 2.6 mm (0.102 in) dimensional gap reached and fully stroke the joint varied number times to disperse the grease.
- Q: How to Replace a CV Boot and CV Joint on a Rear Wheel Drive Shaft for Outer on Buick Enclave?A:In order to replace the rear wheel drive shaft outer joint and boot, one should remove the wheel drive shaft from the car and secure it in a soft jawed vice, ensuring not to cut through the inboard or outboard boot to ensure that the sealing surface is not damaged. After this, check for presence of a low-profile boot clamp, and then eliminate and discard the outer boot clamp and inner boot clamp from the cv joint boot , then remove the cv joint boot from the cv joint housing . If the shaft has the boot clamp of ear type, remove the outer boot clamp & inner boot clamp before you pull the cv joint boot from the cv joint housing. Note: see image, fig 5, removal of cv joint, boott be removedhow to proceed: de cheek mb r 189 first the cv joint has to be taken off from the wheel drive shaft; this task is done with the help of a hammer and with hammer and a wooden block, so as to protect the wheel from being damaged. After that check the c code (J8059) to remove the retaining ring from the wheel drive shaft and take off the cv joint boot from the wheel drive shaft. Check the cv-joint prior to assembly by placing the boot and clamp on the wheel drive shaft without crimping and have the boot seated in the groove of the wheel drive shaft. Install the retaining ring on the wheel drive shaft using j 8059, close the boot clamp on j 35910 so as to measure 1.8mm (0.07in) for x88 vehicles, 2.6mm (0.10 in) for x88/z88/w49/wda vehiclesas in such a way as to make it make the cv joint just brush against the inner retaining ring. Mount the cv joint on the wheel drive shafts with the aid of a block of wood and a hammer, then apply half of the lubricant into the CV Boot and half into the cv joint , ensuring to remove the excess lubricant. In case of the wheel drive with ear type clamp, the boot clamp should be closed by the means of j 35910 until the distance between two parts would be 1.9mm (0.07 in). For vehicles with x88 while all locking tabs should be locked. For a low profile clamp, then close boot clamp with ch 48894, then rotate the cv joint to a circular motion of 4 to 5 times to evenly spread the lubricant before releasing the wheel drive shaft from the vise and reinstalling it.
- Q: How to replace the outer CV Boot and CV Joint on Buick LeSabre?A:The toolset required for wheel drive shaft outer joint and boot replacement includes Snap Ring Pliers J 8059 and Eared Clamp Tool J 35910 and Small Swage Tool J 41048 as well as a breaker bar and torque wrench. You need Snap Ring Pliers (J 8059), Eared Clamp Tool (J 35910), Small Swage Tool (J 41048), a breaker bar alongside a torque wrench for this repair job. Start the replacement procedure by cutting off the large boot retaining clamp from the CV joint with a side cutter before discarding it. Next, use a side cutter to disconnect the small boot retaining clamp from the halfshaft bar. The outer race of the CV joint must be separated from the boot before sliding the boot at least one inch away from the bar direction. Before removing the CV joint assembly from the bar use the Snap Ring Pliers (J 8059) to open the retaining ring's ears after wiping grease off the CV joint inner race face. Tapping the CV joint cage with a brass drift and hammer helps remove the chrome alloy balls while you keep the boot away from the bar . Use cleaning solvent to cleanse the CV joint cage with balls as well as the inner and outer race assemblies until all older grease and contaminants disappear before the elements dry. After mounting the new swage ring on the small end of the joint boot you should position it onto the halfshaft bar. First set the boot into its boot groove then fix the Small Swage Tool (J 41048) inside a vise so that the halfshaft assembly's outer end points toward the tool. Begin bolt tightening with hand pressure until they reach normal resistance before alternating each bolt's tightening 180 degrees using a ratchet wrench. Using service kit grease, apply a very thin covering to the inner and outer race ball grooves. Next, insert the inner race into the cage making sure the retaining ring side points toward the halfshaft bar. Place the cage windows in exact alignment with the outer race's lands before combining cage and inner race components within the outer race assembly. High-precision installation requires the insertion of chrome balls followed by grease packing of the CV joint while carefully molding the outboard boot. Using a Eared Clamp Tool (J 35910), breaker bar, and torque wrench crimp the large boot retaining clamp to meet a 176 Nm (130 ft. lbs.) torque specification while verifying the clamp ear gap dimensional compliance.


