Popular OEM Buick Rainier Parts
- Body & Hardware Parts View More >
- Steering Parts View More >
- Electrical Parts View More >
- Air & Fuel Delivery Parts View More >
- Charging & Starting Parts View More >
- Engine Parts View More >
- Belts & Cooling Parts View More >
- Suspension Parts View More >
- Driveline & Axles Parts View More >
- Emission Control & Exhaust Parts View More >
- Transmission Parts View More >
- Brakes Parts View More >
Why Buy Genuine Buick Rainier Parts From ChevyPartsGiant.com
Looking for real Buick Rainier parts? ChevyPartsGiant.com may be a better choice to find genuine parts at wallet-friendly prices. We sell only OEM Buick Rainier parts, ensuring perfect fit, reliability, and long-term performance. With our website, you can easily get access to the same parts found at local Buick stores. All components are produced by Buick and are exclusively fitted on Buick Rainier automobiles. By shopping at our store, you can enjoy the quality of the Buick factory without the high prices of brick-and-mortar facilities. We achieve this because we are an online store operating at lower costs, which we pass on to you. We also have a user-friendly platform where you can find and order genuine Buick Rainier parts swiftly. We are here to make your process of restoring a Buick Rainier or dealing with simple repairs quick and inexpensive. We also make it easy to obtain Buick Rainier parts at competitive shipping prices and a team of knowledgeable staff ready to take your order. Choose ChevyPartsGiant.com to save time and money, as well as keep your Buick Rainier in the good condition.
The Buick Rainier was a mid-size SUV produced by Buick from 2004 to 2007, marking Buick's entry into the SUV market during this period. This vehicle provides five seats in a broad interior space using its extensive body-on-frame. Two engine choices power the Buick Rainier through its production run including the 4.2 L Vortec I6 rated at 291 horsepower as well as the 5.3 L Small-block V8 offering 300 horsepower for standard engine performance. The 4-speed automatic transmission of the Rainier unites with two engine options to deliver smooth transmission changes and improved driving responsiveness. The Buick Rainier measures 113.0 inches in wheelbase length while the width reaches 75.4 inches and stands 74.5 inches tall and shows two different lengths at 191.8 inches during the 2004-05 period and 193.4 inches for the 2006-07 models. The vehicle offers rear and all-wheel drive configurations that help drivers handle various climate conditions. The V8 engine received an output boost to 300 horsepower during the 2005 model year while the occupant sensing system and touch-screen navigation radio entered the market. Genuine parts for the Buick Rainier exceed manufacturing requirements of Buick resulting in durable components which prioritize vehicle reliability through owner maintenance.
Buick Rainier clubs typical issues into suspension support, fuel metering, and HVAC air distribution. When in suspension, Rainier in the rear may sit low at the start or overnight. A compromised air compressor has no way to supply the air springs, so it will not hold ride height. Test the air compressor command and fuse integrity, replace the air compressor and check all lines for leaks. The fuel system will result in Rainier exhibiting unpredictable readings on the fuel gauge and empty warnings. Unserviceable dirt and accretion on a fuel level sensor within the module report erroneous volume and incorrectly estimate range. Perform a sweep of the sender, then replace a fuel pump assembly on high-mileage automobiles. HVAC control Rainier can blow out at floor vents and defrost vents only. The default options can become permanent as any battery service can reset the mode calibration. Recalibration of actuators in the AC mode then the AC mode actuator can be replaced, assuming feedback errors still exist. These measures not only correct Rainier's comfort but also make use of reliable fuel reading and a steady ride height. Conclude with a scan on Buick systems, clear faults, and road test the Buick Rainier to verify. Trail Buick service procedures and record results to be applied later in planning Buick maintenance on Rainier models.
Buick Rainier Parts Questions & Answers
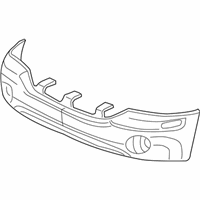
- Q: How to replace the rear bumper fascia on Buick Rainier?A:The rear bumper fascia replacement process begins by taking away applicable back up lamp socket assemblies from back up lamp housings followed by removing the lower fascia push-pins and rear wheelhouse flange screws. The next step involves removing upper bolts from the fascias rear part before removing it from the vehicle. To install the fascia move it onto the vehicle impact bar after which install upper retaining bolts while tightening until reaching 2.5 N.m (22 lb in). Secure the fascia to wheelhouse flanges by applying screws until you reach 2 N.m torque (18 lb in). Insert the lower push pins completely after sealing the screws. The back up lamp socket assemblies must be reinstalled after completion of the repair process.
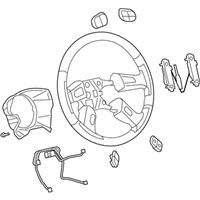
- Q: How to replace the steering wheel on Buick Rainier?A:The first step to replace a Steering Wheel involves disabling sir and removing the inflator module. You can remove the horn plunger from the Steering Column after pressing it toward the stop and turning the plunger 90 degrees, then disconnect the Steering Wheel electrical cable. The Steering Wheel's retaining nut requires removal from its position which secures it to the Steering Wheel shaft. The correct tools to protect the Steering Column include j1859-a (J1859-A) combined with j36541-a (J36541-A). Start by applying j1859-a (J1859-A) and j36541-a (J36541-A) to the Steering Wheel then pull it away with these tools. After fixing the Steering Wheel onto the Steering Wheel shaft users should tighten the retaining nut to 41 nm (30 ft. Lbs.). Reinstall the Steering Wheel electrical connector after connecting it. Finish with horn plunger and deflator module setup before enabling sir system functions.
- Q: How to replace the grille emblem on Buick Rainier?A:To replace the grille emblem in the Rainier, get rid of the grille and lay it on a clean, prepared surface. Next, release two tabs located at the back of the emblem and pull out the emblem from the grille. For installation, sliding in the new emblem into the grille opening until you hear an audible click sound, then reinstall the grille.
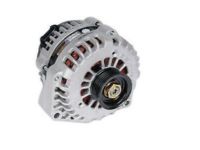
- Q: How to Perform an Alternator Replacement on Buick Rainier?A:Begin the generator replacement by disconnecting the negative Battery Cable and removing the Drive Belt. Start by removing the battery positive cable nut from the generator followed by taking off the a/c line mounting bracket bolt attached to the engine lift hook. The next step involves removing the lift hook's right bolts followed by the removal of the lift hook itself. Remove the 3 generator mounting bolts first before extracting the generator. During installation replace the generator before tightening the 3 bolts at 50 n.m (37 lb ft). Seal and tighten the generator's positive Battery Cable using the nut to a torque of 9 n.m (80 lb in). Mount the engine lift hook back and lock it into place with two bolts tightened to 50 n.m (37 lb ft). Use 10 n.m (89 lb in) torque to fasten the a/c line bracket bolt onto the lift hook. You need to reattach both the Drive Belt and the battery negative cable.


