ChevyParts
My Garage
My Account
Cart
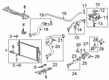
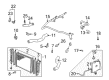
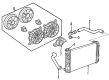
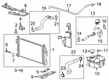
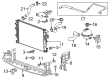
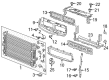
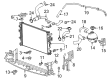
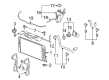
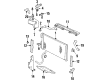
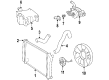
OEM Buick Radiator
Cooling Radiator- Select Vehicle by Model
- Select Vehicle by VIN
Select Vehicle by Model
orMake
Model
Year
Select Vehicle by VIN
For the most accurate results, select vehicle by your VIN (Vehicle Identification Number).
118 Radiators found


Buick Radiator Part Number: 89018545
$177.83 MSRP: $265.81You Save: $87.98 (34%)Product Specifications- Other Name: Radiator Assembly; Radiator, Radiator
- Replaces: 52489507, 25731392


Buick Radiator Part Number: 22762531
$171.32 MSRP: $256.08You Save: $84.76 (34%)Ships in 1-2 Business DaysProduct Specifications- Other Name: Radiator Assembly; Radiator, Radiator
- Replaces: 13241729


Buick Radiator Part Number: 89018542
$123.10 MSRP: $236.85You Save: $113.75 (49%)Product Specifications- Other Name: Radiator Assembly; Radiator, Radiator
- Replaces: 52478254, 10329499, 52487052, 88957431
Buick Radiator Part Number: 25731390
$385.19 MSRP: $606.07You Save: $220.88 (37%)Ships in 1-3 Business Days
Buick Radiator Part Number: 25731389
$385.19 MSRP: $606.07You Save: $220.88 (37%)Ships in 1-3 Business Days

Buick Radiator Part Number: 13267665
$191.67 MSRP: $368.79You Save: $177.12 (49%)Ships in 1-2 Business DaysProduct Specifications- Other Name: Radiator Assembly; Radiator, Radiator


Buick Radiator Part Number: 22942965
$356.35 MSRP: $532.67You Save: $176.32 (34%)Ships in 1-3 Business DaysProduct Specifications- Other Name: Radiator Assembly; Radiator, Radiator

Buick Radiator Part Number: 23104892
$274.51 MSRP: $410.33You Save: $135.82 (34%)Ships in 1-2 Business DaysProduct Specifications- Other Name: Radiator Assembly; Radiator, Radiator

Buick Radiator Part Number: 84208066
$202.54 MSRP: $302.75You Save: $100.21 (34%)Ships in 1-2 Business DaysProduct Specifications- Other Name: Radiator, Radiator

Buick Radiator Part Number: 84690758
$223.37 MSRP: $430.30You Save: $206.93 (49%)Ships in 1-2 Business DaysProduct Specifications- Other Name: Radiator, Radiator
- Replaces: 23477119

Buick Radiator Part Number: 84208067
$149.78 MSRP: $223.88You Save: $74.10 (34%)Ships in 1-3 Business DaysProduct Specifications- Other Name: Radiator, Radiator


Buick Radiator Part Number: 42670687
$206.63 MSRP: $308.87You Save: $102.24 (34%)Ships in 1-3 Business DaysProduct Specifications- Other Name: Radiator, Radiator
- Replaced by: 42771759

Buick Radiator Part Number: 15140592
$231.94 MSRP: $346.70You Save: $114.76 (34%)Ships in 1-2 Business DaysProduct Specifications- Other Name: Radiator Assembly; Radiator, Radiator

Buick Radiator Part Number: 52453816
$266.92 MSRP: $402.60You Save: $135.68 (34%)Ships in 1-2 Business DaysProduct Specifications- Replaced by: 52477309

Buick Auxiliary Radiator Part Number: 84174839
$153.13 MSRP: $228.90You Save: $75.77 (34%)Ships in 1-2 Business DaysProduct Specifications- Other Name: Radiator, Radiator; Radiator


Buick Radiator Part Number: 15140506
$202.77 MSRP: $303.10You Save: $100.33 (34%)Product Specifications- Other Name: Radiator Assembly; Radiator, Radiator
- Replaces: 10324030


Buick Upper Seal Part Number: 10344419
$184.95 MSRP: $276.45You Save: $91.50 (34%)Product Specifications- Other Name: Radiator Assembly; Radiator; Radiator, Radiator


Buick Radiator Assembly Part Number: 25813509
Product Specifications- Other Name: Radiator; Radiator, Radiator
- Replaces: 10420263, 10310317, 15791269

Buick Radiator Part Number: 52493121
$179.89 MSRP: $268.90You Save: $89.01 (34%)Product Specifications- Other Name: Radiator Assembly; Radiator, Radiator
- Replaces: 52462564, 52462554, 52476571

Buick Radiator Assembly Part Number: 15196386
$185.55 MSRP: $277.35You Save: $91.80 (34%)Product Specifications- Other Name: Radiator; Radiator, Radiator
- Replaces: 15162213
| Page 1 of 6 |Next >
1-20 of 118 Results
Buick Radiator
Want to cut long-term maintenance and repair costs? Choose OEM Radiator. Those parts deliver top durability you can trust. On our site, you'll find a huge catalog of genuine Buick parts. Prices are unbeatable, so you can keep more in your pocket. Every OEM Buick Radiator includes a manufacturer's warranty. You can also get an easy return policy that keeps buying risk free. Fast delivery, get your car on the road quickly. It's simple to search, compare, and order. Stop guessing about quality or fit. Order today and save with parts that last.
Buick Radiator Parts Questions & Experts Answers
- Q: How to replace the radiator (L26/3.8L) on Buick Lucerne?A:The replacement of a Radiator (L26/3.8L) starts with draining part of the cooling system. After removing the cooling Fan Shroud assembly proceed with removing the condenser line to Radiator retaining bolt. Hose clamp pliers (J 38185) enable you to move hose clamps to the Radiator outlet hose and extract the outlet hose from the Radiator. Unscrew the condenser mounting bolts with caution as you avoid the lower connecting points of the Radiator alongside the condenser. Lift the condenser verticality to free its lower feet from critical mounting features on the front Radiator before lifting the Radiator from the vehicle. During installation simply set the Radiator inside the vehicle then direct the condenser feet to match the mounting elements. Only apply the unique bolts designed for end tanks at the condenser section when installation is complete and tighten them to 13 n.m (115 lb in). Rely on hose clamp pliers (J 38185) to repose the hose clamp before installing the Radiator outlet hose. Mount the condenser line along the Radiator retaining bolt before installing both cooling fans. Finally, fill the cooling system.
- Q: How to replace the radiator on Buick LeSabre?A:Engine coolant drain should be the first step for Radiator replacement followed by the removal of upper Radiator seal and upper tie bar. The hose clamp pliers (J 38185) enables the disconnection of the coolant overflow hose from the Radiator while sealing it with a plug. You should disconnect the Radiator hoses using the hose clamp pliers (J 38185) from both upper and lower ends while placing them properly to the side. Disconnect the lower tie bar bolt that holds the transaxle oil cooler pipe bracket then extract the cooling fans. Use the cooler quick connect tool (J 41623-B) to disconnect the upper and lower transaxle oil cooler pipes from the Radiator after sliding off their plastic caps from quick connect fittings. You must disconnect the condenser bolts from the a/c condenser then remove the condenser from the Radiator to raise the Radiator out of the vehicle. A special bolt with the correct length should be used as a protective measure for avoiding condenser to Radiator end tank damage during installation. Secure the bottom of the Radiator within the lower pads before implementing the condenser and tightening a/c condenser mounting bolts to 13 nm (115 inch lbs.). Finish the installation of transaxle oil cooler pipes by leaving them to click into Radiator quick connect fittings before soft pulling for retention and placing plastic caps over the quick connect joints. Secure the transaxle oil cooler pipe bracket bolt on the lower tie bar by tightening it to 10 nm (89 inch lbs.). The hose clamp pliers (J 38185) helps install upper and lower Radiator hoses to the Radiator before attaching the coolant recovery hose to the Radiator neck with the hose clamp pliers (J 38185). Mount the upper tie bar followed by installing the upper Radiator seal then proceed with filling the cooling system lastly checking the transmission oil level.
- Q: How to replace the radiator in an A/C system on Buick Terraza?A:Refrigerant recovery should start before you disconnect the lower transmission oil cooler lines from the Radiator. Begin the procedure by removing cooling fans with their shroud and then move on to unplug the Radiator inlet hose and Radiator outlet hose. You should ordinarily stop the nutrient line to condenser block bolt then cut the a/c discharge hose from the condenser block while disposing the sealing washer. After opening a/c hoses the worker must immediately install tape or caps over these openings to stop system contamination from reaching all parts of the discharge hose and beyond. Take the evaporator inlet tube to condenser bolt off while disconnecting the evaporator inlet tube from the condenser block by capping or taping the tube for prevention and system protection. Remove the bolt connecting the Radiator to the condenser and the condenser tube clip screw before shifting the Radiator and condenser toward the engine to remove the Radiator. Start by installing the Radiator followed by the condenser tube clip screw and tighten the bolts to 6 nm (53 inch lbs.). Secure the Radiator to the condenser by screwing in the bolt until it reaches 2.5 nm (22 inch lbs.). Seal the evaporator inlet tube with a new washer before joining it to the condenser block and installing the evaporator inlet tube to condenser bolt and then torquing it to 16 nm (12 ft. Lbs.). First disconnect the a/c discharge hose from the condenser block by removing the cap or tape while installing a new sealing washer before setting the hose to the condenser block followed by installation of the a/c discharge hose to condenser block nut and torque it to 16 nm (12 ft. Lbs.). The installation process starts with adding the Radiator outlet hose and proceeding to the Radiator inlet hose before you add the cooling fans alongside the shroud and finish by uniting the lower transmission oil cooler line to the Radiator. The system requires recharging while the technician uses a halogen leak detector (J 39400-A) for checking a/c component fittings then checks the transmission fluid's current level.


Related Buick Parts
 Buick Coolant Reservoir
 Buick Radiator Cap
 Buick Water Pump
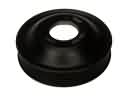 Buick Water Pump Pulley
 Buick Automatic Transmission Oil Cooler Line
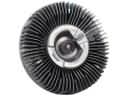 Buick Cooling Fan Clutch
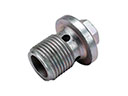 Buick Drain Plug
 Buick Fan Clutch
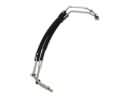 Buick Oil Cooler Hose
 Buick Radiator Hose
 Buick Radiator fan
 Buick Thermostat Housing