Make sure this part fits

GM 25813498
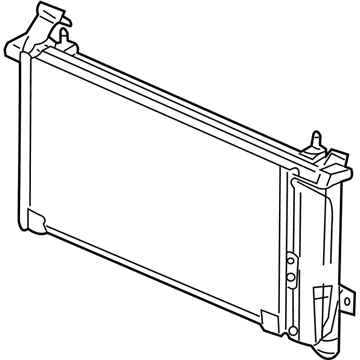
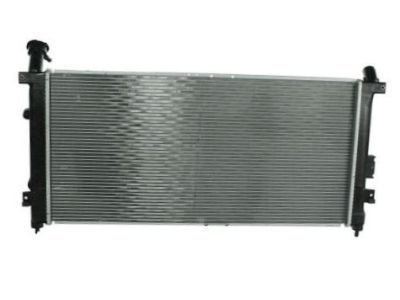
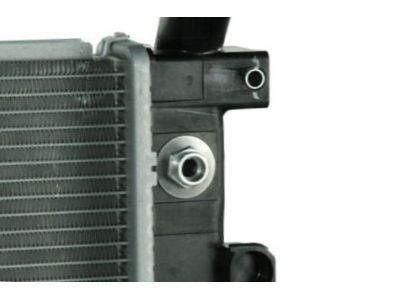
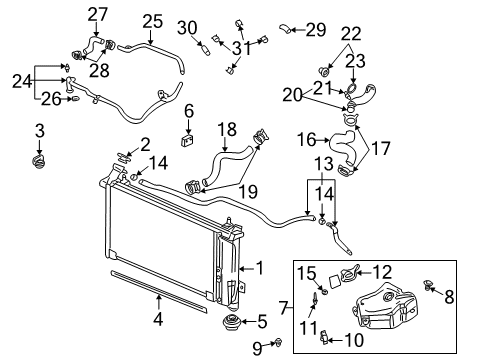
Radiator Assembly

2001-2007 GM

Customer Questions & Expert Answers (10)
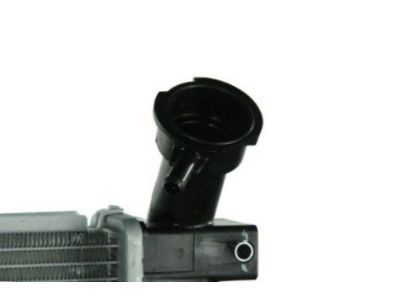
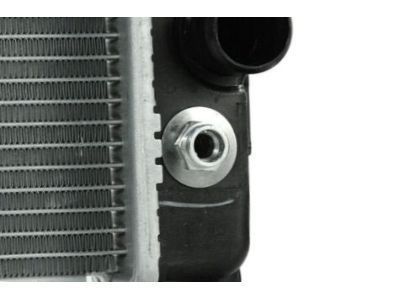
GM 25813498 Radiator Assembly
  • Part Description
    Radiator Assembly
  • Replaces
    10436714, 15791268, 10420728, 10310318
  • Manufacturer
    General Motors
  • Manufacturer's Notes
    This part is discontinued.
Make sure this part fits
  • Related Parts
  • Product Specifications
  • Vehicle Fitment
  • Customer Questions & Expert Answers
  • Product Specifications

    BrandGenuine GM
    Manufacturer Part Number25813498
    Part DescriptionRadiator Assembly
    Other NamesRadiator; Radiator, Radiator
    Item Dimensions5.2 x 41.6 x 25.5 inches
    Item Weight7.10 Pounds
    ConditionNew
    Fitment TypeDirect Replacement
    Replaces10436714, 15791268, 10420728, 10310318
    ManufacturerGeneral Motors
    SKU25813498
    WarrantyThis genuine GM part is guaranteed by GM's factory warranty.
    Shipping & ReturnShipping Policy Return Policy
    Warning: California's Proposition 65
  • Vehicle Fitment

    Year Make Model Trim Engine
    2002-2007 Buick RendezvousCX, CX Plus, CXL, CXL Plus6 Cyl 3.4 L GAS, 6 Cyl 3.5 L GAS
    2005-2006 Buick TerrazaCX, CXL6 Cyl 3.5 L GAS
    2005-2006 Chevrolet UplanderBase, LS, LT6 Cyl 3.5 L GAS
    2001-2005 Chevrolet VentureBase, LS, LT, Plus, Value, Warner Bros.6 Cyl 3.4 L GAS
    2001-2004 Oldsmobile SilhouetteGL, GLS, Premiere6 Cyl 3.4 L GAS
    2001-2005 Pontiac AztekBase, GT, Rally6 Cyl 3.4 L GAS
    2001-2006 Pontiac MontanaBase, SV66 Cyl 3.4 L GAS, 6 Cyl 3.5 L GAS, 6 Cyl 3.9 L GAS
    2005-2007 Saturn Relay1, 2, 36 Cyl 3.5 L GAS, 6 Cyl 3.9 L FLEX, 6 Cyl 3.9 L GAS
  • Customer Questions & Expert Answers

    Q:
    Can you help me check if this 25813498 is the right part for my car? Posted by ChevyPartsGiant Specialist
    A:
    Please Select Your Vehicle model to see if part number 25813498 is suitable before ordering.
    Posted by ChevyPartsGiant Specialist
    Q:
    How to replace the radiator in an A/C system on Buick Terraza? Posted by Customer
    A:
    Refrigerant recovery should start before you disconnect the lower transmission oil cooler lines from the Radiator. Begin the procedure by removing cooling fans with their shroud and then move on to unplug the Radiator inlet hose and Radiator outlet hose. You should ordinarily stop the nutrient line to condenser block bolt then cut the a/c discharge hose from the condenser block while disposing the sealing washer. After opening a/c hoses the worker must immediately install tape or caps over these openings to stop system contamination from reaching all parts of the discharge hose and beyond. Take the evaporator inlet tube to condenser bolt off while disconnecting the evaporator inlet tube from the condenser block by capping or taping the tube for prevention and system protection. Remove the bolt connecting the Radiator to the condenser and the condenser tube clip screw before shifting the Radiator and condenser toward the engine to remove the Radiator. Start by installing the Radiator followed by the condenser tube clip screw and tighten the bolts to 6 nm (53 inch lbs.). Secure the Radiator to the condenser by screwing in the bolt until it reaches 2.5 nm (22 inch lbs.). Seal the evaporator inlet tube with a new washer before joining it to the condenser block and installing the evaporator inlet tube to condenser bolt and then torquing it to 16 nm (12 ft. Lbs.). First disconnect the a/c discharge hose from the condenser block by removing the cap or tape while installing a new sealing washer before setting the hose to the condenser block followed by installation of the a/c discharge hose to condenser block nut and torque it to 16 nm (12 ft. Lbs.). The installation process starts with adding the Radiator outlet hose and proceeding to the Radiator inlet hose before you add the cooling fans alongside the shroud and finish by uniting the lower transmission oil cooler line to the Radiator. The system requires recharging while the technician uses a halogen leak detector (J 39400-A) for checking a/c component fittings then checks the transmission fluid's current level.
    Posted by ChevyPartsGiant Specialist
    Q:
    How to replace the radiator on a Relay on Buick Terraza? Posted by Customer
    A:
    All replacement operations of the Radiator in 2005 buick terraza, 2005 chevrolet uplander, 2005 pontiac montana sv6, and 2005 saturn relay vehicles begin by disconnecting the lower transmission oil cooler (TOC) line from the Radiator before moving on to the cooling fans and shroud and Radiator inlet hose and outlet hose. Remove the bolt which secures the Radiator to the condenser next to the condenser tube clip screw. To uninstall the Radiator position it and the condenser toward the engine so you can remove the Radiator. Install the Radiator correctly by placing it in its position and applying the condenser tube clip screw with 6 nm (53 lb in) torque followed by bolting the Radiator to the condenser with 2.5 nm (22 lb in). Reinstall both the outlet and inlet hose on the Radiator before you put back the cooling fans with their shroud. The last step involves attaching the lower transmission oil cooler (CFOC) line to the Radiator before you refill the cooling system and check the transmission fluid level.
    Posted by ChevyPartsGiant Specialist
    Q:
    How to replace the radiator in an A/C system on Chevrolet Venture? Posted by Customer
    A:
    The first step to replace a Radiator includes recovering refrigerant from the a/c system and draining the cooling system fluids. The installation of the new Radiator begins by uninstalling the cooling fans together with their shroud. Release the clamp tension on the hose using hose clamp pliers (J 38185) until the locking mechanism activates as a method to remove the hose. The hose clamp pliers (J 38185) can be used to loosen the hose clamp near the water pump housing before disconnecting the Radiator outlet hose from that housing. Cut the lower toc line from the Radiator and then unscrew the a/c discharge hose nut from the condenser block before disconnecting it. Directly close the exposed A/C Hose with a cap before contamination occurs and apply tape to the exposed position of the a/c discharge hose too. Release the bolt which maintains the evaporator inlet tube connection to the condenser block and disconnect the tube while using caps or tape for sealing each opening. Start by removing the Radiator and condenser assembly and use the hose clamp pliers (J 38185) to remove tension from the hose clamp at the Radiator as a necessary step to remove the lower Radiator Hose. The condenser must be taken off the Radiator by removing two components: condenser tube clip bolt and Radiator mounting bolts. The installation starts by attaching the condenser to the Radiator while tightening the mounting bolts to 6 nm (53 inch lbs.). The installation proceeds with the lower Radiator Hose after securing the condenser tube clip bolt at 2.5 nm (22 inch lbs). Use a small flat bladed screwdriver to open the hose clamp lock but position the hose on the Radiator before closing it. Connect both pieces of the condenser assembly to the Radiator while removing the moisture barrier from the evaporator inlet tube to apply a new washer before joining the inlet and condenser block together with a 16 nm (12 ft. Lbs.) torque setting. After installing a new sealing washer to the a/c discharge hose you should connect it to the condenser block where you must tighten the nut to 16 nm (12 ft. Lbs.). Finish toc line attachment to Radiator after you hook up the water pump housing to the Radiator outlet hose while loosening the clamp locking mechanism. The procedure requires installing cooling fans with their corresponding shroud followed by filling up the cooling system before evacuating and recharging the a/c system before conducting a leak test on fittings with j 39400-a halogen leak detector. The final step involves checking the transmission fluid measurement.
    Posted by ChevyPartsGiant Specialist
    Q:
    What is the next step after disconnecting the radiator outlet hose from the water pump for the 2007 Buick Rendezvous? Posted by Customer
    A:
    Raise the vehicle and reposition the hose clamp at the radiator before disconnecting the radiator outlet hose from the radiator.
    Posted by ChevyPartsGiant Specialist
    See expert answers on similar Radiator
    Q:
    How do you disconnect the radiator outlet hose from the water pump housing for the 2002 Buick Rendezvous? Posted by Customer
    A:
    Use the Hose Clamp Pliers (J 38185) to reposition the hose clamp, then disconnect the hose.
    Posted by ChevyPartsGiant Specialist
    See expert answers on similar Radiator
    Q:
    How do you install the condenser to the radiator for the 2006 Buick Rendezvous? Posted by Customer
    A:
    Attach the condenser to the radiator, securing it with mounting bolts tightened to 6 Nm (53 inch lbs.) and the condenser tube clip bolt tightened to 2.5 Nm (22 inch lbs.).
    Posted by ChevyPartsGiant Specialist
    See expert answers on similar Radiator
    Q:
    What should you avoid doing to the radiator fins for the 2004 Buick Rendezvous? Posted by Customer
    A:
    Avoid brushing the radiator fins to prevent damage.
    Posted by ChevyPartsGiant Specialist
    See expert answers on similar Radiator
    Q:
    What should be done after securing the A/C discharge hose for the 2005 Buick Rendezvous? Posted by Customer
    A:
    Raise the vehicle again to connect the lower TOC line to the radiator, install the radiator outlet hose, and connect it to the radiator.
    Posted by ChevyPartsGiant Specialist
    See expert answers on similar Radiator
    Q:
    What should you do if the cooling fins are damaged for the 2003 Buick Rendezvous? Posted by Customer
    A:
    Straighten any damaged cooling fins to maintain optimal performance.
    Posted by ChevyPartsGiant Specialist
    See expert answers on similar Radiator
    If you have any questions about this product, please don't hesitate to ask us. We will be happy to help you!

OEM GM 25813498, Excellent Performance and Perfect Fitment

To ensure reliability, purchase GM part # 25813498 Radiator Assembly. It is sometimes referred to as GM Radiator. Choosing OEM parts is the optimal decision for guaranteeing superior quality and perfect performance. These components undergo stringent quality checks and are carefully constructed to comply with GM's factory specifications, ensuring a smooth installation process.

ChevyPartsGiant.com is a leading supplier of genuine GM parts such as GM 25813498 Radiator Assembly. Our website boasts an extensive inventory of OEM GM parts, available at highly competitive prices in the market. Should you require any new genuine GM parts, rest assured we will deliver them swiftly and efficiently to your doorstep. Furthermore, all our parts come with the assurance of a manufacturer's warranty. For detailed Chevy parts information, click here.
Choose ChevyPartsGiant for discounted prices, exceptional service and fast delivery