
Popular OEM Chevrolet Uplander Parts
- Body & Hardware Parts View More >
- Steering Parts View More >
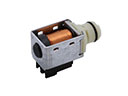
- Electrical Parts View More >
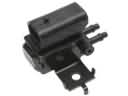
- Air & Fuel Delivery Parts View More >
- Charging & Starting Parts View More >
- Engine Parts View More >
- Belts & Cooling Parts View More >
- Suspension Parts View More >
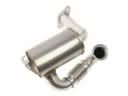
- Emission Control & Exhaust Parts View More >
- Transmission Parts View More >
- Brakes Parts View More >
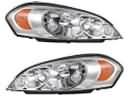
- Headlights & Lighting Parts View More >


Why Buy Genuine Chevrolet Uplander Parts From ChevyPartsGiant.com
Looking for real Chevrolet Uplander parts? ChevyPartsGiant.com may be a better choice to find genuine parts at wallet-friendly prices. We sell only OEM Chevrolet Uplander parts, ensuring perfect fit, reliability, and long-term performance. With our website, you can easily get access to the same parts found at local Chevrolet stores. All components are produced by Chevrolet and are exclusively fitted on Chevrolet Uplander automobiles. By shopping at our store, you can enjoy the quality of the Chevrolet factory without the high prices of brick-and-mortar facilities. We achieve this because we are an online store operating at lower costs, which we pass on to you. We also have a user-friendly platform where you can find and order genuine Chevrolet Uplander parts swiftly. We are here to make your process of restoring a Chevrolet Uplander or dealing with simple repairs quick and inexpensive. We also make it easy to obtain Chevrolet Uplander parts at competitive shipping prices and a team of knowledgeable staff ready to take your order. Choose ChevyPartsGiant.com to save time and money, as well as keep your Chevrolet Uplander in the good condition.
General Motors launched the Chevrolet Uplander minivan as the 2005 model in 2004 with a standard wheelbase alongside an extended version which followed production until 2009. Customers of the Chevrolet Uplander can select between three powertrain options where the 3.5L LX9 V6 and 3.9L LZ9 V6 and LGD V6 variants are available. The E85-compatible 3.9L LGD V6 engine rated at 240 horsepower produced 240 lb-ft of torque and it had a displacement of 3,498 cc. This V-shaped engine implements multi-point indirect injection as it provides smooth operation in driving conditions. The four-speed automatic transmission used for front-wheel drive enables balanced handling while the tuned suspension system delivers moderate driving feel. The Chevrolet Uplander model achieves an estimated 16 mpg for city driving while reaching 23 mpg on highway roads. Standard equipment on the Chevrolet Uplander includes disc brakes with antilock function while stability control and traction control systems are available yet side airbags are optional. The Chevrolet Uplander fit into dimensions of 5,191 mm (204.4 in) long and 1,834 mm (72.2 in) wide by 1,834 mm (72.2 in) high and its curb weight reached 1,730 kg (3,814 lbs). United States-based Chevrolet Uplander parts follow high-quality standards that deliver reliable performance while a simple returns process and original equipment manufacturer supplies reflect their commitment to customer satisfaction.
Chevrolet Uplander issues include a group in sealing emissions, stopping in the front, and steering in the hydraulic. Under emissions control, the Uplander may put a check engine light on after refueling. A loose or worn gas cap permits vapor leaks and will cause minor leak codes. Test the cap seal and filler neck, and replace with a new cap on the Uplander. Perform Chevrolet diagnostics to verify the integrity of EVAP and drive cycle, then check. The Uplander has the ability to pulse the pedal during a stop or downhill grade in braking. Variation in the thickness of the rotor and glazing decreases the friction and the stopping distance. Replace brake pad and both in front rotors and get them bedded properly. Use a Chevrolet torque value on caliper hardware and wheel fasteners to avoid running. The Uplander tends to leak the high-pressure power steering hose. The lost fluid contributes to noise, decreases assist, may be dirty, and can contaminate surrounding parts. Fit a new hose to the power steering, flush the system, and check that no air is in the system. Chevrolet observation aids the line inspection, clamping position, and the level of the reservoir. The driver test is finished by driving and making sure that the Uplander stays straight on track and its brakes are working properly.
Chevrolet Uplander Parts and Q&A
- Q: How to replace the engine flywheel on Chevrolet Uplander?A:In order to change the engine flywheel, one should remove the automatic transaxle first. Install the Flywheel Holder so that the flywheel is secured and the rotation of the crankshaft is not possible. Unscrew and unattach the flywheel bolts, next take off the flywheel retainer, and clean the threads of the bolts. Install the flywheel and transaxle again.
- Q: How to replace the engine oil and oil filter on Chevrolet Uplander?A:To replace the engine oil and oil filter, disconnect the negative battery cable and jack the vehicle up. Reduce oil pan drain plug and oil filter. Lubricate the oil filter gasket, install the gasket and tighten. Install drain bolt, lower car, fill with oil and check for leaks.
- Q: How to replace a water pump on Chevrolet Uplander?A:Replacement of the water pump requires emptying the cooling system, loosening the pulley bolts, and pulling of the drive belt. Unscrew the bolts of the pulley, the pump, and wipe the mating surfaces. Install the new gasket and pump, tighten the bolts, re-attach the pulley and drive belt and look at leaks.


