
Popular OEM Buick Rendezvous Parts
- Body & Hardware Parts View More >
- Steering Parts View More >
- Electrical Parts View More >
- Air & Fuel Delivery Parts View More >
- Charging & Starting Parts View More >
- Engine Parts View More >
- Belts & Cooling Parts View More >
- Suspension Parts View More >
- Emission Control & Exhaust Parts View More >
- Transmission Parts View More >
- Brakes Parts View More >
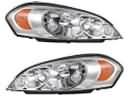
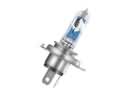
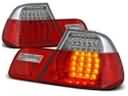
- Headlights & Lighting Parts View More >


Why Buy Genuine Buick Rendezvous Parts From ChevyPartsGiant.com
Looking for real Buick Rendezvous parts? ChevyPartsGiant.com may be a better choice to find genuine parts at wallet-friendly prices. We sell only OEM Buick Rendezvous parts, ensuring perfect fit, reliability, and long-term performance. With our website, you can easily get access to the same parts found at local Buick stores. All components are produced by Buick and are exclusively fitted on Buick Rendezvous automobiles. By shopping at our store, you can enjoy the quality of the Buick factory without the high prices of brick-and-mortar facilities. We achieve this because we are an online store operating at lower costs, which we pass on to you. We also have a user-friendly platform where you can find and order genuine Buick Rendezvous parts swiftly. We are here to make your process of restoring a Buick Rendezvous or dealing with simple repairs quick and inexpensive. We also make it easy to obtain Buick Rendezvous parts at competitive shipping prices and a team of knowledgeable staff ready to take your order. Choose ChevyPartsGiant.com to save time and money, as well as keep your Buick Rendezvous in the good condition.
The Buick Rendezvous joined the market in 2002 and continued production through 2007 to introduce Buick into the mid-size crossover SUV segment. The Buick Rendezvous features basic components taken from the condensed U-body van second-generation to power its efficient V6 engine with a four-speed automatic transmission that facilitates automatic gear shifting. The Versatrak all-wheel-drive system functions to engage the rear wheels during detected slip for better traction on slippery surfaces yet it does not support off-road capability. The Buick Rendezvous combines an independent front suspension with a semi-independent rear suspension to deliver both responsive steering and comfortable ride quality. The Buick Rendezvous allows seven passengers to fit inside as it includes an interior built for families and provides power outlets alongside laptop storage in the center console. The top-tier CXL variant of the model presents a dashboard display which shows fuel economy information and mileage readings and an optional head-up display. Safety and performance receive protection from the Buick Rendezvous through its integrated tire pressure monitoring system. Purchasing original Buick Rendezvous parts manufactured specifically for the factory is crucial for maintenance because these products fulfill precise original factory requirements and guarantee both reliability over extended periods and accurate part alignment.
Buick Rendezvous concerns group into transmission control, engine sealing, and evaporative emissions. In the transmission system, Rendezvous may shift erratically or delay engagement during light throttle. Pressure control loss often follows a failed transmission solenoid and degraded fluid. Service the fluid, reset adaptives, and replace the transmission solenoid when tests confirm faults. For engine sealing, Rendezvous can leak coolant or oil at the intake manifold gasket. External leaks stain the engine, while internal leaks contaminate oil and threaten bearings. Replace the intake manifold gasket, torque in sequence, then retest for stable temperatures. For emissions and fueling, Rendezvous may illuminate the check engine light after refueling. A loose or worn gas cap lets vapor escape and trips EVAP leak diagnostics. Install a new gas cap, clear codes, and run the monitor drive cycle. Across systems, Buick diagnosis begins with scans, visual checks, and pressure or vacuum tests. Confirm software updates for Buick modules, then road test the Rendezvous under varied loads. Finish with fluid inspections and connector checks so this Buick Rendezvous returns consistent performance. Verify ground integrity and battery health to prevent false flags in multiple modules.
Buick Rendezvous Parts Questions & Answers
- Q: How to replace the water pump (LA1) on Buick Rendezvous?A: You need to empty the cooling system until the Water Pump drainage line is below the pump to replace la1. First turn off the Drive Belt guard and unbolt both Water Pump Pulley bolts and Drive Belt. Start by unscrewing the Water Pump bolts then take off its components followed by removing the pump and gasket. Wipe both sides of the Water Pump assembly before adding its new gasket and replacing the pump itself. Fasten the new Water Pump bolts with 10 nm torque and put back the Water Pump Pulley with its bolts adjusted to 25 nm. Put back the Drive Belt and its cover before filling the cooling system.
- Q: How to replace the grille emblem on Buick Rendezvous?A: A step-by-step procedure for Front Fascia Grille Replacement can be found in Fascia Grille Replacement (Aztek) or Fascia Grille Replacement (Rendezvous). First separate the emblem from its mounting points by removing the back nut and finally pull off the front emblem. Position the new emblem on the grille before installing the nut and converting torque to 2 N.m (18 lb in). To reinstall the grille start by following the Front Fascia Grille Replacement procedures for both Aztek and Rendezvous models.
- Q: How to replace the steering wheel on Buick Rendezvous?A: To change the steering wheel, disarm the SIR system and take off the inflator module. Take off the steering wheel nut and disconnect the steering wheel control electrical connector. Now, install Steering wheel puller legs (J 42578) and Stearing wheel puller (J 1859-A) to the steering wheel. Now use the tools to remove the steering wheel. Steering wheel (hardware) - remove the Steering Wheel Puller Legs (J 42578), and the Steering Wheel Puller (J 1859-A), and controls, then the control harness. For installation, strap your controls and control harness onto the wheel, and then mount the wire within the steering wheel. Mount the steering wheel and connect the steering wheel control connector and to ensure installing the steering wheel nut and tighten it to 41 Nm (30 ft. lbs.). Lastly, reinstall the inflator module and enable the SIR system.
- Q: How to replace the alternator on Buick Rendezvous?A: Begin the generator replacement process by disconnecting both the Wiper Motor transmission link and negative Battery Cable in front of the wiper unit. After that, rotate the engine forward. You must first remove the Drive Belt and disconnect the engine harness electrical connector from the generator before repositioning the positive Battery Cable boot to the generator terminal. Begin the procedure by removing both the positive Battery Cable terminal nut and terminal while proceeding to detach the lower and upper bolts from the generator before extracting the generator itself. Position the generator first then torque the upper bolt until it becomes snug while following with the lower bolts before tightening all generator bolts to 50 n.m (37 lb ft). Secure the positive Battery Cable terminal on the generator then lock the terminal nut at 20 n.m (15 lb ft) torque before installing the positive Battery Cable boot. The engine harness must be reconnected to the generator while you reinstall the Drive Belt after which you must position the engine back to its original place and install the engine mount strut bolts. The last step involves reinstalling both the windshield wiper transmission link and the negative Battery Cable.


