
Popular OEM Buick Lucerne Parts
- Body & Hardware Parts View More >
- Steering Parts View More >
- Electrical Parts View More >
- Air & Fuel Delivery Parts View More >
- Charging & Starting Parts View More >
- Engine Parts View More >
- Belts & Cooling Parts View More >
- Suspension Parts View More >
- Emission Control & Exhaust Parts View More >
- Transmission Parts View More >
- Brakes Parts View More >
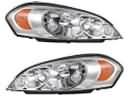
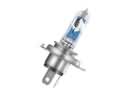
- Headlights & Lighting Parts View More >


Why Buy Genuine Buick Lucerne Parts From ChevyPartsGiant.com
Looking for real Buick Lucerne parts? ChevyPartsGiant.com may be a better choice to find genuine parts at wallet-friendly prices. We sell only OEM Buick Lucerne parts, ensuring perfect fit, reliability, and long-term performance. With our website, you can easily get access to the same parts found at local Buick stores. All components are produced by Buick and are exclusively fitted on Buick Lucerne automobiles. By shopping at our store, you can enjoy the quality of the Buick factory without the high prices of brick-and-mortar facilities. We achieve this because we are an online store operating at lower costs, which we pass on to you. We also have a user-friendly platform where you can find and order genuine Buick Lucerne parts swiftly. We are here to make your process of restoring a Buick Lucerne or dealing with simple repairs quick and inexpensive. We also make it easy to obtain Buick Lucerne parts at competitive shipping prices and a team of knowledgeable staff ready to take your order. Choose ChevyPartsGiant.com to save time and money, as well as keep your Buick Lucerne in the good condition.
The Buick Lucerne entered the market in 2006 as an evolution of the LeSabre which combined powerful performance with luxurious comfort in its design. Standard Buick Lucerne models receive the GM 3800 engine which they call the Buick V6 3.8 L along with a revision of the G platform making it powerful enough for 227 horsepower and 237 pounds of torque. Users who want better performance will find success with the Lucerne Super because it includes a stronger V8 engine combined with a four-speed automatic transmission providing fluid gear shifts. The Lucerne Super featured enhanced suspension modifications to improve handling and responsiveness, offering a more dynamic driving experience. The Buick Lucerne achieves excellent stability with its 115.6-inch wheelbase while offering road comfort thanks to its curb weight of between 3,800 and 4,100 lbs. The vehicle stands 205.9 inches long and extends to 73.8 inches wide while reaching 58.4 inches in height. In 2008 the Buick Lucerne was launched with CX, CXL, and CXS trims before introducing the CXL Special Edition and Super trims. The Buick Lucerne utilizes authentic parts that conform to factory requirement which guarantees both high quality standards and dependable performance for enhancing vehicle lifespan.
Buick Lucerne groups three issues by engine cooling, engine sealing, and engine management for clear diagnosis and repair. In cooling, the Lucerne may lose coolant and overheat during traffic, with residue at connections and gradual level drops. Leaks may develop at the water pump or radiator on the Lucerne, and loss risks damage over short trips. Replace the water pump, inspect the radiator, bleed the system, verify fan command, and pressure test after repairs. For sealing, some Buick Lucerne engines seep oil from the lower crankcase junction and subframe areas after heat cycles. Plan for engine removal, then reseal carefully with a new oil pan gasket and correct torque sequences. Clean mating surfaces, confirm crankcase ventilation health, and recheck for drips after an extended idle and road test. In management, the Buick Lucerne can stall intermittently without codes during warm restarts or long idles in traffic. A failing crankshaft position sensor drops sync and cuts spark, so monitor data and replace the crankshaft position sensor. The Buick Lucerne must be temperature-stable, dry at the bottom, and supply a consistent idle value with consistent starts after service.
Buick Lucerne Parts Questions & Answers
- Q: How to replace the Power Steering Pump (L26) on Buick Lucerne?A:When replacing the Power Steering Pump (L26) begin by removing the Drive Belt then raising the vehicle while keeping it securely supported. A drain pan should be placed below to start while disconnecting the power steering pressure hose and return hose from the pump and removing the wiring harness. Lower the vehicle then take out the coolant recovery reservoir before removing the Power Steering Pump retaining bolts to extract the pump. The power steering pulley requires transfer in case of necessary installation. Apply new Power Steering Pump to the motor before installing retaining bolts which must reach 25 nm (18 ft. Lbs.) torque specification. You should add the coolant recovery reservoir before hooking up the wiring harness and finally fastening the power steering pressure hose at 30 nm (22 ft. Lbs.). The vehicle should lower and the power steering return hose needs to be connected while also reattaching the Drive Belt. During the last step bleed the power steering system while checking for fluid leaks.
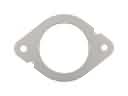
- Q: How to replace the catalytic converter (L26/3.8L) on Buick Lucerne?A:The first step in Catalytic Converter (L26/3.8L) replacement requires vehicle elevation. First disconnect the heated Oxygen Sensor electrical connector then unscrew the stud nuts which secure the Catalytic Converter pipe before removing its gasket. Before you detach the Catalytic Converter nuts and Catalytic Converter itself and Catalytic Converter gasket you must support the exhaust system. Before installation of new ho2s perform an inspection of the Exhaust Manifold surfaces along with the gasket mating areas on the exhaust pipe. For installation, first, install the ho2s. The flexible coupling in the Catalytic Converter assembly demands converter support and strictly limits rear vertical motion between 6-degree upward or downward positions. Attach a fresh gasket to each exhaust pipe stud afterward you can put in the Catalytic Converter and support it properly. Fix the Catalytic Converter nuts at 60 n.m (44 lb ft) of torque. The next step involves mounting new sparse gaskets to the Catalytic Converter pipe alongside its stud nuts before tightening everything to 35 n.m (26 lb ft). Use a wrench to detach the exhaust system support then connect the ho2s electrical connector before checking for exhaust leaks and underbody contact and finishing by lowering the vehicle.
- Q: How to change a Snap In Style TPMS Sensor on Buick Lucerne?A:Vehicle suspension on a recommended support provides access for Tire Pressure Indicator Sensor (Snap In Style) replacement. Start by moving the tire/wheel assembly off your vehicle before you dismount the tire from the rim. New Torx screws pair with fresh Schrader(R) tire pressure monitors when performing installations. Tear away the trailing TORX screw released from the tire pressure sensor to uncover the valve stem on the tire pressure sensor. Take caution not to put tire changing equipment near aluminum wheels since exposure could cause clear coating damage which produces corrosion and peel effects. Pull the tire pressure valve stem all the way through the rim to remove it. The flat surface of the valve must match the snap enclosures' flats during installation and neither TPM valves nor TORX screws have reusability. Offline the tire pressure sensor to the valve stem before installing the new TORX screw and tightening it to 1.3 N.m (11.5 lb in). Approved tire mounting lubricants are acceptable but they should omit silicon or corrosive base compounds. Apply tire soap to the valve stem rubber area then use a tire valve stem mounting tool to move the stem through the hole in parallel direction with the rim. New Snap Fit TPM sensors arrive with a default OFF setting which automatically turns on upon air inflation so technicians can complete standard vehicle programming. After mounting the tire to the rim proceed by installing both tire/wheel assembly onto the vehicle and then lowering it. Tire Pressure sensors require learning as your final step.
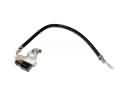
- Q: How to replace the alternator (RPO L26/3.8L) on Buick Lucerne?A:Begin generator replacement by disconnecting the negative Battery Cable (RPO L26/3.8L). After removing the intake manifold cover you should also remove the Drive Belt. Begin by removing the generator brace bolt and nut then proceed to remove the generator brace. The engine harness electrical connector needs unattachment from the generator then follow by relocation of the starter cable boot before removing the generator terminal nut and starter cable from the generator. Follow this sequence to uninstall the generator: remove the generator's front bolt, rear bolt and stud. To install the generator you must position it on the engine then install the generator front bolt. Secure the generator rear stud and bolt by torquing them to 50 n.m (37 lb ft). Fasten the starter cable to the generator before tightening the generator terminal nut to 20 n.m using (15 lb ft) torque specification. The installation process requires fitting the starter cable boot followed by connecting the engine harness electrical connector to the generator while mounting the generator brace along with its bolt and nut. Tighten the bolt to 25 n.m (18 lb ft) and the nut to 50 n.m (37 lb ft). The last installation steps include the Drive Belt and intake manifold cover before reattaching the negative Battery Cable.


