ChevyParts
My Garage
My Account
Cart
OEM GMC Jimmy Transfer Case
Speed Transfer Case- Select Vehicle by Model
- Select Vehicle by VIN
Select Vehicle by Model
orMake
Model
Year
Select Vehicle by VIN
For the most accurate results, select vehicle by your VIN (Vehicle Identification Number).
3 Transfer Cases found

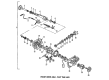
GMC Jimmy Transfer Case Part Number: 24228421

GMC Jimmy Transfer Case Part Number: 24228412


GMC Jimmy Transfer Case Part Number: 15960128
GMC Jimmy Transfer Case
Want to cut long-term maintenance and repair costs? Choose OEM Transfer Case. Those parts deliver top durability you can trust. On our site, you'll find a huge catalog of genuine GMC Jimmy parts. Prices are unbeatable, so you can keep more in your pocket. Every OEM GMC Jimmy Transfer Case includes a manufacturer's warranty. You can also get an easy return policy that keeps buying risk free. Fast delivery, get your car on the road quickly. It's simple to search, compare, and order. Stop guessing about quality or fit. Order today and save with parts that last.
GMC Jimmy Transfer Case Parts Questions & Experts Answers
- Q: How to replace the transfer case assembly on GMC Jimmy?A:The first step for Transfer Case assembly replacement requires vehicle elevation followed by Transfer Case shield removal. Users should remove the left-side Transfer Case brace before draining the Transfer Case fluid when equipment is available. After you disconnect both the front and rear propeller shafts you should proceed to remove the Transfer Case vacuum switch vacuum line and the motor/encoder electric connector with its wiring harness. Position a proper jack stand to support the transmission after which you must take out the transmission mount retaining bolts and transmission support assembly. You should remove the transmission mount in addition to the transmission mount for automatic transmissions. A technician must help remove the Transfer Case straight back from the adapter by lowering its front section while raising the rear until the torsion bar bracket clears. Afterward the technician can take off the Transfer Case adapter retaining nuts. Replace the damaged gasket with a new one that should not receive any type of sealant. Install the Transfer Case assembly after setting the new gasket tab in an upward direction. Tighten the Transfer Case retaining nuts to 55 nm then install the transmission mount and torque its bolts to 47 nm. Reinstall the transmission support assembly followed by transmission mount retaining nuts while torquing them to 46 nm (35 ft. Lbs.). Reconnect both the motor/encoder electrical connector and the wiring harness and install the vacuum line that leads to the Transfer Case vacuum switch. You must reinstall the left side Transfer Case brace while tightening its engine bolt to 60 nm (44 ft. Lbs.) along with good tension on the Transfer Case bolt at 47 nm (35 ft. Lbs.). Reinstallation of front and rear propeller shafts is followed by fluid addition to the Transfer Case then the placement of the housing shield before the car is lowered.

Related GMC Jimmy Parts
 GMC Jimmy Automatic Transmission Input Shaft Seal
 GMC Jimmy Automatic Transmission Seal
 GMC Jimmy Clutch Disc
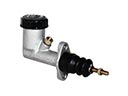 GMC Jimmy Clutch Master Cylinder
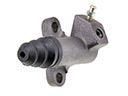 GMC Jimmy Clutch Slave Cylinder
 GMC Jimmy Flywheel
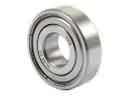 GMC Jimmy Pilot Bearing
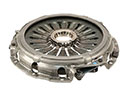 GMC Jimmy Pressure Plate
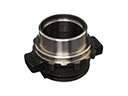 GMC Jimmy Release Bearing
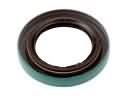 GMC Jimmy Transfer Case Seal
 GMC Jimmy Transmission Assembly
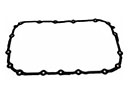 GMC Jimmy Transmission Gasket