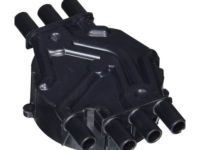
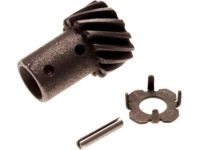
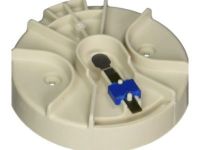
Make sure this part fits

GM 12598210
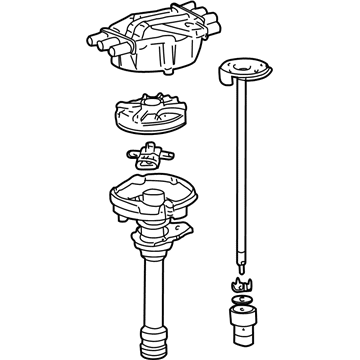
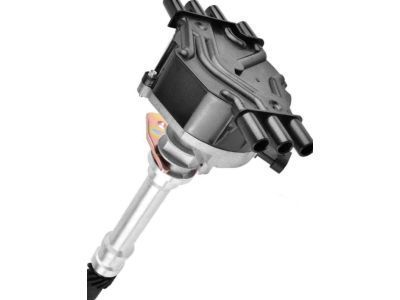
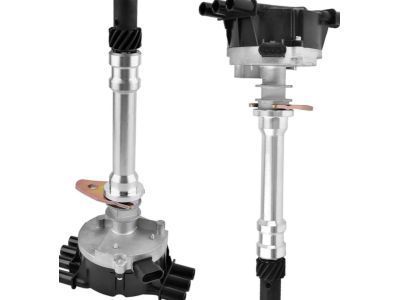
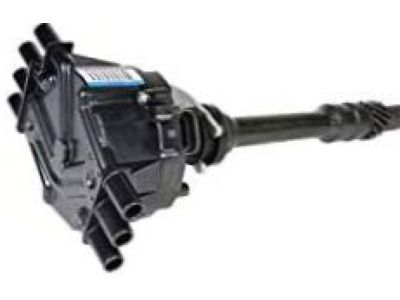
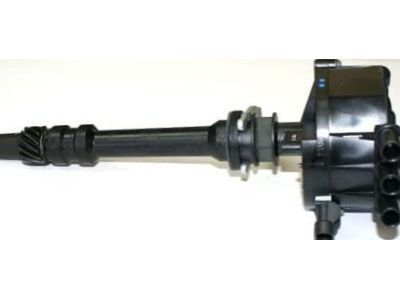
Distributor Assembly

1995-2007 GM

Customer Questions & Expert Answers (36)
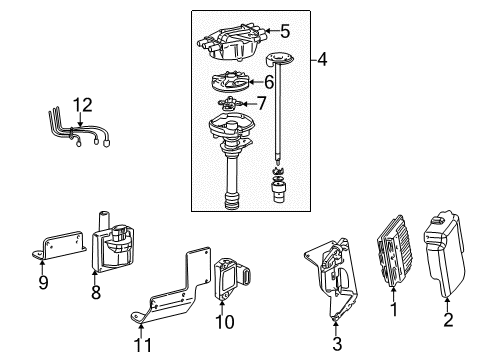
GM 12598210 Distributor Assembly
  • Part Description
    Distributor Assembly
  • Replaces
    01104057, 01104078, 01104050, 1104050, 1104078, 1104057, 93441559
  • Manufacturer
    General Motors
  • Manufacturer's Notes
    This part is discontinued.
Make sure this part fits
  • Related Parts
  • Product Specifications
  • Vehicle Fitment
  • Customer Questions & Expert Answers
  • Product Specifications

    BrandGenuine GM
    Manufacturer Part Number12598210
    Part DescriptionDistributor Assembly
    Other NamesDistributor; Distributor, Ignition
    Item Dimensions15.8 x 8.3 x 5.2 inches
    Item Weight2.60 Pounds
    ConditionNew
    Fitment TypeDirect Replacement
    Replaces01104057, 01104078, 01104050, 1104050, 1104078, 1104057, 93441559
    ManufacturerGeneral Motors
    SKU12598210
    WarrantyThis genuine GM part is guaranteed by GM's factory warranty.
    Shipping & ReturnShipping Policy Return Policy
    Warning: California's Proposition 65
  • Vehicle Fitment

    Year Make Model Trim Engine
    1996-2005 Chevrolet AstroBase, LS, LT6 Cyl 4.3 L GAS
    1995-2005 Chevrolet BlazerBase, LS, LT, Trailblazer, Xtreme, ZR26 Cyl 4.3 L GAS
    1996-1998 Chevrolet C1500Base, Cheyenne, Silverado, WT6 Cyl 4.3 L GAS
    1996-2007 Chevrolet Express 1500Base, LS, LT6 Cyl 4.3 L GAS
    1996-2007 Chevrolet Express 2500Base, LS, LT6 Cyl 4.3 L GAS, 8 Cyl 4.8 L GAS, 8 Cyl 6.0 L GAS, 8 Cyl 6.6 L DIESEL
    2003-2007, 1997-1998 Chevrolet Express 3500Base, LS, LT6 Cyl 4.3 L GAS, 8 Cyl 4.8 L GAS, 8 Cyl 6.0 L CNG, 8 Cyl 6.0 L GAS, 8 Cyl 6.6 L DIESEL
    1996-1998 Chevrolet K1500Base, Cheyenne, Silverado, WT6 Cyl 4.3 L GAS
    1996-1999 Chevrolet P30Base6 Cyl 4.3 L GAS
    1995-2004 Chevrolet S10Base, LS, SS, Xtreme, ZR2, ZR56 Cyl 4.3 L GAS
    1999-2007 Chevrolet Silverado 1500Base, LS, LT, WT6 Cyl 4.3 L GAS
    View More
  • Customer Questions & Expert Answers

    Q:
    Is this 12598210 designed for my car? Posted by ChevyPartsGiant Specialist
    A:
    Please Select Your Vehicle model to see if part number 12598210 is suitable before ordering.
    Posted by ChevyPartsGiant Specialist
    Q:
    How to replace the distributor on Chevrolet Blazer? Posted by Customer
    A:
    To replace the Distributor, turn off ignition and remove the air cleaner assembly. Detach the Spark Plug Wires from the Distributor Cap, twist the boot boot 1/2 turn and pull only the wire boot. There are screws on the base of the Distributor keep connector, remove it then unscrew the 2 screws that hold the Distributor Cap to the housing and get rid of them. Take out the Distributor Cap and mark the position of the rotor with a grease pencil to the Distributor housing, and to the Intake Manifold. Remove mounting clamp hold down bolt, and remove the Distributor, noting the rotor rotate approximately 42 degrees counter-clockwise. Mark the base of the Distributor for adequate rotor alignment when putting the piece together. In case a new Distributor assembly is used, mark the new housing at the same spots as the original one. Move the new Distributor Cap if need be, but align the rotor with the second mark and use the Distributor to insert it into the engine, where the hold-down base comes in line with the Intake Manifold mounting hole. As the Distributor is installed, the rotor moves clockwise about 42 degrees; then it does not coincide with the mark on the distributer base, remove the Distributor and install it again. Snug the Distributor clamp bolt to 25 n.m (18 lb ft) and put the Distributor Cap back on with 2 new screws cinched to 2.4 n.m (21 lb in), reconnected the electrical connector, and connecting the Spark Plug Wires and ignition coil wire, making sure to identify the wire boot orientation. If the malfunction indicator lamp (MIL) is on after installing, and the code p1345 is detected, the Distributor has been improperly installed. For the second procedure of installation, turn the crankshaft balancer clockwise in order to align the alignment marks with the engine front-cover tabs, where the number 1 Piston is at top dead center of the compression stroke. Bring the white paint mark on the bottom stem of the Distributor into line with the pre-drilled indent hole in the gear. To prevent the no-start problem, locate the Distributor driven gear, shaft, and rotor hole for proper reassembly. Direct the Distributor into the engine, in such a way as that the spark plug towers are vertical to the center line of the engine. After fully seated, the rotor segment should be same as the pointer on the Distributor base; if not, the gear mesh misalignment may cause a need for perform the procedure again. Always use a torque wrench when tightening bolts/lmc l-2300 to 27 n.m (20 lb ft), Distributor clamp bolt to 25 n.m (18 lb ft), tighten Distributor Cap with 2 new screws to 2.4 n.m (21 lb in), to reconnect the 2 electrical connector, then attach the 2 Spark Plug Wires and the ignition coil wire being sure to note the correct orientation (below) of the wire boot. If mil is on after the installation varnish it again varying.
    Posted by ChevyPartsGiant Specialist
    Q:
    How to overhaul the distributor on Chevrolet Astro? Posted by Customer
    A:
    To retool the Distributor, start with the removal of the engine cover. Mark the Distributor driven gear, Distributor shaft, rotor holes to guarantee correct replacement as incorrect alignment would cause no-start situation and possible engine damage. Match the white paint mark of the bottom stem of the Distributor with the pre-drilled indent hole in the bottom of the gear to match the rotor segment correctly for a v6 engine ; if not, replace the Distributor. Take out the two screws that fasten the rotor and remove the rotor, marking the locating holes for reassembly. Align the square-cut hole in the vane wheel with the cmp sensor, then take off the two screws that hold the cmp sensor and toss them. Fly the dimple that is located below the roll pin hole on one side of the gear for the correct orientation once reassembly. Support the Distributor drive gear in a v-block, drive out the roll pin with a suitable punch, then remove the driven gear from the Distributor shaft with the round washer, tang washer and shim washer, then remove the old oil seal. For assembly, put the square-cut hole of the vane wheel for the cmp sensor in line and slot the sensor into the housing, putting another two new screws for the cmp sensor and tighten the settles to 2.2 nm (19 lb in.). Specify correct rotor mounting as per the locator position at rotor screw holes and rotor locator pin holes, install the Distributor rotor by index marks and fix using two rotor hold down screws to 1.9 nm (17 lb in.). Set the shim washer, tang washer, round washer and install the driven gear with alignment of rotor segment as depicted for v6 engine or v8 engine. Match up the white paint mark on the bottom stem of the Distributor with the pre-drill ledge hole in the bottom of the gear, to verify proper installation of the governed gear as an incorrect gear installation will place the dimple 180 degrees away from the rotor segment. Support the driver's gear in a v-block and fix roll pin with the help of suitable punch and hammer to secure the driven gear. Finally install in the new oil seal under the mounting flange of the Distributor base, install the Distributor, replace the engine cover.
    Posted by ChevyPartsGiant Specialist
    Q:
    How to overhaul the distributor on Chevrolet Blazer? Posted by Customer
    A:
    To replace the Distributor, start with bringing into alignment on the white paint mark found on the bottom stem of the Distributor in the pre-drilled indent hole of the bottom of the gear. Make sure the rotor segment is properly placed on a v6 engine. If not, replace the Distributor. Remove two screws from the rotor; take out rotor and write locating holes it was removed from. The rotor screw holes as well as the rotor locator pin holes. Perform an alignment of the square cut hole in the vane wheel to the camshaft position (CMP) sensor and then take out the two screws that are holding the cmp sensor together and throw them. Remove the cmp (Call Metering Plug) sensor, identifying the dimple under the roll pin hole at one end of the gear, as shown below, when rechecking the gear end orientation while reassembly. Support the Distributor drive gear in a v block or vise and drive out the roll pin using a suitable punch to remove the driven gear from the Distributor shaft, along with the round washer, tang washer, shim washer, and old oil seal. For assembly, make sure to align the square-cut hole of the vane wheel for cmp sensor and push the sensor into the housing. Mount two new cmp sensors; one in the top of the case and the other over the entry port. Tighten the screws to 2.2 n.m (19 lb in). Find the proper rotor mounting position at the rotor screw holes and rotor locator pin holes and install the Distributor rotor using the index marks and fasten it using two hold-down screws torque of 1.9 n.m (17 lb in). Set the shim washer at the bottom of the Distributor shaft followed by tang washer and round washer. Mount the driven gear in line with the index marks while the rotor segment is positioned as indicated for a v6 or v8 engine while covering the white paint mark on the bottom stem of the Distributor with the pre-drilled indent hole found at the bottom of the gear. If the driven gear is installed in a wrong manner, the dimple will be around 180 degree to the rotor segment. Support the Distributor drive gear on a v-block or equivalent and install roll pin with an appropriate punch and hammer to seat the board gear. Last, but not least, fit the new oil seal beneath the mounting flange of the Distributor base, and fix the Distributor.
    Posted by ChevyPartsGiant Specialist
    Q:
    How to replace the distributor in an engine on Chevrolet Astro? Posted by Customer
    A:
    In order to replace the Distributor, first turn off ignition, then the engine cover, also air cleaner assembly and the air intake resonator assembly. Pull the brake parking shoe and brake ajusting tool between the brake shoes. Unplug the electrical connector from the bottom of the Distributor and then pull out the 2 screws holding the Distributor Cap to the housing and discard them. Remove the Distributor Cap and with the help of grease pencil mark the position of the rotor in reference to the distrbutor housing and Intake Manifold when you take out the Distributor, notice that rotor moves against the clock by counterclockwise turn of 42 and put a 2 nd mark on the base of Distributor for installing the rotor in the right direction when putting it back. Put off the mounting clamp hold-down bolt and remove the Distributor. For installation procedure 1, in case of installing a new Distributor assembly, mark the new Distributor housing at the same position as the one from origin. Unfortunately the manuscript is lost, but from the written notes we are able to piece together parts of the story that he attempted to write down in that manuscript. However the words are those of poem #30 so that may give an added idea of what the manuscript was to be. As the Distributor is shown, watch the rotor spin clockwise for approximately 42 degrees. Once seated, align the rotor segment to the mark of the Distributor base ; otherwise, take out the Distributor and reinstall it. Mount the Distributor mounting clamp bolt and secure it to 25 n.m (18 lb ft), then mount the Distributor Cap and tighten the new cap screws to 2.4 n.m (21 lb in). Re-connect the electrical connector and the Spark Plug Wires should be installed into the Distributor Cap and an ignition coil wire should be attached, making sure the orientation of the boot is correctly made. If the malfunction indicator lamp light up, and dtc p1345 is recorded, the Distributor has been installed in the wrong manner. With installation procedure 2, rotate the no. 1 cylinder to top dead center (TDC) compression stroke, positioning crankshaft balancer marks with the engine front cover tabs in alignment. Readjust so the white paint mark on the bottom stem of the Distributor to the pre-drilled indent hole of the gear. Mark the Distributor components to reconnect them in the right way, since incorrect replacement of the connection can lead to a no-start condition or damage to the engine. With the gear positioned accordingly, guide the Distributor in the engine, make sure that the flat part of the housing faces the front. After positioning, the rotor segment should lie within the area covered by the pointer on the Distributor base; if not, repeat the procedure. Mount the Distributor mounting clamp bolt and tighten it to 25 n.m (18 lb ft) then mount the Distributor Cap slightly and tighten the cap screws to 2.4 n.m (21 lb in). Connect the electrical connector back, mount the Spark Plug Wires, and connect the ignition coil wire in the correct manner. In case the malfunction indicator lamp lights up after installation and dtcp 1345 is stored, repeat installation procedure 2. Finally, install the engine cover.
    Posted by ChevyPartsGiant Specialist
    Q:
    How to Properly Service and Repair the Distributor on a Chevrolet Blazer? Posted by Customer
    A:
    To overhaul the Distributor, first align the white paint mark inside at the bottom stem of the Distributor with the pre-drilled indent hole at the bottom on the gear. Make sure you have the rotor segment in the appropriate place for a v6 engine. If not, replace the Distributor. Remove two screws of the rotor and get the rotor out with the locating holes in mind. The rotor screw holes , and the rotor locator pin holes . Line up the square-cut hole in the vane wheel with the camshaft position (CMP) sensor and now remove the two screws that are fitted in the cmp sensor and toss them out. Remove the cmp sensor and write down the dimple that appears below the roll pin hole on one of the gear's sides for the correct arrangement in the process of reassembling. Myung block your Distributor drive and then drive out the roll with a proper punch as well as unravelling the driven gear from your Distributor shaft including the round wave, tang washer, and shim washers. Remove the old oil seal. For assembly, align square-cut hole at vane wheel side of cmp sensor to cmp sensor housing and insert the sensor and make two new screw for the cmp sensor and tighten it to 2.2 n.m (19 lb.in). Mount rotor at the rotor screw holes and the rotor locator pin holes, making sure they are the correct mounting then install the Distributor rotor using it's index marks and secure it with two rotor hold down screws tightened to 1.9 n.m (17 lb in). Attach to the bottom of the Distributor shaft by using the shim washer, then the tang washer, and lastly, the round washer. Prepare unit according to index marks and its installation; handle rotor segment according to a v6 engine or v8 engine and ensure the white paint mark on the bottom stem of the Distributor coincides with the pre-drilled indent hole on the bottom of the gear. In case the driven gear is to be installed incorrectly, the rotor segment will have a dimple around 180 degrees place the opposite. Advocate for the Distributor drive gear on a v-block or some similar fixture, then put in the roll sign using an adequate punch and hammer to retain the drove gear. Lastly, install the new oil seal at the mount flange of the Distributor base and install the Distributor.
    Posted by ChevyPartsGiant Specialist
    Q:
    How to Ensure Proper Distributor Installation on Chevrolet S10? Posted by Customer
    A:
    First disable ignition and remove the air cleaner assembly to replace the Distributor. Twist each Distributor Cap boot by 1/2 turn while pulling just on the wire boot to disconnect the Spark Plug Wires. First remove the electrical connector at the Distributor base while also removing the two screws which secure the Distributor Cap housing before discarding both components. Label the Distributor housing position with a grease pencil and write down the rotor's starting location on both Distributor housing and Intake Manifold. Gently remove the mounting clamp hold down bolt to extract the Distributor while keeping in mind the counter-clockwise 42-degree rotation of the rotor. Insert an additional second alignment mark on the Distributor base to ensure proper rotor positioning when it gets reinstalled. To install the Distributor assembly using procedure 1 begin by marking new Distributor housing components at the same positions as original hardware before removing the Distributor Cap when needed. Align Distributor rotor with the second mark and carefully guide the housing into the engine space while placing the base hole directly over the Intake Manifold mounting slot. During Distributor installation the rotor must rotate clockwise by 42 degrees until it rests against the Distributor base mark. Distributor removal must be performed if initial installation alignment does not meet specifications. First tighten the Distributor clamp bolt to 25 n.m (18 lb ft) while installing the Distributor Cap with new screws at 2.4 n.m (21 lb in) and reestablish electrical connection and add Spark Plug Wires and ignition coil wire in proper orientation. A faulty installation of the Distributor will result in a milokud6bz0jtq0p6nerat4q7xkcfnrxaiewemw and the dtc p1345 error code appearing after the installation process. During installation procedure 2 users must position cylinder number 1 at top dead center compression stroke before lining up the engine front cover tabs with balancer mark cranks. Place the white paint mark on the Distributor's bottom stem exactly over the pre-drilled indent hole in the gear. Set the rotor segment in its precise place according to the vehicle's v6 or v8 engine configuration. Guide the Distributor into position by aligning spark plug towers perpendicular to the centerline while the rotor segment finds its mark on the pointer of the Distributor base. If misaligned, repeat the procedure. Begin by tightening the Distributor clamp bolt to 25 n.m (18 lb ft). Install the Distributor Cap with two new screws tightened to 2.4 n.m (21 lb in), then reattach the electrical connector and install the Spark Plug Wires and ignition coil wire with correct wire placement noted. Running a successful installation procedure 2 should be followed to redo the operation if the mil remains on with a dtc p1345 detection.
    Posted by ChevyPartsGiant Specialist
    Q:
    How to replace the distributor in an engine on Chevrolet Express 2500? Posted by Customer
    A:
    Before changing the Distributor make sure to turn off the ignition, remove engine cover, air cleaner assembly and air intake resonator assembly. Compare the rotor's position with the cylinder it belongs to using the heater and the vacuum pipe connection. Disconnect the Spark Plug Wires from the Distributor Cap as follows: twist each wire boot 1/2 turn and simply pull on the boot. The electrical connection at the base of the Distributor is next to be pulled out, also, the 2 screws holding the Distributor Cap in place are to be removed and thrown away. Disconnect the Distributor Cap and use the grease pencil to mark the position of rotor with reference to the housing of Distributor and also the Intake Manifold of Distributor's. While you are pulling the Distributor out, observe that the rotor will rotate counter-clockwise about 42 degrees and put a mark number 2 on the base of the Distributor for realignment when installing. Your next step is to remove the mounting clamp hold-down bolt; pull out the Distributor. For installation procedure 1: using a new Distributor assembly, put 2 marks in the new housing at the same place as the original. Align rustor to the second mark , guide the Distributor on the engine, and bring the hole at hold down base on the engine cover hole at the Intake Manifold. As you install, the rotor will turn clockwise 42 degrees. Ensure the rotor segment is aligned with mark on the Distributor base. If there is a misalignment, remove and re-mount the Distributor. If you see any oil spill in the oil filler valve tube, feel free to replace that tube as well. Tighten the Distributor mounting clamp bolt to 25 n.m (18 lb ft) and fit the Distributor Cap while fitting the Distributor Cap screws that are new that need to be tightened to 2.4 n.m (21 lb in). Reconnect the electrical connector, reinstall the Spark Plug Wires and ignition coil wire making sure all are initially correct. Following the installation, if the malfunction indicator lamp lights up with a value of dtc p1345, the Distributor has been installed incorrectly. For installation method 2, turn the crankshaft balancer in a clockwise direction so that the alignment marks fall on the engine front cover tabs so that the number 1 Piston is at tdc of the compression stroke. Assemble the bottom stem of the Distributor with the white paint mark aligned with the pre-drilled indent hole in the gear with the make note of the rotor segment aligning as shown for a v6 engine. Using a long screwdriver, align the oil pump drive shaft with the Distributor's drive tab and guide the latter into the engine with the flat part in the direction of the car's front; the rotor segment must be aligned with the Distributor's pointer on the base of the latter. Make sure the Distributor mounting bolt is tightened to 25 n.m (18 lb ft) and fit the Distributor Cap then tighten new screws to 2.4 n.m (21 lb in), reconnect the electrical connector and plug in the spark plug and ignition coil wire making sure that it is in the correct orientation. Repeat installation procedure 2 should the malfunction indicator lamp light up following installation signifying a wrong installation. Finally, install the engine cover.
    Posted by ChevyPartsGiant Specialist
    Q:
    How to overhaul the distributor on Chevrolet Express 2500? Posted by Customer
    A:
    Start by removing the engine cover and line up the mark on Distributor bottom stem with the drilled hole in the gear base. Make permanent marks on the Distributor driven gear, Distributor shaft and rotor holes before disassembly because improper reinstallation can cause no-start conditions as well as engine harm. Fit the rotor segment according to v6 specifications ; replace the Distributor when its position does not match specifications. Take out the rotor by removing its two screws and marking down its rotor screw location holes and rotor locator pin while doing so. Remove the two cmp sensor retaining screws before you align the Distributor and vane wheel cutout to the Camshaft Position Sensor position. Then discard these screws. Note the dimple position under the roll pin hole on theardware gear's one side for proper reinstallation. Set the Distributor drive gear inside a v-block while driving out the roll pin using suitable punch tools until you can extract the Distributor shaft with its driven gear along with round washer, tang washer and shim washer for disposal. At assembly time insert the cmp sensor into the housing while correctly positioning its square-cut hole in the vane wheel and secure the sensor using two new screws tightened to 2.2 n.m (20 lb in). Mount the Distributor rotor correctly on the rotor holes before installing it to the index marks. Secure it with two tight hold-down screws adjusted to 1.9 n.m (17 lb in). The Distributor shaft requires the shim washer at its base before adding the tang washer and round washer followed by the application of the driven gear using index marks. Position the rotor segment as shown for v6 motor or v8 motor applications and set the driven gear by making sure the white paint on the Distributor bottom stem matches the pre-drilled hole at the gear base. When the driven gear receives improper installation its dimple will be situated at 180-degree opposition to the rotor segment position. Put the Distributor drive gear into a v-block support structure before adding the roll pin using proper tools to lock the driven gear into place. Install the new oil seal under the Distributor base's mounting flange before reinstalling the Distributor along with the engine cover.
    Posted by ChevyPartsGiant Specialist
    Q:
    How to overhaul the distributor on Chevrolet S10? Posted by Customer
    A:
    The first step for Distributor overhaul involves lining up the white paint mark on the bottom Distributor stem with the pre-drilled bottom gear indent hole. Place the v6 engine rotor segment at its correct placement during installation. If not, replace the Distributor. Locate and remove the rotor by taking out its two retaining screws then write down which holes it originally fit into: rotor screw holes and rotor locator pin holes. The Distributor includes a pair of holes for rotor screws along with holes specifically for rotor locator pins. Set the square-cut hole of the vane wheel to match the camshaft position (CMP) sensor before discarding the two screws that attach the cmp sensor. The cmp sensor removal must happen while noting the dimple on one side of the gear which will guide correct positioning during assembly. Place the Distributor drive gear in a v-block or similar fixture while you drive out its roll pin with appropriate hand tools. Disassemble the Distributor shaft to remove the driven gear combined with a round washer and tang washer and shim washer and an old oil seal. Insert the cmp sensor into the housing through its square-cut hole present on the vane wheel. Put in two new cmp sensor screws after torquing them to 2.2 n.m (19 lb in). The correct distribution rotor position becomes established by matching screw holes on the rotor with locator pin holes and rotor index marks and then use two rotor hold down screws to fasten the rotor assembly at 1.9 n.m (17 lb in) torque. Put the shim washer under the Distributor shaft base before you add the tang washer and the round washer. Mount the driven gear by following the index marks which ensure proper rotor segment alignment for v6 engines or v8 engines. Adjust the white paint mark on the Distributor's bottom stem to match the pre-drilled hole on the gear's bottom surface. A wrong installation of the driven gear will position the dimple at a 180-degree angle from the designated rotor segment. Set up the Distributor drive gear inside a v-block or equivalent fixture before hammering the roll pin into place through a well-suited punch to fasten the driven gear. To finish the project install the new oil seal beneath the Distributor base mounting flange before installing the Distributor.
    Posted by ChevyPartsGiant Specialist
    Q:
    How to overhaul the distributor on Chevrolet Silverado 1500? Posted by Customer
    A:
    Proper Distributor overhaul starts with equipment removal followed by marking each hole on the driven gear and Distributor shaft and rotor for later assembly. Position the white paint mark on the Distributor's bottom stem against the pre-drilled indent hole found at the gear's lower end for accurate v6 engine rotor orientation. If not, replace the Distributor. Separate the rotor screws from the rotor by keeping track of both rotor screw hole locations and rotor locator pin hole positions. Follow the cmp sensor alignment with the vane wheel square-cut hole before eliminating the cmp sensor screws and discarding both the cmp sensor and screws. Check the dimple underneath the roll pin hole on one side of the gear to identify correct installation order when putting parts together. A v-block fixture supports the Distributor drive gear while a suitable punch drives out the roll pin to remove all components including the driven gear and round washer and tang washer and shim washer and oil seal. When assembling the system place the square-cut hole of the cmp sensor vane wheel correctly then screw in the cmp sensor using new screws tightened to 2.2 n.m (19 lb in). Mark the appropriate rotor mounting locations. Drive the Distributor rotor into position based on index marks and torque rotor screws to 1.9 n.m (17 lb in). Depositing the shim washer under the Distributor shaft should be followed by inserting the tang washer and afterward adding the round washer. To install the driven gear follow index marks while aligning the rotor segment according to v6 engine specifications so that the white paint mark on the Distributor bottom stem will match the pre-drilled indent hole on the bottom of the gear. The driven gear installation must be precise because incorrect positioning will shift the dimple 180 degrees against the rotor segment. Before you start fix the Distributor drive gear inside a v-block mount then use a proper punch to insert the roll pin while hitting it with a hammer until it takes its final position under the Distributor base mounting flange before final installation.
    Posted by ChevyPartsGiant Specialist
    Q:
    How to overhaul the distributor on Chevrolet Silverado 1500 Classic? Posted by Customer
    A:
    In order to overhaul this Distributor, start by removing the Distributor and marking the holes of the Distributor driven gear, shaft and rotor so that the correct assembly will be ensured. Line up the white paint mark on the bottom stem of the Distributor with the pre-drilled indent hole at the bottom of the gear and make sure the rotor segment is correctly set up for a v6 engine. Unscrew the rotor screws and the rotor, taking note of places where the rotor screw holes and rotor locator pin holes are located. Position the square-cut hole in the vane wheel over the cmp sensor, then remove and toss cmp sensor screws and cmp sensor. Write down the location of dimple below the roll pin hole on one side of the gear for accurate orientation at the time of assembling. Support Distributor drive gear on one end in a v-block and knock off the roll pin with suitable punch and take out the driven gear and the round washer, tang washer, shim washer, and oil seal. For assembly, align square-cut hole on vane wheel for the cmp sensor, and construct the cmp sensor onto it with new screws and 2.2 n.m(19 lb in). Locate the correct rotor mounting holes and install the Distributor rotor corresponding to the index marks by using the rotor screws and tightening to 1.9 n. M. (17 lb. In). Mount the shim washer, tang washer, and round washer, then install the driven gear with the index marks shown for a v6 engine and align the rotor segment as shown for a v6. Mount the gear and also align the white paint mark on the bottom stem of the Distributor with the pre-drilled indent hole on the bottom of the gear. Make sure that the installed dimple is not 180 degrees from the rotor segment. Place the Distributor drive gear into a v-block and insert the roll pin with the suitable punch and hammer. Finally, replace a brand new oil seal under mounting flange of Distributor base and reinstall the Distributor.
    Posted by ChevyPartsGiant Specialist
    Q:
    How to properly overhaul a distributor to ensure correct reassembly and prevent engine damage on Chevrolet Silverado 1500? Posted by Customer
    A:
    To overhaul the Distributor go ahead and dismantle it first, mark the Distributor, driven gear, shaft, rotor holes, to ensure precise reassembling as wrong connection can result in no-start conditions & engine damage. Position the white paint mark of the bottom stem of the Distributor inside the pre-drilled indent hole in the bottom of the gear for the placement of the rotor segment for v6 engine; if not, replace the Distributor. Take off the screws from the rotor, and take out the rotor, while taking note of where the rotor screw holes and rotor locator pin holes are. Mount the cmp sensor screws into the square-cut hole in the vane wheel with the cmp sensor lined up, and remove and discard the cmp sensor. Watch the dimple below the roll pin hole on one side of the gear for correct orientation when assembling it. Support the driven gear in a v-block or similar fixture, drive our the roll pin with a suitable punch, remove the driven gear and round washer, loosen the tang washer and shim washer, and press the oil seal, as it cannot be removed and is incorporated in the listed washers. For assembly, align the square-cut hole on the vane wheel for cmp sensor and mount the cmp sensor with new screws (secure to 2.2 N.m./19 lb in), and then determine the correct rotor mounting holes. Install the rotor Distributor following the index marks, fasten it rotor screws to 1.9 n.m (17 lb. In.), install the shim washer, tang washer, round washer. Mount the driven gear where the index lines indicate, the rotor segment should align as indicated in a v6 engine, and the white paint from the bottom stem of the Distributor should be installed over the pre-drilled indent hole present at the bottom of the gear. Make sure that the dimple is correctly located. If the driven gear is placed wrongly, it will be about 180 degrees to the rotor segment. Position the Distributor drive gear in a v-block or an appropriate fixture, insert the roll pin using an appropriate punch and hammer, fit a new oil seal under the mounting flange of the Distributor base, and the last step is to fit the Distributor.
    Posted by ChevyPartsGiant Specialist
    Q:
    How to replace the distributor on Chevrolet S10? Posted by Customer
    A:
    To replace the Distributor, users should turn off the ignition, remove the air cleaner assembly. Remove the Spark Plug Wires from the Distributor with the bootstrap twisted 1/2 turn and a pull on it only. Next, pull off the electrical connector at the base of the Distributor and the two screws that hold the Distributor Cap to the housing, throwing away the screws afterward. Pull off the Distributor Cap and then mark the position of the rotor with reference to the Distributor housing and Intake Manifold using a grease pencil. Remove the mounting clamp hold down bolt and redistribute leaving the left in place writing down the rotor will move counter-clockwise about 42 degrees upon removal. For installation procedure 1 for using a new Distributor assembly, copy the marks off of the new housing, line up the rotor's end with the mark number two and feed the Distributor into the engine, ensuring that the hold down base is against the Intake Manifold hole. As the Distributor is installed, the rotor should turn clockwise approximately 42 degrees and after seating, rotor segment has to be set at the first mark. If there is misalignment, take out and install the Distributor. Slacken the Distributor clamp bolt to 25 n.m (18 lb ft), install the Distributor Cap using two new screws with 2.4 n.m (21 lb in), rewire the electrical connector, and plug in the Spark Plug Wires and ignition coil wire, in the correct orientation. Once the malfunction indicator lamp or mil comes on and there is a dtc p1345, the Distributor is misinstalled. In installation procedure 2, turn the number 1 cylinder to the top dead center (TDC) of compression stroke, with crankshaft balancer marks coinciding with the engine front cover tabs. Mount the steel gear on a wooden block of wood supported by the magneto base and turn the brass index until its red line coincides with the white paint mark made on the Distributor's bottom stem. Then, align the gear hub onto the hole made in the gear. On an oily pump drive shaft align with the Distributor's drive tab, guide Distributor into the engine tbd takes spark plug towers should be perpendicular, and rotor segment with pointer in Distributor base. If alignment is not perfect, then redo the process. Finally, you should install the Distributor mounting clamp bolt, which must be stretched down to 25 n.m (18 lb ft), installer the Distributor Cap with new screws tightened to 2.4 n.m (21 lb in), install the electrical connector, install the Spark Plug Wires and ignition coil wire remembering the correct orientation. If mil is activated and dtc p1345 is found, the installation of the Distributor was incorrect and to do the repetition of installation procedure 2 is needed.
    Posted by ChevyPartsGiant Specialist
    Q:
    How to replace the distributor on Chevrolet Silverado 1500? Posted by Customer
    A:
    To replace the Distributor, the air cleaner outlet resonator needs to be removed and the cold electrical connectors from the straight propulsion (CMP) sensor and the gas/oil pressure sensor need to be disconnected. Then, take off the Ignition Coil wire from the coil and from the Distributor Cap, then the Spark Plug Wires by twisting each boot 1/2 turn and pull the wire boot. Screw out the Distributor Cap and take it off. Mark the position of the rotor in relation to the housing of the Distributor as well as Intake Manifold and pull out the Distributor hold down bolt then distrubutor thus observing that the rotor will move clock wise 42 degrees. When installing, use a second mark on the base of the Distributor for alignment. If a new Distributor needs to be installed, there must be two marks on the housing and they must be placed in the same location as the old one; rotor must be aligned with the second mark and the Distributor is to be installed in such a way that the rotor turns clockwise about 42 degrees. The rotor division should end on the mark on the Distributor base ; if it doesn't, the Distributor should be removed and replaced. Torque the Distributor hold down bolt to 25 n.m (18 lb ft), install the cap to the Distributor with new screws torqued to 2.4 n.m (21 lb in) and re-attach the cmp sensor and fuel pump/oil pressure sensor. Reattach the Ignition Coil wire by placing the coil wire nipple in an angle of 35 to 60 degrees aft of perpendicular from the engine centerline. If the malfunction indicator lamp (MIL) is on and dtc p1345, dist. Will be installed improperly. For the second installation, rotate the number 1 cylinder to top dead center (TDC) of the compression stroke, matching the crankshaft balancer marks with the engine front cover tabs. Line up the white paint mark on the Distributor stem with the pre-drilled indent hole in the gear to align the rotor segment with a v6 engine . Position the oil pump drive shaft with that of the Distributor drive tab using a long screwdriver and insert the Distributor into the engine with the spark plug towers parallel to the engine centerline, and the rotor segment parallel to this on the Distributor base. Hold down bolt on the Distributor to the front to 25 n.m (18 lb ft); install the Distributor Cap with new screws going to 2.4 n.m (21 lb in) and connect the cmp sensor and fuel pump/oil pressure sensor and reconnect the Ignition Coil wire in return going with the right orientation. In case the mil is on following the installation, please repeat the second installation procedure; in case it is not, install the air cleaner outlet resonator.
    Posted by ChevyPartsGiant Specialist
    Q:
    How to replace the distributor in an engine on GMC Jimmy? Posted by Customer
    A:
    The replacement process for a Distributor starts by turning off the ignition point while pulling off the air cleaner and Distributor Cap sparks through each wire boot turn half a turn and suction on the wire boot. First disconnect the electrical connector from the Distributor base before removing two screws holding the Distributor Cap in place and discarding those screws. Before installing new marks on the Distributor housing use a grease pencil to indicate the Distributor rotor position and Distributor housing alignment and Intake Manifold position. Pull out the Distributor while keeping an eye on the rotor's counter-clockwise movement that reaches about 42 degrees after bolt removal. Home engine repair begins with Distributor assembly mark duplicates on new equipment then rotor allocation to second mark before Distributor insertion followed by base hole alignment at Intake Manifold hole. When installing the Distributor the rotor rotates in a clockwise direction approximately 42 degrees until it settles and the rotor segment should position itself against the first mark. The Distributor needs removal followed by reinstallment if the marks between original housing and new one do not match. Use a 25 n.m torque wrench to tighten the Distributor clamp bolt after installing new screws that require 2.4 n.m torque to tighten into the Distributor Cap. Then restore the electrical connection before installing Spark Plug Wires and the ignition coil wire properly oriented to their boots. The vehicle's malfunction indicator lamp turns on when dtc p1345 triggers and indicates the Distributor has an installation problem. You should position the number 1 cylinder at top dead center (TDC) compression stroke while ensuring the crankshaft balancer marks match with the engine front cover tabs during installation procedure 2. Install the Distributor by aligning its white paint mark on the stem bottom with the pre-drilled indent hole in the gear. This alignment marks the Distributor driven gear, shaft, and rotor holes to prevent misalignment. Position the gear correctly before inserting the Distributor into the engine while maintaining spark plug tower alignment to the center of the engine. The Distributor base pointer needs the rotor segment to reach alignment before fully seating into position. The gear mesh alignment requires correction through re-execution of the procedure when the Distributor base points are not aligned properly. Secure the clamp bolt at 25 n.m (18 lb ft) torque before attaching the Distributor Cap with new screws set to 2.4 n.m (21 lb in). Reattach the electrical connector then place the Spark Plug Wires and ignition coil wire with correct wire orientation. Repeating installation procedure 2 becomes necessary when the malfunction indicator lamp remains lit after completion of installation.
    Posted by ChevyPartsGiant Specialist
    Q:
    How to overhaul the distributor on GMC Safari? Posted by Customer
    A:
    For Distributor overhaul start by removing engine covers. Adjust the white paint mark on the Distributor's bottom stem to fit the pre-etched hole on the gear base. Take marks on the Distributor driven gear and Distributor shaft with marks on the rotor holes because improper installation will create a no-start scenario that potentially damages the engine. For correct placement of the v6 rotor segment follow the indicated position. If misaligned, replace the Distributor. Free the Distributor's two screws from the rotor unit after removing the rotor while recording the rotor screw hole locations and rotor locator pin hole positions. Prepare the cmp sensor by removing its two different screws while discarding them before aligning the vane wheel's square-cut opening with the cmp sensor. A dimple located below the roll pin hole on one side of the gear serves as an indicator for correct Distributor reassembly alignment. Place the Distributor drive gear inside a v-block or similar fixture while using a suitable punch to remove the roll pin which extracts both the driven gear and the round washer the tang washer and the shim washer from the Distributor shaft. Insert the sensor into the housing after aligning its square-cut hole in the vane wheel. Tighten two new screws for the cmp sensor to 2.2 n.m (19 lb in). Position the Distributor rotor according to mark references at the rotor screw holes along with the rotor locator pin holes. Secure the rotor in place by tightening the two hold-down screws to 1.9 n.m (17 lb in). Begin by placing the shim washer at the bottom of the Distributor shaft and then layer the tang washer and round washer on top. Install the driven gear to index marks that align the rotor segment for v6 engines or v8 engines while adjusting the white paint mark on the Distributor bottom stem to match the pre-drilled gear bottom indent. The driven gear must be correctly installed while checking that the dimple sits at a position where the rotor segment is not at 180 degrees opposition. Place the Distributor drive gear in a v-block or equivalent fixture before hand-driving the roll pin into position using a suitable punch alongside a hammer to secure the driven gear. After installing a new distribution base oil seal, reattach the Distributor before securing the engine cover.
    Posted by ChevyPartsGiant Specialist
    Q:
    How to replace the distributor on GMC Sierra 1500 Classic? Posted by Customer
    A:
    To replace the Distributor, one begins to remove the air cleaner outlet resonator and disconnect electrical connectors camshaft position (CMP) sensor and fuel pump/oil pressure sensor. Secondly, disconnect the Ignition Coil wire from the Ignition Coil and Distributor Cap and the Spark Plug Wires from the Distributor Cap. Twist each piece of boot 1/2 turn and pull on boot. Take off the Distributor Cap screws and remove the Distributor Cap. Mark the position of rotor to Distributor housing and Intake Manifold, unbolt the Distributor hold-down and Distributor noting on it moves counterclockwise approximately 42 degrees. Put another mark on the base of the Distributor for alignment while installing. If you decide to install a new Distributor, make two marks on the new housing on the same location as the original, then align the rotor with the second mark and install the Distributor being sure that the hole in the hold-down clamp aligns with the Intake Manifold. Once the Distributor is installed, the rotor will rotate counterclockwise about 42 degrees; if it feels not on the number 1 mark, remove and re install the Distributor. After sitting down, the rotor piece should go in line with the mark on the Distributor bottom. All together, bolt the Distributor hold-down and tighten to 25 n.m (18 lb ft) and install the Distributor Cap with new screws tightened to 2.4 n.m (21 lb in). Reconnect the cmp sensor and fuel pump/oil pressure sensor and make sure the coil wire nipple is oriented to 35 to 60 degrees aft of perpendicular from the engine centerline. They will verify that they installed the Ignition Coil wire to the Ignition Coil and driver cap and if the malfunction indicator lamp (MIL) is on with a dtc p1345 they will determine the Distributor was installed incorrectly. If mil is not active, fit the air cleaner outlet resonator. In the case of installation procedure 2, rotate the number 1 cylinder to the top dead center (TDC) of the compression stroke while matching the crankshaft balancer marks with the engine front cover tabs. Align the white patch of paint located on the Distributor stem as far as the pre-drilled indent in the gear , marking the Distributor components for successful reassembly. From the position in which the oil pump drive shaft should align with a long screwdriver, guide the Distributor into the engine making sure that the spark plug towers are perpendicular on the Distributor side, and make sure that rotor segment aligns with the point on the Distributor base. Mount hold-down bolt to 25 n.m (18 lb ft), then mount Distributor Cap and screws to 2.4 n.m (21 lb in). Attach the cmp sensor and fuel pump/oil pressure sensor, positioning the coil wire nipple properly, and attach the Ignition Coil wire. If the mil is on with dtc p1345, repeat procedure 2. Otherwise, install the outlet portion air cleaner resonator.
    Posted by ChevyPartsGiant Specialist
    Q:
    How to service and repair the distributor on GMC Jimmy? Posted by Customer
    A:
    To service and repair the Distributor, start by separating it cautiously making whereby marking the Distributor driven gear, Distributor shaft, and rotor holes to observe their correct reassembly. Match the white paint sign on the lower stem of the Distributor to the pre-drilled indent hole on the bottom part of the gear. In case the rotor segment is not placed properly in v6 engine, then one will need to replace the Distributor. Pull the rotor after taking out the two screws from the rotor, pointing out the locating holes for rotor screw and locator pin. Complement the square-cut hole of the vane wheel with the camshaft position gp cmosition (CMP) sensor, next remove the two screws operating the cmp sensor and dispose it. Also, do not miss the small groove (dimple) below the roll pin hole on one side of the gear when disassembling for proper orientation in reassembly. Mount both ends of the support Distributor drive gear in v-block or equivalent fixtures, then use a suitable punch and drive out the roll pin for removal of the driven gear from the Distributor shaft followed by the round washer, tang washer and shim washer and the old oil seal. For assembly, align the square-cut hole of the vane wheel for the cmp sensor and introduce the sensor into the housing. Install two new screws of the cmp sensor which are to be tightened to 2.2 n.m (20 lb in). Determine the proper rotor mounting position at rotor screw holes and locator pin holes and assist the Distributor rotor according to the index marks and closing with two hold down screws at 1.9nm (17lb in). Mount the shim washer at the bottom of the shaft of the Distributor, then the tang washer and round washer. Mount the driven gear utilising the index marks so that the rotor segment is oriented as shown (for a V6 or V8 engine) and have the white paint mark at the bottom stem of the Distributor be in line with the pre-drilled indent hole at the bottom of the gear. If the driven gear is not installed correctly, the dimple will be about 180 degrees away from the rotor segment. Support the Distributor drive gear in a v-block or similar fixture, and then insert the roll pin with an appropriate punch and hammer to attach the driven gear. Finally, install a new oil seal under mounting flange of the Distributor base and install the Distributor.
    Posted by ChevyPartsGiant Specialist
    Q:
    How to service and repair the distributor on GMC Savana 2500? Posted by Customer
    A:
    The distributor repair process needs the removal of the engine cover as its first step. Normal wear shows as cap discoloration combined with white deposits nearby the terminals together with rotor cap yellowing coupled with darkening from carbon accumulation under the rotor segment. Driveability issues will determine the need for replacement. Look for cracks and small holes along with carbon tracks between the terminal traces on the cap. Use the DMM lead connected to the cap terminal to inspect all other terminals and the center carbon ball until testing all secondary terminals. Move the DMM base lead between each terminal while performing these tests. Check and replace the ignition cap when you find resistance readings other than infinity. Terminal inspections should take place for excessive corrosion leading to terminal cleaning before cap replacement if corrosion reaches high levels but normal buildup is expected. The rotor segment requires replacement if significant looseness is detected. Examine the housing for signs of cracks while testing shaft-to-bushing looseness with the shaft inserted into its place before installing a new housing assembly if the shaft shows noticeable movement. Finally, reinstall the engine cover.
    Posted by ChevyPartsGiant Specialist
    Q:
    How to overhaul the distributor on GMC Sierra 1500? Posted by Customer
    A:
    Prior to dismantling the Distributor start by marking holes in the Distributor driven gear, shaft and rotor for correct assembly. The white paint mark on the Distributor's lower stem must line up with the predrilled hole in the bottom of the gear to position the v6 engine rotor segment correctly. If not, replace the Distributor. Detach rotor screws then take the rotor while writing down the rotor screw hole locations and rotor locator pin hole positions. Fit the square-cut hole of the vane wheel to the cmp sensor before discarding both the cmp sensor screws and the cmp sensor itself. Examine the dimple found below the roll pin hole of one Distributor drive gear side for correct placement when putting components together. A v-block or equivalent fixture should support the drive gear while you use an appropriate punch to extract the roll pin before you remove the gear and its parts including a round washer a tang washer a shim washer and an oil seal. Place the cmp sensor into the square-cut hole of the vane wheel before installing new screws torqued to 2.2 n.m (19 lb in). After that mark the distribution rotor's mounting holes. Screw in the Distributor rotor using index marks while tightening its screws to 1.9 n.m (17 lb in) torque setting. Place the shim washer at the Distributor shaft's bottom before installing the tang washer and round washer. Route the driven gear based on index marks to match the displayed v6 engine configuration while making sure the Distributor's white marker faces the pre-drilled indent on the gear's bottom surface. When the driven gear gets positioned improperly the dimple will appear at a 180-degree position relative to the rotor segment. Before installation place the Distributor drive gear in a v-block while using a suitable punch to install the roll pin. Then install a new oil seal under the mounting flange before putting back the Distributor.
    Posted by ChevyPartsGiant Specialist
    Q:
    How to service and repair the distributor on GMC Savana 3500? Posted by Customer
    A:
    Begin Distributor service and repair by turning off ignition first and removing the engine cover. Position marks on the Distributor's driven gear and Distributor shaft and rotor holes to maintain proper installation alignment since improper assembly will prevent engine startup and possibly cause engine harm. When servicing the Distributor start by removing the screws from both the rotor and Distributor before extracting the rotor and keeping note of the reference holes for later installation. The cmp sensor must be removed by aligning its square-cut hole with the vane wheel before discarding the screws which retain the sensor. Check the gear's dimple by the roll pin hole to understand proper installation orientation before putting everything back together. Use a v-block to support the Distributor drive gear before extracting the roll pin with an appropriate punch to remove the driven gear as well as round washer and tang washer and shim washer and old oil seal gasket. Insert the cmp sensor into the housing through its square-cut hole in the vane wheel before tightening new screws to 2.2 n.m (20 lb in). Follow index marks to place rotor correctly before screwing it into position with 1.9 n.m (17 lb in) torque. Position the shim washer onto the Distributor shaft before adding the tang washer and round washer. Then set the driven gear into position according to index marks with the white paint mark matching the pre-drilled indent hole of the gear . The driven gear installation requires careful inspection because the dimple must face the opposite direction from the rotor segment by 180 degrees. Position the Distributor drive gear in a v-block and apply a roll pin by using a punch and striking with a hammer. Secure Distributor Cap screws with 2.4 n.m (21 lb in) torque. Before installation of the Distributor base's mounting flange position the new oil seal gasket underneath. Next install the Distributor followed by electrical connector attachment and completing the spark plug wire connections to the Distributor Cap being mindful to avoid contact between the ignition coil wire and any objects to avoid shorting or grounding. Place the ignition coil wire and position the engine cover into its original place.
    Posted by ChevyPartsGiant Specialist
    Q:
    How to service and repair the distributor on GMC Safari? Posted by Customer
    A:
    Start by removing the engine cover to service and repair the distributor. Whitish buildup around the cap terminals, cap discoloration and yellowing of rotor cap and darkening with some carbon under rotor segment is normal. replacement is only done if there are driveability concerns. Check for caps leaks, small holes or carbon tracks between the terminal traces. Take off the cap and apply a DMM by putting one lead on a cap terminal while probing all the other terminals and the central carbon ball with the second lead, rotating the base lead to the next terminal and repeating the process until all secondary terminals have been tested. replace the cap if there are readings which are not infinite. Inspect for corrosion excess on the boundaries and nail brushing to clean, and the cap to replace if there is an excess corrosion but some is normal. Check the rotor segment for excess misuse and replace the rotor when there is excess looseness. Inspect for shaft-to-bushing looseness by examining the housing for cracks and damage, putting the shaft into the housing to replace the whole housing assembly if the shaft wobbles. Finally, reinstall the engine cover.
    Posted by ChevyPartsGiant Specialist
    Q:
    How to replace the distributor on GMC Sonoma? Posted by Customer
    A:
    Initiate Distributor replacement by turning off ignition then extracting the air cleaner assembly. Start by pulling the Distributor Cap's boot 1/2 turn while twisting it away from its base in order to disconnect the Spark Plug Wires. First remove the Distributor's electrical connector from its base and use a screwdriver to remove and discard the two screws holding the Distributor Cap to its housing. Note the rotor's position using a grease pencil on both the Distributor housing and Intake Manifold before removing the Distributor Cap. Before proceeding with Distributor removal, loosen the holding bolt on the mounting clamp and extract the Distributor component after observing the rotor's counter-clockwise rotation of approximately 42 degrees. The second Distributor mark should be added at its base to assist with rotor alignment when reinstallation happens. Installation procedure 1 requires new Distributor housing users to replicate original marks and position rotor against the second mark before guiding the Distributor into its engine slot and aligning the hold-down base hole with the Intake Manifold mounting hole. Install the Distributor while the rotor rotates clockwise 42 degrees then check for correct rotor segment alignment with the Distributor base mark when its properly seated. The Distributor requires removal and reinstall because its misaligned position. The installation process requires tightening the Distributor clamp bolt to 25 n.m (18 lb ft) followed by mounting the Distributor Cap with two new screws at 2.4 n.m (21 lb in) torque. Reconnect the electrical connector then connect the Spark Plug Wires and ignition coil wire maintaining correct wire boot orientation. After installation the Distributor is incorrectly installed when the malfunction indicator lamp (MIL) activates with dtc p1345. When performing installation procedure 2, turn the crankshaft balancer clockwise until engine front cover tabs match Distributor alignment marks while the number 1 Piston rests at compression stroke top dead center. A white paint mark on the Distributor's stem must align with an indent hole to set the correct rotor segment for either v6 or v8 engines. Insert a long screwdriver to position the oil pump drive shaft directly against the Distributor's drive tab. Then guide the Distributor into the engine block while ensuring both spark plug towers remain perpendicular to the centerline. Check that the rotor segment points to the Distributor base pointer. Repeat the maneuver if necessary. If misaligned, repeat the procedure. After installing the Distributor clamp bolt to 25 n.m (18 lb ft) torque, use two new screws to join the Distributor Cap with 2.4 n.m (21 lb in) tightening. Then reconnect electrical connections and position Spark Plug Wires and ignition coil wire while maintaining proper wire boot alignment. You must retrace all steps of installation procedure 2 whenever the mil indicator stays on.
    Posted by ChevyPartsGiant Specialist
    Q:
    How to service and repair the distributor on GMC Savana 1500? Posted by Customer
    A:
    The service and repair of the Distributor start by the removal of the engine cover. Mark the Distributor components such as the driven gear, Distributor shaft, and rotor holes to aid in the correct assembly process because improper assembly results to a no-start situation and possible damage to the engine. Position the white paint mark down the bottom stem of the Distributor against the pre-drilled indent hole positioned at the bottom of the gear. Confirm the rotor segment is properly mounted for a v6 engine ; if not, replace the Distributor. Preparations and removal of two screws from the rotor, then pull out rotor noting locating holes for rotor screw and locator pin. Position the squarish-cut hole of the vane wheel to fit with the camshaft position (CMP) sensor and then pull off the 2 screws that attach the cmp sensor and discard them. Remove the cmp sensor and record the presence of the dimple beneath the roll pin hole on the gear around it. These dimples will help determine the orientation later on throughout reassembling the parts. Support the Distributor drive gear into a v-block and drive out the roll pin using an appropriate punch, then remove the driven gear, round washer, tang washer, shim washer, and old oil seal. For assembling, align square cut hole in vane wheel for the cmp sensor then insert the sensor in the housing and fit two new screws for cmp sensor and do a tight loosen of 2.2 n.m (20 lb in). Find the correct rotor mounting position at the rotor screw holes and locator pin holes and install the Distributor rotor based on the index marks and tighten it with the help of two hold- down screws which should be put to 1.9 n.m (17 lb in). Apply shim washer, tang washer and round washer and insert driven gear in relation to index marks. Magnify the rotor section for the v6 engine or v8 engine, position the gear and line up the white paint mark at the underside stem of the Distributor with the pre- drilled indent hole at the underside of the gear. In case the driven gear is placed in a wrong position the dimple will be located about 180 degrees from the rotor segment. Support the Distributor drive gear in v-block, insert the roll pin by using a proper punch and hammer to lock the driven gear. Lastly, install the new oil seal to the mounting flange of the Distributor base, install the Distributor and replace an engine cover.
    Posted by ChevyPartsGiant Specialist
    Q:
    How to replace the distributor on GMC Sierra 1500? Posted by Customer
    A:
    The Distributor replacement process begins with air cleaner outlet resonator removal and removal of electrical connectors for the camshaft position (CMP) sensor and fuel pump/oil pressure sensor. Start by taking off the Ignition Coil wire from its coil and the Distributor Cap. Proceed to detach Spark Plug Wires from the Distributor Cap through a 1/2 turn boot twist followed by wire boot pull. Remove the Distributor Cap after you discard its screws. Apply a grease pencil to note both the rotor position versus Distributor housing alignment and the Distributor housing intakes manifold relation. Extract the Distributor by removing the hold down bolt while tracking that the rotor rotates counterclockwise by 42 degrees. The base of the Distributor needs a second mark for easier rotor alignment when reinstalling the vehicle. Two marks should be placed on new Distributor housing similar to where the original markings were. Place the Distributor into position while making sure the hole in the Distributor hold-down clamp matches with the Intake Manifold hole. Then line up the Distributor with the second mark before installation. Watch the Distributor rotor rotate clockwise 42 degrees when installed before it reaches the mark on the base. During final position, the rotor should align precisely with the Distributor mark. Misalignment requires you to uninstall the Distributor before reinstallation. Follow these installation steps: tighten the Distributor hold down bolt to 25 n.m (18 lb ft) but install the Distributor Cap with new screws set to 2.4 n.m (21 lb in) and then connect the cmp sensor and fuel pump/oil pressure sensor. Mount the Ignition Coil wire by directing its nipple between 35 and 60 degrees behind engine centerline perpendicular orientation. A malfunction indicator lamp (MIL) along with dtc p1345 indicates improper Distributor installation. To execute installation procedure 2 you must turn cylinder number 1 until it reaches top dead center compression stroke alignment with engine front cover tabs and crankshaft balancer marks. Set the Distributor's white paint mark on its bottom stem to match the pre-drilled hole found on the bottom of the gear. Mark down Distributor parts during assembly to maintain proper reinstallation. Insert a long screwdriver to the oil pump drive shaft and use it to guide the Distributor into the engine space until the spark plug towers match the engine centerline perpendicular to it. When correctly installed the rotor segment must position itself with reference to the Distributor base pointer. Repetitions of this procedure should be performed to correct alignment problems. Begin by securing the Distributor hold down bolt at 25 n.m (18 lb ft) torque while installing the new Distributor Cap screws to 2.4 n.m (21 lb in) torque. Reconnect the cmp sensor and fuel pump/oil pressure sensor before finalizing your installation with correct Ignition Coil wire placement. Follow installation procedure 2 once again if the mil remains activated. Replace the air cleaner outlet resonator unless the mil remains illuminated.
    Posted by ChevyPartsGiant Specialist
    Q:
    How to replace the distributor on GMC Savana 2500? Posted by Customer
    A:
    Begin Distributor replacement by shutting off the ignition followed by engine cover removal and sequentially disconnecting the air cleaner assembly and the air intake resonator assembly. Twist the wire boot of each spark plug wire 1/2 turn before you pull only the boot to disconnect them from the Distributor Cap. Use a screwdriver to take out the 2 screws holding the Distributor Cap in place against its housing then extract the electrical connector from the Distributor base. Toss these pieces away. Apply a grease pencil to mark two reference points on the Distributor housing and intake manifold then mark down the rotor position against the Distributor housing before removing the Distributor Cap. At Distributor removal you should observe the rotor moving counter-clockwise by about 42 degrees and should apply another alignment mark to the Distributor base while reassembly approaches. Unscrew the mounting clamp hold-down bolt before removing the Distributor. The new Distributor assembly requires two matching Distributor housing marks at positions analogous to those on the original component. To install the Distributor guide it into position while aligning the rotor segment with the second mark followed by placing and securing the Distributor base hole above the intake manifold mounting slot. Monitor the rotor's clockwise movement to reach 42 degrees while installing the Distributor. After placing the Distributor in position check that the rotor segment points towards the Distributor base mark. When the Distributor position does not align properly with the mark use the Distributor installation procedure again. Register Distributor mounting clamp bolt to 25 nm (18 lb ft) before installing the Distributor Cap and securing it with new screws tightened to 2.4 n.m (21 lb in). Reconnect the electrical connector then position the Spark Plug Wires and ignition coil wire with proper orientation before installation. The detector lamp warns you that you installed the Distributor incorrectly when p1345 dtc gets triggered. Installation procedure 2 requires top dead center (TDC) positioning of the number 1 cylinder compression stroke while matching the crankshaft balancer marks to front cover tabs. Guide the white paint mark from the Distributor's bottom stem through the pre-drilled indent situated in the gear. The Distributor must receive proper markings because improper reassembly methods could either block engine startup or lead to motor damage. The installation requires correctly positioned gears which lead you to guide the Distributor through the engine opening maintaining the flat housing section facing forward. When the rotor segment reaches complete insertion its position must match the Distributor base pointer. If not, repeat the procedure. Tighten the Distributor mounting clamp bolt to 25 n.m (18 lb ft) and then install the Distributor Cap while securing new screws at 2.4 n.m (21 lb in) torque. After reconnecting the electrical connector, place the Spark Plug Wires and ignition coil wire properly. An illuminated malfunction indicator lamp, together with the detection of dtc p1345, requires you to perform installation procedure 2 again. Finally, install the engine cover.
    Posted by ChevyPartsGiant Specialist
    Q:
    How to overhaul the distributor on GMC Sonoma? Posted by Customer
    A:
    To overhaul the Distributor, you first line up the white paint mark at the bottom stem of the Distributor in the pre-drilled indent hole at the bottom of the gear. Make sure that the rotor segment is properly positioned on a v6 engine ; if not, replace the Distributor. Unscrew the two screws from the rotor and remove the rotor and take note of the locating holes of the rotor screw and locator pin . Bring the square-cut hole of the vane wheel into alignment with the camshaft position (CMP) sensor and take-out the 2 screws securing the cmp sensor and dispose of it. Note the dimple under the roll pin hole on one side of the gear for orientation during assembling. Support the Distributor drive gear on a v-block or comparable fixture, then drive out the roll pin using appropriate sized punch and remove the driven gear from the Distributor shaft, including the round washer / tang washer, shim washer, and old oil seal. For assembly, align the square-cut hole of vane wheel for cmp sensor, insert the sensor into the housing plus installing two new screws for cmp sensor tight it 2.2 n.m 19 lb in. Determine the right rotor mounting position at the rotor screw hole and locator pin holes, install the Distributor rotor using the index marks and secure with two hold-down screws at 1.9 n.m (17 lb in). Place the shim washer at the bottom of the Distributor shaft and follow up with the tang washer and round washer. Mount the driven gear as per the marks of index & make sure the rotor segment is in position correctly for a v6 engine or v8 engine. Mark a white paint on the bottom stem of the Distributor, align with pre-drilled indent hole in the bottom of the gear. When the constable driven gear is put on in the wrong way, the dimple will be about 180 degrees from the rotor segment. Place the Distributor drive gear in a v-block or similar device and later fitting the roll pin by using a suitable punch and hammer and fix the driven gear. Finally, install new oil seal in the mounting flange at the bottom of Distributor base and install Distributor.
    Posted by ChevyPartsGiant Specialist
    Q:
    How should the distributor be aligned during reassembly for the 2005 Chevrolet Astro? Posted by Customer
    A:
    Align the white paint mark on the bottom stem of the distributor with the pre-drilled indent hole in the bottom of the gear.
    Posted by ChevyPartsGiant Specialist
    See expert answers on similar Distributor
    Q:
    What is the first step to replace the distributor for the 2004 Chevrolet Astro? Posted by Customer
    A:
    Ensure the ignition is turned off.
    Posted by ChevyPartsGiant Specialist
    See expert answers on similar Distributor
    Q:
    How should the crankshaft balancer marks be aligned for the 2002 Chevrolet Astro? Posted by Customer
    A:
    With the engine front cover tabs.
    Posted by ChevyPartsGiant Specialist
    See expert answers on similar Distributor
    Q:
    What is the first step to replace the distributor for the 2004 Chevrolet Silverado 1500? Posted by Customer
    A:
    Remove the air cleaner outlet resonator and disconnect the camshaft position (CMP) sensor and fuel pump/oil pressure sensor.
    Posted by ChevyPartsGiant Specialist
    See expert answers on similar Distributor
    Q:
    What should be done if the rotor segment does not align for the 2005 GMC Safari? Posted by Customer
    A:
    Repeat the procedure.
    Posted by ChevyPartsGiant Specialist
    See expert answers on similar Distributor
    Q:
    What is the first step in Installation Procedure 2 for the 2003 GMC Safari? Posted by Customer
    A:
    Rotate the crankshaft balancer clockwise until the alignment marks align with the engine front cover tabs and the number 1 piston is at TDC of the compression stroke.
    Posted by ChevyPartsGiant Specialist
    See expert answers on similar Distributor
    Q:
    How do you identify the correct rotor mounting position for the 2001 GMC Safari? Posted by Customer
    A:
    Identify the correct rotor mounting position at the rotor screw holes and locator pin holes.
    Posted by ChevyPartsGiant Specialist
    See expert answers on similar Distributor
    Q:
    What should be noted when removing the rotor for the 2002 GMC Safari? Posted by Customer
    A:
    Note the locating holes for the rotor screw holes and rotor locator pin holes.
    Posted by ChevyPartsGiant Specialist
    See expert answers on similar Distributor
    If you have any questions about this product, please don't hesitate to ask us. We will be happy to help you!

OEM GM 12598210, Excellent Performance and Perfect Fitment

To ensure reliability, purchase GM part # 12598210 Distributor Assembly. It is sometimes referred to as GM Distributor. Choosing OEM parts is the optimal decision for guaranteeing superior quality and perfect performance. These components undergo stringent quality checks and are carefully constructed to comply with GM's factory specifications, ensuring a smooth installation process.

ChevyPartsGiant.com is a leading supplier of genuine GM parts such as GM 12598210 Distributor Assembly. Our website boasts an extensive inventory of OEM GM parts, available at highly competitive prices in the market. Should you require any new genuine GM parts, rest assured we will deliver them swiftly and efficiently to your doorstep. Furthermore, all our parts come with the assurance of a manufacturer's warranty. For detailed Chevy parts information, click here.
Choose ChevyPartsGiant for discounted prices, exceptional service and fast delivery