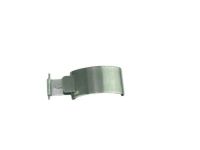
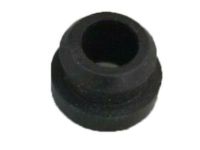
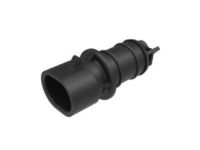
Make sure this part fits

GM 19417445
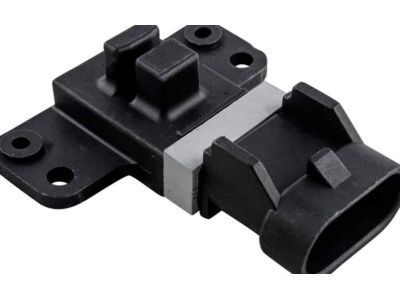
Camshaft Position Sensor

1995-2007 GM

Customer Questions & Expert Answers (65)
GM 19417445 Camshaft Position Sensor
  • Part Description
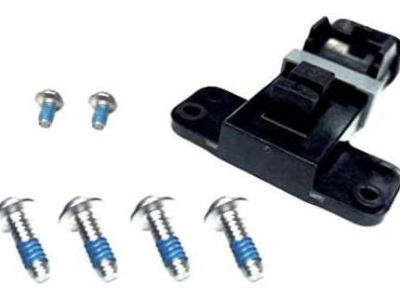
    Sensor Assembly, Camshaft Position (Kit); Engine Camshaft Position Sensor; Camshaft Sensor; Cam Sensor
  • Replaces
    10490645, 10485432
  • Manufacturer
    General Motors
Make sure this part fits
$65.22 MSRP: $122.48
You Save: $57.26 (47%)
Ships in 1 Business Day
1
ADD TO CART
  • Related Parts
  • Product Specifications
  • Vehicle Fitment
  • Customer Questions & Expert Answers
  • Product Specifications

    BrandGenuine GM
    Manufacturer Part Number19417445
    Part DescriptionSensor Assembly, Camshaft Position (Kit); Engine Camshaft Position Sensor; Camshaft Sensor; Cam Sensor
    Other NamesPosition Sensor; Switch; Sensor, Distributor (Also Knock Sensor)
    Item Dimensions4.4 x 2.7 x 2.7 inches
    Item Weight0.40 Pounds
    ConditionNew
    Fitment TypeDirect Replacement
    Replaces10490645, 10485432
    ManufacturerGeneral Motors
    SKU19417445
    WarrantyThis genuine GM part is guaranteed by GM's factory warranty.
    Shipping & ReturnShipping Policy Return Policy
    Warning: California's Proposition 65
  • Vehicle Fitment

    Year Make Model Trim Engine
    1999-2000 Cadillac EscaladeBase8 Cyl 5.7 L GAS
    1996-2005 Chevrolet AstroBase, LS, LT6 Cyl 4.3 L GAS
    1995-2005 Chevrolet BlazerBase, LS, LT, Trailblazer, Xtreme, ZR26 Cyl 4.3 L GAS
    1997-1999 Chevrolet C1500Base, Cheyenne, LS, Silverado, WT6 Cyl 4.3 L GAS, 8 Cyl 5.0 L GAS, 8 Cyl 5.7 L GAS
    1997-1999 Chevrolet C1500 SuburbanBase, LS, LT8 Cyl 5.7 L GAS
    1997-2000 Chevrolet C2500Base, Cheyenne, LS, Silverado, WT8 Cyl 5.0 L GAS, 8 Cyl 5.7 L CNG, 8 Cyl 5.7 L GAS, 8 Cyl 7.4 L GAS
    1997-1999 Chevrolet C2500 SuburbanBase, LS, LT8 Cyl 5.7 L GAS, 8 Cyl 7.4 L GAS
    1997-2000 Chevrolet C3500Base, Cheyenne, LS, Silverado8 Cyl 5.7 L CNG, 8 Cyl 5.7 L GAS, 8 Cyl 7.4 L GAS
    1996-2007 Chevrolet Express 1500Base, LS, LT6 Cyl 4.3 L GAS, 8 Cyl 5.0 L GAS, 8 Cyl 5.7 L GAS
    1996-2006 Chevrolet Express 2500Base, LS6 Cyl 4.3 L GAS, 8 Cyl 5.0 L GAS, 8 Cyl 5.7 L BI-FUEL, 8 Cyl 5.7 L CNG, 8 Cyl 5.7 L GAS
    View More
  • Customer Questions & Expert Answers

    Q:
    Is this 19417445 designed for my car? Posted by ChevyPartsGiant Specialist
    A:
    Please Select Your Vehicle model to see if part number 19417445 is suitable before ordering.
    Posted by ChevyPartsGiant Specialist
    Q:
    How to service and repair the Camshaft Position Sensor on Chevrolet Astro? Posted by Customer
    A:
    The first step when repairing a Camshaft Position Sensor requires removing the engine cover ahead of disconnecting both Spark Plug Wires and ignition coil wire from the Distributor. Begin by unplug the cmp sensor harness connector attached to the Distributor then unfasten the Distributor Cap screws before removing the cap. Next insert the square slot of the reluctor wheel into the cmp sensor position before taking out the rotor screws along with the rotor parts. The next step involves executing cmp screws removal followed by taking out the cmp sensor. During installation use new screws coated with thread locking compound instead of reusing the old cap, cmp sensor and rotor screws. Place the cmp sensor into the slot of the reluctor wheel then install new cmp screws while tightening them to 2.2 n.m (19 lb in). Place rotor onto the reluctor wheel before applying new rotor screws which you should tighten to 1.9 n.m (17 lb in). Fitting the Distributor Cap requires new screws that you must tighten to 2.4 n.m (21 lb in). Connect the cmp sensor harness connector then return the Spark Plug Wires together with ignition coil wire before putting back the engine cover.
    Posted by ChevyPartsGiant Specialist
    Q:
    How to replace the Crankshaft Position Sensor on Chevrolet Astro? Posted by Customer
    A:
    Begin by disconnecting the negative Battery Cable along with the ckp sensor harness connector before starting the sensor replacement. To replace the Crankshaft Position Sensor first remove its mounting bolt and then ease the sensor free. The mounting surfaces must be cleaned of burrs before installing the new ckp sensor. After fully seating the sensor inside the front cover maintain it motionless before you tighten the hold down bolt to 20 n.m (15 lb ft). Examine the sensor o-ring for any sign of deterioration along with breaks and fluid leakage. Complete the ckp sensor installation by connecting its connector followed by reconnecting the negative Battery Cable. The ckp system variation learn procedure must always be conducted after removing or installing the ckp sensor.
    Posted by ChevyPartsGiant Specialist
    Q:
    How to Replace a Crankshaft Position Sensor and Perform the CKP System Variation Learn Procedure on Chevrolet Blazer? Posted by Customer
    A:
    arkers begin by raising the car and following the routine to remove the underbody shield package before finishing installation. Start by disconnecting the CKP sensor harness connector before you remove its mounting bolt to extract the CKP sensor. Firmly position the new CKP sensor before tightening the mounting bolt because improper installation can lead to erratic performance and false DTCs. Avoid using the original O-ring for this installation. After installing the new CKP sensor O-ring you need to apply clean engine oil for lubrication before completing the sensor installation. Clean the CKP sensor mounting area of all burrs before mounting the sensor with its bolt which should be tightened up to 9 N.m (80 lb in). Secure the mounting bolts of the steering linkage shield at 33 N.m (24 lb ft) while the CKP sensor harness connector remains connected. Then lower the vehicle for performing the CKP system variation learn procedure.
    Posted by ChevyPartsGiant Specialist
    Q:
    How to replace the Camshaft Position Sensor on Chevrolet Blazer? Posted by Customer
    A:
    The first step to replace the camshaft position (CMP) sensor involves disconnecting the Spark Plug Wires together with the ignition coil wire from the Distributor followed by removing the cmp sensor harness connector from the Distributor. Begin by unscrewing the Distributor Cap screws then removing the Distributor Cap before moving on to unfasten the rotor screws along with the rotor. The square slot of the reluctor wheel needs to be aligned with the cmp sensor before removing the cmp screws and the cmp sensor. Use fresh components with a thread locking compound when reinstalling the system because the old screws and cap along with cmp sensor must be replaced. The cmp sensor must pass through the reluctor wheel slot before installing fresh cmp mounting screws while tightening them to 2.2 n.m (19 lb in). The next step involves putting the rotor onto the reluctor wheel before using new rotor screws to fasten it while tightening them to 2 n.m (18 lb in). Secure both Distributor caps with new handling screws which must be tightened to 2.4 n.m (21 lb in). Attach the cmp sensor harness connector while also reattaching all Spark Plug Wires and the ignition coil wire.
    Posted by ChevyPartsGiant Specialist
    Q:
    How to replace the Camshaft Position Sensor on Chevrolet Express 1500? Posted by Customer
    A:
    The first step to replace the Camshaft Position (CMP) Sensor is to clean its surrounding area so outside matter stays out of the engine compartment. Proceed with the engine cover removal before disconnecting the CMP sensor electrical connector. Begin by taking out the CMP sensor bolt and then remove the CMP sensor from its location. You should place the CMP sensor into its proper position and follow the Fastener Notice in Service Precautions before tightening the CMP sensor bolt to 25 N.m (18 lb ft). Replace the engine cover by reconnecting the CMP sensor electrical connector.
    Posted by ChevyPartsGiant Specialist
    Q:
    How to perform the Crankshaft Position Sensor service and repair on Chevrolet Express 3500? Posted by Customer
    A:
    The Crankshaft Position Sensor service requires connection of the scan tool combined with application of the vehicle's parking brake followed by wheel blocking and hood closure. Put the transmission into park (A/T) or set it to neutral (M/T) and allow the engine to idle until the coolant thermometer displays 65°c (150°F). Turn off all accessories. A failed attempt at the ckp system variation learn procedure requires scanning for additional diagnostic information through dtc p1336. The scan tool must execute the crankshaft position system variation learn procedure provided the powertrain control module (PCM) registers a brake switch state transition from released to applied during this procedure after the ignition switch reaches crank position. Service brakes must be maintained rather than parking brake activation at all times during this learning stage. The operator should release throttle immediately when engine deceleration occurs to allow engine control return before responding to throttle position post procedure completion. After reaching 4,000 rpm maintain engine speed for less than a second prior to instantly releasing the throttle. Turn off the ignition after a 15-second wait during which you completed the required learn procedure.
    Posted by ChevyPartsGiant Specialist
    Q:
    How to replace the Crankshaft Position Sensor on Chevrolet Express 1500? Posted by Customer
    A:
    In order to replace the crankshaft position (CKP) sensor ensure that the ignition key is in the off or lock position, and the electrical loads should be off. Disconnect the negative Battery Cable from the battery to avoid personal injury or any potential to immobilize the vehicle by yourself. Start by lifting the car and taking out the Starter. Remove the ckp sensor electrical connector and clean the area around the sensor to avoid debris from getting into the engine. Remove the ckp sensor retaining fastener first, and subsequently, remove the ckp sensor itself. For installation, seat the ckp sensor and fasten it with retaining fastener and tighten it to 25 n.m (18 lb ft). Reinstall the Starter, lower the vehicle, and reconnect the negative Battery Cable after reconnecting the ckp sensor electrical connector. Lastly, carry out ckp system variation learn procedure after sensor replacement.
    Posted by ChevyPartsGiant Specialist
    Q:
    How to service the camshaft position sensor on Chevrolet K3500? Posted by Customer
    A:
    The service process for the camshaft position (CMP) sensor begins with negative Battery Cable removal and then Ignition Coil extraction. Begin the procedure by unwiring the Spark Plug Wires that are located on one side of the Distributor Cap and place these wires to the side. Begin by disconnecting the electrical connector of the camshaft sensor and afterward remove all Distributor Cap screws and the cap itself. The two rotor screws must be removed before you can detach the rotor. The square-cut hole in the rotor vane should be placed directly over the cmp sensor during this process. Unscrew the two screws that attach the cmp sensor to the distributor and proceed to remove the sensor from its place. New Distributor Cap screws and cmp sensor screws along with rotor screws can be bought separately as p/n 10475922 and p/n 10475924 in packages containing 10 screws each. The cmp sensor should be placed within the distributor where new installed screws using a thread locking compound should be tightened to 2.2 n.m (19 lb in). The rotor needs new screws which should be tightened to 1.9 n.m (18 lb in) after installation. Install the Distributor Cap by using new screws which you should tighten to 2.4 n.m (22 lb in). Complete the installation by reconnecting the cmp sensor electrical connector then reinstalling Spark Plug Wires to the Distributor Cap as well as installing the Ignition Coil before reconnecting the negative cable.
    Posted by ChevyPartsGiant Specialist
    Q:
    How to service and repair the Camshaft Position Sensor on Chevrolet Express 3500? Posted by Customer
    A:
    The first step for repairing or servicing the Camshaft Position Sensor starts with disconnecting the negative Battery Cable then removing the engine cover. During service begin by disconnecting Spark Plug Wires along with the ignition coil wire from Distributor and then disconnect the cmp sensor harness connector. First disconnect the Distributor cap screws along with the Distributor cap before proceeding to separate the rotor screws and the rotor. The alignment of the square slot on the reluctor wheel with the cmp sensor allows the removal of cmp sensor fasteners and sensor retrieval. During the replacement operation utilize fresh screws modified with a thread locking compound which can be obtained through gm p/n 10475922 for Distributor cap screws and gm p/n 10475924 for rotor screws packed in sets of ten screws each. Transport the cmp sensor through the reluctor wheel slot by aligning its square slot with the sensor then bolt the new mounting screws and tighten them to 1.6-2.8 n.m (14-25 lb in). The proper rotor alignment depends on maintaining the rotor locating tabs in position before screwing the rotor onto the reluctor wheel with new screws while tightening them to 1.5-2.4 n.m (13-22 lb in). Position the Distributor cap and secure it by using new Distributor cap screws which must be tightened between 1.8-3.0 n.m (16-26 lb in). To complete the process install the engine cover along with reconnecting the negative Battery Cable after connecting the cmp sensor harness connector and reconnecting the Spark Plug Wires and ignition coil wire.
    Posted by ChevyPartsGiant Specialist
    Q:
    How to replace the Crankshaft Position Sensor on Chevrolet K3500? Posted by Customer
    A:
    To replace the Crankshaft Position Sensor (CKP) first remove the electrical connector and the hold down bolt on the sensor, and then you remove the sensor from the Timing Cover. Before tighten the hold down bolt, make sure that the sensor is completely seated and stationary in the front cover otherwise it will lead to erratic operation and false codes. Check the sensor o-ring for wear, cracks, leakage or replace it, lubricating the new ring with clean engine oil prior to installation. While installing, the ckp sensor surfaces should be clean and burr-free. Mount the sensor into the Timing Cover and fasten it down with the hold down bolt and tighten it to 8 n.m (71 lb in). At last, reconnect the electrical connector and the ckp system variation learn procedure.
    Posted by ChevyPartsGiant Specialist
    Q:
    How to service and repair the Camshaft Position Sensor on Chevrolet S10? Posted by Customer
    A:
    Camshaft Position Sensor repair requires removal of Spark Plug Wires and ignition coil wire from the Distributor followed by unharnessing the camshaft position (CMP) sensor connector from the Distributor. The first step requires removal of the Distributor Cap screws and Distributor Cap along with rotor screws and rotor. Glide the square slot of the reluctor wheel into place with the cmp sensor before you unscrew the cmp sensor and its mounting screws. During installation keep out the previous cap and rotor screws and cmp sensor along with their screws. Replace Distributor screws with ones that have thread locking compound applied to them. After slotting the cmp sensor into the reluctor wheel position install new cmp mounting screws that require a torque setting of 2.2 n.m (19 lb in). Install the rotor onto the reluctor wheel before adding new rotor screws and torque them to 2 n.m (18 lb in). Put the Distributor Cap in its place and fasten it with new Distributor Cap screws at a torque of 2.4 n.m which equals 21 lb in. The final step involves connecting the cmp sensor harness connector and putting back the Spark Plug Wires and ignition coil wire.
    Posted by ChevyPartsGiant Specialist
    Q:
    How to replace the Camshaft Position Sensor on Chevrolet Silverado 1500 Classic? Posted by Customer
    A:
    The procedure to replace the Camshaft Position Sensor begins with removing ignition coil wire and Spark Plug Wires from the Distributor by either turning the spark plug wire boot 1/2 turn and pulling by boot only or using an appropriate tool. Disconnect the electrical connection of the cmp sensor before you remove the Distributor Cap screws and cap itself. Begin sensor replacement by removing the rotor screws along with the rotor while keeping the square slot on the reluctor wheel properly aligned with the cmp sensor before you detach the cmp screws and cmp sensor. Insert the new cmp sensor into the reluctor wheel slot then fasten new cmp screws treated with threadlock compound while tightening them to 2.2 n.m (19 lb in). Install the rotor using new screws tightened to 2 n.m (18 lb in) and then install the Distributor Cap guided by new screws tightened to 2.4 n.m (21 lb in). Complete the process by reconnecting the cmp sensor electrical connector then install the Spark Plug Wires along with the ignition coil wire to the Distributor.
    Posted by ChevyPartsGiant Specialist
    Q:
    How to replace the Crankshaft Position Sensor on Chevrolet Silverado 1500 Classic? Posted by Customer
    A:
    The vehicle needs proper support before starting the crankshaft position sensor replacement process. Start by taking out all engine shield bolts when needed before removing the shield itself. To replace the CKP sensor you must first disconnect its electrical connector then remove the bolt securing the sensor before removing it completely. Before you tighten the bolt during new CKP sensor installation ensure that the sensor is fully positioned to prevent erratic behavior and the generation of spurious diagnostic trouble codes. Removal of the O-ring original seal is strictly prohibited because replacement should use a new O-ring sealed with clean engine oil. Use new engine oil to lubricate a fresh O-ring seal before sensor installation. Lay the CKP sensor in place before bolting it down with the CKP sensor bolt tightened to 9 N.m (80 lb in). Secure the engine shield by installing its bolts, then connect the CKP sensor electrical connector before torquing the bolts to 20 N.m (15 lb ft). The CKP system variation learn procedure should be the last step to complete.
    Posted by ChevyPartsGiant Specialist
    Q:
    How to Ensure Proper Installation of the Crankshaft Position Sensor on Chevrolet S10? Posted by Customer
    A:
    Start the Crankshaft Position Sensor replacement by lifting the vehicle then disassemble steering shielding components according to the underbody shield package requirements. Start by disconnecting the CKP sensor harness connector before removing both the mounting bolt and sensor. Before tightening the mounting bolt to install a new CKP sensor make sure the sensor sits fully in the mount because this action prevents both erratic performance and false DTCs and you should avoid using the old O-ring. To install the CKP sensor replace its O-ring first and lubricate it with clean engine oil then complete sensor installation by verifying the mounting surface is burr-free and clean. Follow this installation procedure: install the CKP sensor with a torque of 9 N.m to 80 lb in and then attach the CKP sensor harness connector and reposition the steering linkage shield and its mounting bolts at 33 N.m to 24 lb ft torque. Perform the CKP system variation learn procedure after letting the vehicle drop to the ground.
    Posted by ChevyPartsGiant Specialist
    Q:
    How to replace the Camshaft Position Sensor on Chevrolet Silverado 1500? Posted by Customer
    A:
    The initial step to replace the Camshaft Position Sensor includes removing ignition coil wires and Spark Plug Wires from the Distributor by turning the boot of the spark plug wire 1/2 turn and extracting it through the boot alone or utilizing a suitable tool. You must disconnect the cmp sensor electrical connector followed by removing the Distributor cap screws before taking out the Distributor cap. Begin the process by removing rotor screws and rotor while achieving correct position between reluctor wheel's square slot and cmp sensor. The procedure requires removing cmp screws before taking out the cmp sensor. Fresh threadlock-coated screws must be applied during installation instead of using past components including screws and the Distributor cap and cmp sensor. Place the cmp sensor into the reluctor wheel slot and attach brand-new cmp screws which require tightening at 2.2 n.m (19 lb in). New rotor screws should be installed to 2 n.m (18 lb in) torque before the Distributor cap receives new screws secured to 2.4 n.m (21 lb in). Before completion, reattach the cmp sensor electrical connector along with the attachment of Spark Plug Wires and ignition coil wire to the Distributor.
    Posted by ChevyPartsGiant Specialist
    Q:
    How to replace the Crankshaft Position Sensor on Chevrolet S10? Posted by Customer
    A:
    Begin by raising the vehicle and follow up with steering linkage shield mounting bolt removal and then remove the steering linkage shield if your vehicle includes the underbody shield package. First disconnect the CKP sensor harness connector before you remove the mounting bolt to extract the CKP sensor from its location. The correct installation order for the new CKP sensor requires full seating before the mounting bolt tightening to prevent both erratic performance and DTC-related errors. Original O-ring will not be used when replacing parts. Before installing the new sensor replace its O-ring and apply clean engine oil as a lubricant on the O-ring. Safety-first involves cleaning any burrs from the mounting surface before installing the CKP sensor through its mounting bolt; use a torque of 9 N.m (80 lb in). Restore the CKP sensor harness connector before reattaching the steering linkage shield with mounting bolts that need tightening to 33 N.m (24 lb ft) torque. Before ending the repair process lower the vehicle and begin the CKP system variation learn procedure.
    Posted by ChevyPartsGiant Specialist
    Q:
    How to replace the Crankshaft Position Sensor on GMC C2500? Posted by Customer
    A:
    Begin sensor replacement for the crankshaft position (CKP) by placing the ignition key in off or lock and turning off every electrical load. The operation requires negative Battery Cable detachment to avoid damage and injuries when using tools near live electrical terminals. After elevating the vehicle start by taking off the Starter component. Before starting the install disconnect the electrical connector of the ckp sensor while cleaning the sensor area to resist debris entering the engine block. Separate the ckp sensor retaining fastener before pulling out the ckp sensor. Begin by installing the ckp sensor followed by tightening its retaining fastener to 25 n.m (18 lb ft). The ckp sensor electrical connector should be reconnected first before installing the Starter, lowering the vehicle and restoring the negative Battery Cable. The ckp system variation learn procedure should be done after you replace the sensor.
    Posted by ChevyPartsGiant Specialist
    Q:
    How to replace the Camshaft Position Sensor on GMC Savana 1500? Posted by Customer
    A:
    The first step to replace the cmp sensor starts with removing the engine cover followed by disconnecting all Spark Plug Wires and ignition coil wire from the Distributor. To begin with disconnect the cmp sensor harness connector from the Distributor before you remove the Distributor Cap screws then remove the Distributor Cap itself. You should then remove both rotor screws and rotor while properly lining up the square slot of the reluctor wheel with the cmp sensor. The next step involves removing both cmp screws before extracting the cmp sensor from its position. When installing the Distributor use new screws which must have thread locking compound applied on them instead of reusing previous hardware components. Place the cmp sensor through the reluctor wheel slot before installing new mounting screws that should be tightened to 2.2 n.m (20 lb in). After placing the rotor onto the reluctor wheel use new rotor screws to fasten it at 2 n.m (18 lb in) torque. Fasten the Distributor Cap using new screws and follow the tightening protocol of 2.4 n.m (21 lb in). The final step requires connection of the cmp sensor harness and reattachment of Spark Plug Wires as well as ignition coil wire before reinstalling the engine cover.
    Posted by ChevyPartsGiant Specialist
    Q:
    How to service the camshaft position sensor on GMC C2500? Posted by Customer
    A:
    The service process for the Camshaft Position (CMP) sensor begins with disconnecting its electrical connector while simultaneously cleaning nearby areas to avoid engine entry of debris. The first step requires you to detach the CMP sensor retaining bolt followed by removing the CMP sensor from its position. After repositioning place the CMP sensor with its retaining bolt and tighten it to 25 N.m (18 lb ft). Connect electrical connector on CMP sensor as the final step of completion.
    Posted by ChevyPartsGiant Specialist
    Q:
    How to service and repair the Crankshaft Position Sensor on GMC Savana 1500? Posted by Customer
    A:
    Service procedures for crankshaft position sensors start with installing a scan tool to monitor powertrain control module (PCM) diagnostic trouble codes (DTCs). Consult the diagnostic trouble code (DTC) list for additional details if any DTCs appear except P1336. Proceed to close the vehicle's hood, then execute the crankshaft position variation learn procedure from the scan tool while watching for any engine fuel cutoffs. Follow the scan tool's instructions: use the following steps to perform the crankshaft position system variation learn procedure: first, apply the vehicle's parking brake, followed by blocking the drive wheels. Then cycle the ignition between off to on positions before applying brake pedal pressure to start and idle the engine while turning off the A/C and selecting vehicle transmission either park (A/T) or neutral (M/T). During the scan tool inspection, it will check crankshaft position sensor activity (DTC P0335 or P0336 in case of issues) and camshaft position sensor activity (DTC P0341 in case of issues) along with engine coolant temperature measurements after the temperature reaches its threshold. The scan tool enables crankshaft position system variation learn procedures following tool preparation and requires user throttle release when deceleration occurs to allow engine control return to the operator. During the speed increase maneuver, maintain a slow ramp-up to reach the target RPM, then stop the throttle input when the engine reaches the fuel cutoff point. The scan tool will show a message "learn status" during this procedure. Check engine symptoms when a learned status message fails to appear without any newly-set DTCs. Check the DTC list before continuing if your vehicle shows any active fault codes. A thirty-second ignition shutdown follows successful completion of the learn procedure.
    Posted by ChevyPartsGiant Specialist
    Q:
    How to replace the Crankshaft Position Sensor on GMC Jimmy? Posted by Customer
    A:
    In order to replace the Crankshaft Position (CKP) Sensor, one must first lift up the vehicle. Remove the underbody shield mounting bolts if the underbody shield package is installed, and then the underbody shield. Deplug CKP sensor harness connector, back off the CKP sensor mounting bolt and remove CKP sensor. When fixing a new CKP sensor, make sure it is properly seated to minimize erratic performance and false DTCs by tightening the bolting bolt. Replace the CKP sensor O-ring with a new unit and lubricate it with clean engine oil, and mount surface to be clean and free of burrs then install CKP sensor. Mount the CKP sensor mounting bolt and tighten it to 20 N.m (15 lbs ft). Reconnect the harness connector of the CKP sensor and remount the steering linkage shield tightening the mounting bolts with 33 N.m (24 lb ft). Lastly, lower the vehicle and do the CKP System Variation Learn Procedure.
    Posted by ChevyPartsGiant Specialist
    Q:
    How to service the Camshaft Position Sensor (CMP) on GMC Savana 2500? Posted by Customer
    A:
    The procedure to service a Camshaft Position Sensor (CMP) requires two steps of cleaning the sensor area followed by removing the engine cover. First disconnect the CMP sensor electrical connector and after removing its bolt you can remove the CMP sensor from its position. Reposition the CMP sensor to its installation place while following the Fastener Notice in Service Precautions before installing the CMP sensor bolt at 25 N.m (18 lb ft). Connect and secure the CMP sensor electrical connector and complete the installation by putting back the engine cover.
    Posted by ChevyPartsGiant Specialist
    Q:
    How to service the camshaft position sensor on GMC Jimmy? Posted by Customer
    A:
    Service on the Camshaft Position Sensor requires you to first disconnect Spark Plug Wires along with the ignition coil wire from the Distributor and then remove the cmp harness connector from the Distributor. The first step of the service should begin with distributing cap screw removal followed by Distributor Cap removal then rotor screws removal and rotor removal. Protecting the reluctor wheel slot square and removing cmp screws allows removal of the cmp sensor from the Distributor. The installation procedure requires new replacement screws which should possess thread locking properties for cap and cmp sensor and rotor screw attachment. Insert the cmp sensor through the reluctor wheel slot while then installing new cmp mounting screws that require tightening to 2.2 n.m (20 lb in). First install the rotor onto the reluctor wheel before using new rotor screws to fasten it with a torque setting of 2.0 n.m (18 lb in). Use new Distributor Cap screws to fasten the Distributor Cap before tightening them to 2.4 n.m (21 lb in). To finish the process connect the cmp sensor harness connector then install back the Spark Plug Wires together with the ignition coil wire.
    Posted by ChevyPartsGiant Specialist
    Q:
    How to service the camshaft position sensor on GMC Safari? Posted by Customer
    A:
    Service of the Camshaft Position Sensor begins with disconnecting the negative Battery Cable while removing the engine cover. The first step in servicing the Camshaft Position Sensor involves removing connectors starting with Spark Plug Wires and ignition coil wire from the Distributor followed by disconnecting the cmp harness connector. Remove the Distributor cap screws before taking away the Distributor cap and rotor screws. Recheck the rotor alignment with the reluctor wheel before putting them back together. Begin by taking out both the rotor along with the cmp screws. Afterwards position the slot in the reluctor wheel with the cmp sensor before removing it. Replacement screws with thread locking compound must be used for all installation applications. The cap and cmp sensor screws can be purchased as p/n 10475922 (pkg of 10 screws) while p/n 10475924 (pkg of 10 screws) should be used for the rotor screws. Insert the cmp sensor through the slot where the reluctor wheel slot is aligned so you can install new cmp mounting screws before snugging down each one to 2.2 n.m (19 lb in). Apply new rotor screws onto the reluctor wheel before securing them tightly at 1.9 n.m (18 lb in). Fasten the Distributor cap with new Distributor cap screws that need to be tightened to 2.4 n.m (21 lb in). Complete the process by linking the cmp harness connector and reinstalling the Spark Plug Wires as well as the ignition coil wire while also putting back the engine cover and replacing the negative Battery Cable.
    Posted by ChevyPartsGiant Specialist
    Q:
    How to service the camshaft position sensor on GMC Savana 3500? Posted by Customer
    A:
    The Camshaft Position Sensor service starts by turning off ignition then removing the engine cover. Begin service of the Camshaft Position Sensor by disconnecting Spark Plug Wires and ignition coil wire from Distributor hardware followed by disconnecting the camshaft position (CMP) sensor electrical connector at the Distributor location. Begin the procedure by unscrewing both Distributor Cap screws then removing the cap. After that detach the rotor screws before removing the rotor. Apply the square slot on the reluctor wheel to the cmp sensor then unscrew and remove both the cmp sensor screws and cmp sensor. Installation requires the replacement of Distributor Cap and cmp sensor screws with thread locking compound coated screws that are available as gm p/n 10475922 (pkg of 10 screws) for Distributor Cap and gm p/n 10475924 (pkg of 10 screws) for rotor. Slip the square slot of the reluctor wheel onto the cmp sensor before inserting the sensor through the slot on the reluctor wheel. Use new cmp sensor mounting screws that you will tighten to a torque value of 2.2 n.m (20 lb in). The locating tabs on the rotor need to remain intact for proper alignment because damage requires rotor substitution. Place the Distributor rotor onto the reluctor wheel before securing it with new rotor screws which should be tightened to 2.2 n.m (20 lb in). Close the Distributor Cap installation by fastening new Distributor Cap screws which need tightening at 2.4 n.m (21 lb in). The cmp sensor electrical connector should be connected after reinstalling the engine cover together with Spark Plug Wires and the ignition coil wire.
    Posted by ChevyPartsGiant Specialist
    Q:
    How to service and repair the Crankshaft Position Sensor on GMC Savana 3500? Posted by Customer
    A:
    To service and repair Crankshaft Position Sensor, start by using a scan tool and looking up the powertrain control module for dtcs and if any dtcs except p1336 are found, refer to the dtc list for additional information. Choose the crank shaft position variation learn procedure from the scan tool and note the fuel interruption for the concerned engine. Follow the scan tool's instructions: block the drive wheels, engage the parking brake on the vehicle, cycle the ignition from off to on holding the Brake Pedal, start and idle the engine, turn off the a/c, and turn the vehicle transmission to park (A/T) or to neutral (M/T). The scan tool will check some of the signals of the components to ensure that all the conditions are fulfilled, like ckp sensor activity, cmp sensor activity, and engine coolant temperature; ride the engine until such time as the correct level of coolant temperature is achieved should it be low. Begin the crankshaft position system variation learn procedure with the scan tool while during this process, being quick to release the throttle if the engine begins to decelerate allowing the engine control back into the operator's hands. Slowly increase the engine speed to observed rpm and let off the throttle when the fuel cut-off is achieved. The scan tool will indicate "learn status: learned this ignition"; learned this ignition"; and if message is not displayed, and no other dtcs are stored, check for engine symptoms, and if dtc (s) present, refer to dtc list. At last, turn off the ignition for 30 seconds after successfully completing the learn procedure.
    Posted by ChevyPartsGiant Specialist
    Q:
    How to service and repair the Camshaft Position Sensor on GMC Sonoma? Posted by Customer
    A:
    Beginning Camshaft Position Sensor repair requires users to disconnect both Spark Plug Wires and ignition coil wire from the Distributor and detach the sensor's harness connector from the Distributor. Start by unscrewing both the Distributor cap screws and then the Distributor cap before moving on to unscrew rotor screws and remove the rotor. Set the reluctor wheel square slot precisely on the cmp sensor then use a screwdriver to remove the cmp screws, safety pin cmp sensor area. Install the new components by avoiding the reuse of the Distributor cap, cmp sensor and rotor screws with thread locking compound. Threads screws with locking compound before replacing them. You should insert the cmp sensor into the reluctor wheel slot then mount new cmp screws using 2.2 n.m (19 lb in) of torque. Put the rotor in position on the reluctor wheel before tightening new rotor screws to 2 n.m torque (18 lb in). Bolt down the Distributor cap using new screws which require a torque of 2.4 n.m (21 lb in). The final step consists of reconnecting both the cmp sensor harness connector and the Spark Plug Wires and the ignition coil wire.
    Posted by ChevyPartsGiant Specialist
    Q:
    How to replace the Crankshaft Position Sensor on GMC Sierra 1500 Classic? Posted by Customer
    A:
    The vehicle needs proper support before starting the crankshaft position sensor replacement process. Start by taking out all engine shield bolts when needed before removing the shield itself. To replace the CKP sensor you must first disconnect its electrical connector then remove the bolt securing the sensor before removing it completely. Before you tighten the bolt during new CKP sensor installation ensure that the sensor is fully positioned to prevent erratic behavior and the generation of spurious diagnostic trouble codes. Removal of the O-ring original seal is strictly prohibited because replacement should use a new O-ring sealed with clean engine oil. Use new engine oil to lubricate a fresh O-ring seal before sensor installation. Lay the CKP sensor in place before bolting it down with the CKP sensor bolt tightened to 9 N.m (80 lb in). Secure the engine shield by installing its bolts, then connect the CKP sensor electrical connector before torquing the bolts to 20 N.m (15 lb ft). The CKP system variation learn procedure should be the last step to complete.
    Posted by ChevyPartsGiant Specialist
    Q:
    How to replace the Camshaft Position Sensor on GMC Sierra 1500 Classic? Posted by Customer
    A:
    The procedure to replace the Camshaft Position Sensor begins with removing ignition coil wire and Spark Plug Wires from the Distributor by either turning the spark plug wire boot 1/2 turn and pulling by boot only or using an appropriate tool. Disconnect the electrical connection of the cmp sensor before you remove the Distributor Cap screws and cap itself. Begin sensor replacement by removing the rotor screws along with the rotor while keeping the square slot on the reluctor wheel properly aligned with the cmp sensor before you detach the cmp screws and cmp sensor. Insert the new cmp sensor into the reluctor wheel slot then fasten new cmp screws treated with threadlock compound while tightening them to 2.2 n.m (19 lb in). Install the rotor using new screws tightened to 2 n.m (18 lb in) and then install the Distributor Cap guided by new screws tightened to 2.4 n.m (21 lb in). Complete the process by reconnecting the cmp sensor electrical connector then install the Spark Plug Wires along with the ignition coil wire to the Distributor.
    Posted by ChevyPartsGiant Specialist
    Q:
    What should be done after securing the rotor for the 2004 Chevrolet Astro? Posted by Customer
    A:
    Install the distributor cap and secure it with new distributor cap screws, tightening them to 2.4 Nm (21 lb in.).
    Posted by ChevyPartsGiant Specialist
    See expert answers on similar Camshaft Position Sensor
    Q:
    How should the CMP sensor be installed for the 2005 Chevrolet Astro? Posted by Customer
    A:
    Insert the CMP sensor through the reluctor wheel slot and install new CMP mounting screws, tightening them to 2.2 N.m (19 lb in).
    Posted by ChevyPartsGiant Specialist
    See expert answers on similar Camshaft Position Sensor
    Q:
    What is the torque specification for the CKP sensor mounting bolt for the 2001 Chevrolet Astro? Posted by Customer
    A:
    Tighten it to 8 N.m (71 lb in).
    Posted by ChevyPartsGiant Specialist
    See expert answers on similar Crankshaft Position Sensor
    Q:
    What is the final step after completing the installation for the 2003 Chevrolet Astro? Posted by Customer
    A:
    Lower the vehicle and perform the CKP System Variation Learn Procedure.
    Posted by ChevyPartsGiant Specialist
    See expert answers on similar Crankshaft Position Sensor
    Q:
    How do you disconnect the CKP sensor for the 2005 Chevrolet Astro? Posted by Customer
    A:
    Disconnect the CKP sensor harness connector.
    Posted by ChevyPartsGiant Specialist
    See expert answers on similar Crankshaft Position Sensor
    Q:
    What is the first step to replace the Crankshaft Position (CKP) Sensor for the 2004 Chevrolet Astro? Posted by Customer
    A:
    First, raise the vehicle.
    Posted by ChevyPartsGiant Specialist
    See expert answers on similar Crankshaft Position Sensor
    Q:
    What should be done after disconnecting the CKP sensor harness connector for the 2005 Chevrolet Express 2500? Posted by Customer
    A:
    Remove the CKP sensor mounting bolt and then take out the CKP sensor.
    Posted by ChevyPartsGiant Specialist
    See expert answers on similar Crankshaft Position Sensor
    Q:
    What is the next step after disconnecting the CKP sensor for the 2005 Chevrolet Blazer? Posted by Customer
    A:
    Remove the CKP sensor mounting bolt and take out the CKP sensor.
    Posted by ChevyPartsGiant Specialist
    See expert answers on similar Crankshaft Position Sensor
    Q:
    What is the final step after replacing the CKP sensor for the 2004 Chevrolet Express 1500? Posted by Customer
    A:
    Perform the CKP system variation learn procedure.
    Posted by ChevyPartsGiant Specialist
    See expert answers on similar Crankshaft Position Sensor
    Q:
    How should the reluctor wheel be aligned for the 2005 Chevrolet Express 2500? Posted by Customer
    A:
    Align the square slot in the reluctor wheel with the CMP sensor.
    Posted by ChevyPartsGiant Specialist
    See expert answers on similar Camshaft Position Sensor
    Q:
    What should be disconnected after removing the engine cover for the 2002 Chevrolet Express 2500? Posted by Customer
    A:
    Disconnect the spark plug wires and ignition coil wire from the distributor.
    Posted by ChevyPartsGiant Specialist
    See expert answers on similar Camshaft Position Sensor
    Q:
    What should be ensured about the CKP sensor mounting surfaces for the 2000 Chevrolet Express 3500? Posted by Customer
    A:
    They should be clean and free of burrs.
    Posted by ChevyPartsGiant Specialist
    See expert answers on similar Crankshaft Position Sensor
    Q:
    What should be checked if the "Learn Status" message does not appear for the 2002 Chevrolet Express 2500? Posted by Customer
    A:
    Check for symptoms related to engine mechanical issues; if a DTC is present, consult the DTC List for applicable details.
    Posted by ChevyPartsGiant Specialist
    See expert answers on similar Crankshaft Position Sensor
    Q:
    What is the next step after removing the engine shield for the 2004 Chevrolet Silverado 1500? Posted by Customer
    A:
    Disconnect the CKP sensor electrical connector.
    Posted by ChevyPartsGiant Specialist
    See expert answers on similar Crankshaft Position Sensor
    Q:
    What is the next step after installing the O-ring seal for the 2007 Chevrolet Silverado 1500? Posted by Customer
    A:
    Install the CMP sensor to the front cover, followed by the CMP sensor wire harness.
    Posted by ChevyPartsGiant Specialist
    See expert answers on similar Camshaft Position Sensor
    Q:
    What is the first step to replace the Camshaft Position (CMP) Sensor for the 2005 Chevrolet Silverado 1500? Posted by Customer
    A:
    First, remove the ignition coil wire and spark plug wires from the distributor by twisting the boot 1/2 turn and pulling only on the boot or using a tool designed for this purpose.
    Posted by ChevyPartsGiant Specialist
    See expert answers on similar Camshaft Position Sensor
    Q:
    What is the torque specification for tightening the CKP sensor bolt for the 2005 Chevrolet Silverado 1500? Posted by Customer
    A:
    Tighten it to 9 N.m (80 lb in).
    Posted by ChevyPartsGiant Specialist
    See expert answers on similar Crankshaft Position Sensor
    Q:
    What should be removed after disconnecting the CMP sensor harness connector for the 2001 GMC Safari? Posted by Customer
    A:
    Remove the distributor cap screws and the distributor cap.
    Posted by ChevyPartsGiant Specialist
    See expert answers on similar Camshaft Position Sensor
    Q:
    What specific component signals will the scan tool monitor for the 2001 GMC Safari? Posted by Customer
    A:
    CKP sensor activity (DTC P0335 or P0336 if an issue arises), CMP sensor activity (DTC P0341 if an issue arises), and engine coolant temperature, which should be warmed up adequately.
    Posted by ChevyPartsGiant Specialist
    See expert answers on similar Crankshaft Position Sensor
    Q:
    What should be done with the old screws during installation for the 2001 GMC Savana 3500? Posted by Customer
    A:
    Do not reuse the old cap, CMP sensor, and rotor screws; instead, use replacement screws coated with a thread locking compound.
    Posted by ChevyPartsGiant Specialist
    See expert answers on similar Camshaft Position Sensor
    Q:
    What should be used instead of the old screws during installation for the 2002 GMC Safari? Posted by Customer
    A:
    Use replacement screws coated with a thread locking compound.
    Posted by ChevyPartsGiant Specialist
    See expert answers on similar Camshaft Position Sensor
    Q:
    What is the final step after replacing the CKP sensor for the 2002 GMC Savana 3500? Posted by Customer
    A:
    Perform the CKP system variation learning procedure.
    Posted by ChevyPartsGiant Specialist
    See expert answers on similar Crankshaft Position Sensor
    Q:
    What should be ensured when installing the CKP sensor for the 2006 GMC Sierra 1500? Posted by Customer
    A:
    Ensure it is fully seated before tightening the bolt to avoid erratic performance and false diagnostic trouble codes (DTCs).
    Posted by ChevyPartsGiant Specialist
    See expert answers on similar Crankshaft Position Sensor
    Q:
    What should be done with the engine speed during the procedure for the 2002 GMC Safari? Posted by Customer
    A:
    Gradually increase the engine speed to the observed RPM and release the throttle when the fuel cut-off is reached.
    Posted by ChevyPartsGiant Specialist
    See expert answers on similar Crankshaft Position Sensor
    Q:
    How do you disconnect the CKP sensor for the 2001 GMC Jimmy? Posted by Customer
    A:
    Disconnect the CKP sensor harness connector.
    Posted by ChevyPartsGiant Specialist
    See expert answers on similar Crankshaft Position Sensor
    Q:
    What should be done if it is equipped with the underbody shield package for the 2001 GMC Savana 2500? Posted by Customer
    A:
    Remove the mounting bolts for the steering linkage shield and then take off the shield.
    Posted by ChevyPartsGiant Specialist
    See expert answers on similar Crankshaft Position Sensor
    Q:
    What is the first step to replace the Crankshaft Position (CKP) Sensor for the 2001 GMC Savana 3500? Posted by Customer
    A:
    First, disconnect the negative battery cable and raise the vehicle.
    Posted by ChevyPartsGiant Specialist
    See expert answers on similar Crankshaft Position Sensor
    Q:
    How should the reluctor wheel be aligned for the 2001 GMC Jimmy? Posted by Customer
    A:
    Align the square slot in the reluctor wheel with the CMP sensor.
    Posted by ChevyPartsGiant Specialist
    See expert answers on similar Camshaft Position Sensor
    Q:
    What needs to be done with the CKP sensor before removal for the 2003 GMC Savana 2500? Posted by Customer
    A:
    Disconnect the CKP sensor electrical connector and clean the area around the sensor to prevent debris from entering the engine.
    Posted by ChevyPartsGiant Specialist
    See expert answers on similar Crankshaft Position Sensor
    Q:
    What is the final step after successfully completing the learn procedure for the 2003 GMC Sonoma? Posted by Customer
    A:
    Turn OFF the ignition for 30 seconds.
    Posted by ChevyPartsGiant Specialist
    See expert answers on similar Crankshaft Position Sensor
    Q:
    What should be ensured when installing the new CKP sensor for the 2002 GMC Safari? Posted by Customer
    A:
    Ensure it is fully seated before tightening the mounting bolt to avoid erratic performance and false DTCs.
    Posted by ChevyPartsGiant Specialist
    See expert answers on similar Crankshaft Position Sensor
    Q:
    What should you do if any DTC's other than P0315 are present for the 2003 GMC Safari? Posted by Customer
    A:
    Consult the Diagnostic Trouble Code (DTC) List for details.
    Posted by ChevyPartsGiant Specialist
    See expert answers on similar Crankshaft Position Sensor
    Q:
    What should be done with the hood and transmission for the 2000 GMC Savana 3500? Posted by Customer
    A:
    Close the hood and place the vehicle's transmission in Park (A/T) or Neutral (M/T).
    Posted by ChevyPartsGiant Specialist
    See expert answers on similar Crankshaft Position Sensor
    Q:
    What should be ensured when installing the new CKP sensor for the 2007 GMC Sierra 1500? Posted by Customer
    A:
    It is fully seated before tightening the bolt.
    Posted by ChevyPartsGiant Specialist
    See expert answers on similar Crankshaft Position Sensor
    Q:
    What is the next step after lubricating the O-ring seal for the 2007 GMC Sierra 1500? Posted by Customer
    A:
    Install the CMP sensor and wiring harness jumper to the engine front cover.
    Posted by ChevyPartsGiant Specialist
    See expert answers on similar Camshaft Position Sensor
    If you have any questions about this product, please don't hesitate to ask us. We will be happy to help you!

OEM GM 19417445, Excellent Performance and Perfect Fitment

To ensure reliability, purchase GM part # 19417445 Camshaft Position Sensor. It is sometimes referred to as GM Camshaft Position Sensor, GM Crankshaft Position Sensor. Choosing OEM parts is the optimal decision for guaranteeing superior quality and perfect performance. These components undergo stringent quality checks and are carefully constructed to comply with GM's factory specifications, ensuring a smooth installation process.

ChevyPartsGiant.com is a leading supplier of genuine GM parts such as GM 19417445 Camshaft Position Sensor. Our website boasts an extensive inventory of OEM GM parts, available at highly competitive prices in the market. Should you require any new genuine GM parts, rest assured we will deliver them swiftly and efficiently to your doorstep. Furthermore, all our parts come with the assurance of a manufacturer's warranty. For detailed Chevy parts information, click here.
Choose ChevyPartsGiant for discounted prices, exceptional service and fast delivery