
Popular OEM GMC Sierra 1500 Parts
- Body & Hardware Parts View More >
- Steering Parts View More >
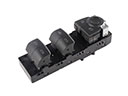
- Electrical Parts View More >
- Air & Fuel Delivery Parts View More >
- Charging & Starting Parts View More >
- Engine Parts View More >
- Belts & Cooling Parts View More >
- Suspension Parts View More >
- Driveline & Axles Parts View More >
- Emission Control & Exhaust Parts View More >
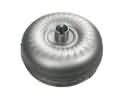
- Transmission Parts View More >
- Brakes Parts View More >


Why Buy Genuine GMC Sierra 1500 Parts From ChevyPartsGiant.com
Looking for real GMC Sierra 1500 parts? ChevyPartsGiant.com may be a better choice to find genuine parts at wallet-friendly prices. We sell only OEM GMC Sierra 1500 parts, ensuring perfect fit, reliability, and long-term performance. With our website, you can easily get access to the same parts found at local GMC stores. All components are produced by GMC and are exclusively fitted on GMC Sierra 1500 automobiles. By shopping at our store, you can enjoy the quality of the GMC factory without the high prices of brick-and-mortar facilities. We achieve this because we are an online store operating at lower costs, which we pass on to you. We also have a user-friendly platform where you can find and order genuine GMC Sierra 1500 parts swiftly. We are here to make your process of restoring a GMC Sierra 1500 or dealing with simple repairs quick and inexpensive. We also make it easy to obtain GMC Sierra 1500 parts at competitive shipping prices and a team of knowledgeable staff ready to take your order. Choose ChevyPartsGiant.com to save time and money, as well as keep your GMC Sierra 1500 in the good condition.
When the GMC Sierra 1500 debuted in 1999 it took over from the C/K Series and gradually developed into a significant full-size pickup truck. The initial GMC Sierra 1500 model built upon GM's GMT800 platform provided options for a 4.3L V6 engine, a 4.8L V8 engine, and a 5.3L V8 engine with specific trim configurations. Subsequent versions of the GMC Sierra 1500 incorporated the 6.2L V8 engine option to deliver more power. The newer Sierra 1500 models provide selectable drive modes including Sport, Tow/Haul and Off-Road which improves vehicle handling and performance. The initial Sierra 1500 models included 4-speed automatic and 5-speed manual transmissions which depended on the vehicle's trim level and configuration. The GMC Sierra 1500 provides three wheelbase options at 119, 133 and 143.5 inches to deliver versatile truck functionality. Customers can choose from different cab configurations in the GMC Sierra 1500 which produces an extensive interior space while its total length spans between 210 and 240 inches based on selected cab and bed features. The Sierra 1500 mild hybrid model came out in the mid-2000s before ending production with starter-generator technology providing limited fuel efficiency improvements. GMC Sierra 1500 vehicles from multiple generations received progressive improvements by integrating advanced components with innovative designs resulting in better performance and enhanced external aesthetics. The GMC Sierra 1500 remains a leading truck model because its original part specifications adhere to precise manufacturer standards and receive superior manufacturer support and customer service.
The GMC Sierra 1500 has issues that cluster around the drivetrain control, HVAC air flow, and fuel level management. In the drivetrain, there is the possibility of the Sierra 1500 showing a service 4WD message. Typical problems are a broken transfer case position sensor or transfer case selector switch. Synchronize the module and verify encoder data and mend faults so as to reinstate the accuracy of the shift. The HVAC issues on the Sierra 1500 usually find their root in a broken AC mode door actuator. The symptoms will be stuck vents, wrong temperature, and we may also hear clicking behind the dash during a controllable actuation. Perform command actuator tests and recalibrate the system, and install a new actuator in case the response remains erratic. The Sierra 1500 can also display an erratic gauge in the fuel system. The fuel level sensor dies within the module, so the readings become erratic or fail to read fully. On higher-mileage vehicles, replace the sensor or the entire fuel pump. These actions assist a Sierra 1500 to sustain stable power delivery, cabin comfort, and correct range. Stay with the GMC diagnostic flowcharts and check all fixations by driving the car a few blocks. Use new parts and match calibrations with the GMC service information to achieve long-lasting results. Sierra 1500 should have its software updated when modules are replaced so that compatibility is achieved. This will comply with practices in GMC maintenance and avoid the occurrence of repeat faults.
GMC Sierra 1500 Parts Questions & Answers
- Q: How to replace the water pump (LU3) on a 4.3L engine on GMC Sierra 1500?A: The first step to replace a Water Pump (LU3) in a 4.3l engine is to eliminate the air cleaner outlet duct and Drive Belt. Empty the cooling system through either the vac-n-fill process or the static fill technique. Change the radiator outlet hose clamps at the surge tank and Water Pump before taking the hose off its connections on both components. Shift in position the hose clamps on the Water Pump inlet and take off the inlet hose. Install the j 41240 fan clutch remover and installer tool to grip the Water Pump Pulley. After removing all the pulley bolts replace these with the Water Pump bolts. Finally take out the Water Pump assembly by using the tool. Take out the worn gaskets from the Water Pump and examine the pump for damages before installing new components. When using saved bolts apply gm 12346004 (Canadian 10953480) sealant or its equivalent on Water Pump bolt threads. Place fresh Water Pump gaskets and the pump into position before fixing the bolts to 45 n.m (33 lb ft). Use the j 41240 (J 41240) to hold the Water Pump Pulley while tightening its bolts to 25 n.m (18 lb ft). Set the Water Pump hose clamps with their forward-pointing tangs level with the Water Pump inlet hose diameter. Position the inlet hose clamps before putting in the Water Pump inlet hose. Place the radiator outlet hose back onto both the Water Pump and surge tank before repositioning its clamps. Attach the Drive Belt and the air cleaner outlet duct to the vehicle. Complete the cooling system setup by choosing between vac-n-fill method or static fill method before testing for any fluid loss.
- Q: How to replace the alternator on a V8 engine on GMC Sierra 1500?A: A v8 engine requires the removal of the negative Battery Cable during generator replacement. You should begin by removing both the intake manifold sight shield along with the accessory Drive Belt. Secondly, disconnect the engine harness electrical connector from the generator and move the generator battery jumper cable boot to its new position. Before removing the generator, start by disassembling the generator battery jumper cable nut along with the terminal from the generator stud and the generator bolts to extract the component. Loosen the existing generator bolts before placing a new generator in position and ensure it is securely in place. Tighten the generator bolts while maintaining a torque of 55 nm (41 lb ft). You should attach the generator battery jumper cable terminal to the generator stud while tightening the nut to 9 nm (80 lb in). Put the jumper cable boot on the generator battery terminal while joining the engine harness electrical connector to the generator. After installing the accessory Drive Belt and intake manifold sight shield, reestablish the vehicle's negative battery connection.
- Q: How to replace the camshaft on GMC Sierra 1500?A: The Camshaft replacement requires starting with Radiator and A/C Condenser extraction along with lifter and Timing Chain and Camshaft sprocket elimination followed by balance shaft drive gear removal. First you must remove both Camshaft retainer bolts and retainer while carefully handling the Camshaft to prevent damage to the Camshaft bearings because all Camshaft journals share the same diameter. The front bolt holes receive three 5/16-18 x 4.0 inch bolts to serve as handles during Camshaft extraction by rotating and pulling out the Camshaft. Preliminary bolt removal from the system enables subsequent examination and cleaning of the Camshaft along with bearings if necessary. Installation of a new Camshaft requires engine oil replacement alongside the filter change along with the addition of engine oil supplement to the oil reservoir. Proper lubricant must be applied to the engine Camshaft lobes and bearing journals and Camshaft bearings. Select three bolts to use as a handle for engine Camshaft installation and afterward remove these bolts while applying threadlocker to reused fasteners when possible. Screw in the Camshaft retainer bolts until they achieve a torque of 12 n.m (106 lb in), then add the balance shaft drive gear, timing chain, Camshaft sprocket, lifters, a/c condenser and finish with the Radiator installation.
- Q: How to replace the Front Drive Axle Inner Wheel Seal and Inner Shaft Bearing on GMC Sierra 1500?A: The repair process for both front drive axle inner shaft seal and inner shaft bearing requires users to first service the differential carrier assembly by draining it while lifting the vehicle. Start by disassembling differential carrier case and removing Clutch Fork assembly components as well as inner Axle Shaft before access to right side seal or bearing inside inner Axle Shaft housing. Position the inner Axle Shaft housing within a vise clamp only along the mounting flange. The j 29369-1 or j 29369-2 acts behind the inner Axle Shaft seal or bearing for necessary applications while the j 2619-01 attaches to these components to extract the seal or bearing. To replace the left side seal only users must first mark the inner Axle Shaft and wheel drive shaft alignment and then break the connection with the shock module if servicing the 8.25 inch axle, disconnect the wheel drive shaft from the inner Axle Shaft and remove the inner Axle Shaft and seal using a hammer and brass drift. A different procedure exists for differential carrier assembly extraction and vise positioning then inner Axle Shaft and seal removal on both left sides. The right side bearing installation requires j 36609 and j 8092 and the new Axle Shaft seal needs j 45225 and j 8092 to perform the installation process. Use a soft-faced mallet to tap the inner Axle Shaft gently into place before reintegrating housing components with the Clutch Fork. Finally, insert the differential carrier case with the inner Axle Shaft housing. When removing both the left bearing and seal install them according to the same sequence. Set the inner Axle Shaft correctly into the differential case side gear before reinstalling the front differential carrier assembly when possible. To install the left-side seal use the j 45225 along with a soft-faced mallet and return the wheel drive shaft to connect with the inner Axle Shaft while tightening bolts to 79 nm (58 lb ft). The final step entails adding the correct fluid into the differential carrier assembly after which the vehicle should be lowered.


