Popular OEM Cadillac Escalade Parts
- Body & Hardware Parts View More >
- Steering Parts View More >
- Electrical Parts View More >
- Air & Fuel Delivery Parts View More >
- Charging & Starting Parts View More >
- Engine Parts View More >
- Belts & Cooling Parts View More >
- Suspension Parts View More >
- Driveline & Axles Parts View More >
- Emission Control & Exhaust Parts View More >
- Transmission Parts View More >
- Brakes Parts View More >
Why Buy Genuine Cadillac Escalade Parts From ChevyPartsGiant.com
Looking for real Cadillac Escalade parts? ChevyPartsGiant.com may be a better choice to find genuine parts at wallet-friendly prices. We sell only OEM Cadillac Escalade parts, ensuring perfect fit, reliability, and long-term performance. With our website, you can easily get access to the same parts found at local Cadillac stores. All components are produced by Cadillac and are exclusively fitted on Cadillac Escalade automobiles. By shopping at our store, you can enjoy the quality of the Cadillac factory without the high prices of brick-and-mortar facilities. We achieve this because we are an online store operating at lower costs, which we pass on to you. We also have a user-friendly platform where you can find and order genuine Cadillac Escalade parts swiftly. We are here to make your process of restoring a Cadillac Escalade or dealing with simple repairs quick and inexpensive. We also make it easy to obtain Cadillac Escalade parts at competitive shipping prices and a team of knowledgeable staff ready to take your order. Choose ChevyPartsGiant.com to save time and money, as well as keep your Cadillac Escalade in the good condition.
The Cadillac Escalade acts as Cadillac's flagship luxury SUV model which received substantial engineering modifications throughout its evolutionary sequence. From 1999 until 2001 the Cadillac Escalade existed before its replacement through the GMT820 platform which brought improved strength and performance abilities. By using its Vortec V8 engine the Cadillac Escalade achieves strong performance capabilities before VVT technology appeared in later models to enhance power and efficiency. The automaker provides 345 horsepower to the engine which enables both fast acceleration and precise handling capabilities. The Cadillac Escalade integrates its six-speed automatic transmission system through model-based gear manipulation to deliver accomplished driving experiences. With the addition of the new Escalade ESV version the vehicle series gained additional storage capabilities without reducing its standard engine power. The 2013 model of Cadillac Escalade introduced tri-zone climate control features and premium Nuance leather seats to deliver enhanced comfort for its passengers. Factory OEM parts provided by Cadillac help maintain long-term reliability along with durability in the Escalade vehicle. The elements undergo extensive quality screening procedures during manufacturing which decreases defects to offer enhanced driving satisfaction. As a premier luxury SUV model the Cadillac Escalade achieves excellent engineering standards for premium vehicle seekers by focusing on quality excellence to draw affluent customers to its marketplace. The Cadillac Escalade maintains its heritage of sophisticated performance as it develops through time to earn interest from diverse customer groups across international markets.
Cadillac Escalade groups three issues by fuel level, driveline bearings and evaporative sealing. The gauge on the Escalade will reportedly be erratic and the distance to empty random in the tank. Awful fuel level sensor compromises the readings and can be applied alongside a fatigued fuel pump. Replace the sensor and take a look at the whole module on high-mileage Escalade trucks. The Cadillac Escalade could growl or whine at the cruise notch position when it comes to the axles. Noise, low fluid, and metallic sheen in oil are symptoms of worn differential bearings. Change backlash, re-pack bearings and seals, and check the proper amount of fluid. In evaporative controls, the Cadillac Escalade can switch the light on after refuelling. A loose or crack gas cap allows vapor to leak and cause a small leak monitor detection. Install a new cap, clear codes, and drive all the way to a full cycle. Fuel level should be indicated properly, and the Cadillac Escalade should run soundly after repairs. The Escalade must also be clean, pass monitors, as well as on the roads with road tracks straight. Measuring pinion play, gear pattern confirmation, and torque fasteners to specification. When chatter during tight turns occurs, use the friction modifier listed.
Cadillac Escalade Parts Questions & Answers
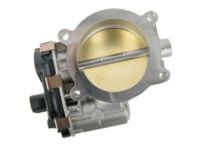
- Q: How to clean the throttle body on Cadillac Escalade?A:Start by removing the air cleaner outlet duct when you want to clean your throttle body. Make sure to turn off the ignition system before inserting fingers inside the throttle bore to stop the throttle blade's sudden movement that could lead to injuries. The throttle body bore requires no tool insertion because the process may damage the throttle valve plate. Check the inside of the throttle body bore and the throttle plate while also inspecting all surfaces by opening the throttle plate. You should avoid using cleaning solvents with Methyl Ethyl Ketone (MEK) because these substances will harm parts of the fuel system. Use GM Top Engine Cleaner (P/N 1052626) or AC-Delco Carburetor Tune-Up Conditioner (P/N X66-P) or their equivalent product to clean the throttle body bore and throttle plate with a clean shop towel. After cleaning the air cleaner outlet duct install it back in its proper position.
- Q: How to replace the intake manifold on Cadillac Escalade?A:Before starting the Intake Manifold replacement process remove Throttle Body and fuel injectors and disconnect electrical connectors of MAP Sensor along with the Knock Sensor. Before continuing remove the Knock Sensor harness connector from the Intake Manifold to set it alongside the electrical harness. Begin manifold replacement by first removing the vacuum brake booster hose from behind the Intake Manifold and next move to the positive crankcase ventilation (PCV) hose with valve. Separate the evaporative emission (EVAP) purge solenoid vent tube by disconnecting it from the solenoid and vapor pipe . Detach the MAP Sensor as part of this sequence. Remove the evap purge solenoid bolt and solenoid and isolator from the Intake Manifold then loosen and remove the Intake Manifold with its gaskets while discarding the old gaskets. The Intake Manifold requires cleaning as well as an inspection. After securing new Intake Manifold gaskets onto the Intake Manifold you should install the manifold. The threads of the Intake Manifold bolts require threadlock gm p/n 12345382 (Canadian P/N 10953489) applied in a 5 mm (0.20 inch) length band. Follow a sequence when tightening Intake Manifold bolts by starting with 5 nm (44 inch lbs.) in the first pass followed by a final pass at 10 nm (89 inch lbs.). Secure the Intake Manifold bolt with threadlock gm p/n 12345382 (Canadian P/N 10953489) to a torque setting of 10 nm (89 inch lbs.) then install the evap purge solenoid, isolator, and bolt to the Intake Manifold. Before fittings the evap purge solenoid vent tube onto the solenoid and vapor pipe make sure to apply a light coating of clean engine oil on the MAP Sensor seal. First install the MAP Sensor before securing the pcv hose with valve while attaching vacuum brake booster hose to the Intake Manifold rear. The electrical harness follows the engine path while connecting the Knock Sensor harness electrical connector to the Intake Manifold and MAP Sensor and Knock Sensor . Install the fuel injectors while you also install the Throttle Body at the end of the process.
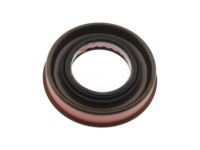
- Q: How to replace the outer rear axle wheel seal on Cadillac Escalade?A:The first step for outer rear Axle Shaft seal replacement requires the vehicle to be raised with subsequent removal of the tire and wheel assembly. First you must remove the Axle Shaft before extracting the Axle Shaft seal. Begin by installing the new Axle Shaft seal after which you should install the Axle Shaft and end with tire and wheel assembly replacement before lowering the vehicle.
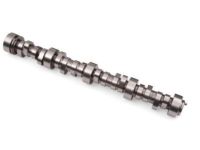
- Q: How to replace the camshaft on Cadillac Escalade?A:The process starts with raising the hood to service position followed by hood hinge bolt removal. Position the hood vertically while tightening the serves-position hinge bolts. Begin by removing the radiator support and front cover and valve lifters and Camshaft sensor bolt and sensor. Rotate the Crankshaft to position its timing marks with the Camshaft sprocket timing marks. Then remove the Camshaft sprocket bolts. Never rotate the Crankshaft assembly post-timing chain removal because it will cause damage to the piston assemblies and valves. First remove the Camshaft sprocket then position the Timing Chain before installing the Camshaft retainer bolts with the retainer while ensuring you do not damage the Camshaft bearings because all Camshaft journals have identical diameters. Begin extraction of the Camshaft by inserting three m8-1.25 x 100 mm (M8-1.25 x 4.0 inch) bolts through the front holes of the Camshaft's bolt pattern. Use these bolts as handles to safely rotate and pull the Camshaft from the engine block before discarding the bolts. You should clean the Camshaft after it undergoes inspection. Before installation apply clean engine oil to the Camshaft journals and bearings followed by the original three bolts to properly set the Camshaft into its position in the engine block then remove the bolts. Install the retainer plate so the sealing gasket faces the engine block with careful attention to maintain a clean surface free of debris. First tighten the Camshaft retainer bolts to 25 nm (18 ft. Lbs.) while installing them before moving on to secure the Camshaft sprocket and Timing Chain with sprocket bolts torqued to 35 nm (26 ft. Lbs.). Check the Camshaft sensor's o-ring seal for signs of damage. The Camshaft sensor needs clean engine oil for lubrication before installation when the sensor is in good condition. Tighten the Camshaft sensor bolt to 25 nm (18 ft. Lbs.). After valve lifter installation users should put together the front cover and radiator support. End the procedure by first taking out the service position hood hinge bolts then bring the hood down to its natural position and reinstall the hood hinge bolts using 25 nm (18 ft. Lbs.) torque.


