Make sure this part fits

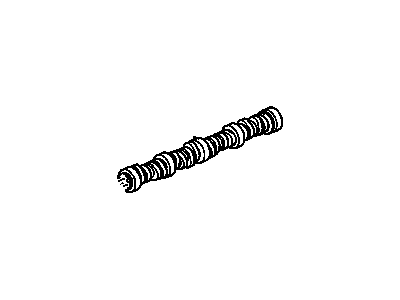
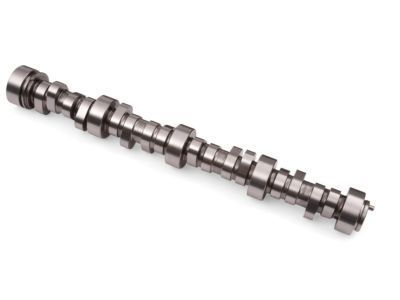
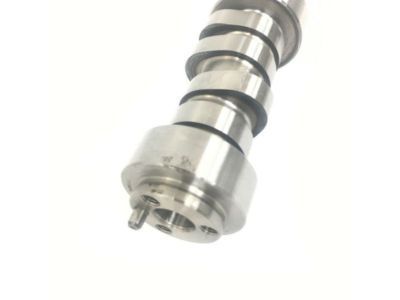
GM 12561721
Camshaft

2001-2007 GM

Customer Questions & Expert Answers (26)
GM 12561721 Camshaft
  • Part Description
    Camshaft, Engine
  • Manufacturer
    General Motors
Make sure this part fits
$506.43 MSRP: $800.41
You Save: $293.98 (37%)
Ships in 1-3 Business Days
1
ADD TO CART
  • Related Parts
  • Product Specifications
  • Vehicle Fitment
  • Customer Questions & Expert Answers
  • Product Specifications

    BrandGenuine GM
    Manufacturer Part Number12561721
    Part DescriptionCamshaft, Engine
    Item Dimensions3.4 x 3.4 x 29.2 inches
    Item Weight10.60 Pounds
    ConditionNew
    Fitment TypeDirect Replacement
    ManufacturerGeneral Motors
    SKU12561721
    WarrantyThis genuine GM part is guaranteed by GM's factory warranty.
    Shipping & ReturnShipping Policy Return Policy
    Warning: California's Proposition 65
  • Vehicle Fitment

    Year Make Model Trim Engine
    2002-2006 Cadillac EscaladeBase8 Cyl 6.0 L GAS
    2003-2006 Cadillac Escalade ESVBase8 Cyl 6.0 L GAS
    2002-2006 Cadillac Escalade EXTBase8 Cyl 6.0 L GAS
    2001-2002 Chevrolet CamaroZ28, Z28 SS8 Cyl 5.7 L GAS
    2001-2004 Chevrolet Corvette50th Anniversary Edition, 50th Anniversary Edition Pace Car, Base, Z068 Cyl 5.7 L GAS
    2003-2007 Chevrolet Express 2500Base, LS, LT8 Cyl 6.0 L CNG, 8 Cyl 6.0 L GAS
    2003-2007 Chevrolet Express 3500Base, LS, LT8 Cyl 6.0 L CNG, 8 Cyl 6.0 L GAS
    2003-2006 Chevrolet Silverado 1500LS, LT, SS8 Cyl 6.0 L GAS
    2007 Chevrolet Silverado 1500 ClassicLT, SS8 Cyl 6.0 L GAS
    2005-2006, 2001-2003 Chevrolet Silverado 1500 HDBase, LS, LT8 Cyl 6.0 L GAS
    View More
  • Customer Questions & Expert Answers

    Q:
    Is this 12561721 designed for my car? Posted by ChevyPartsGiant Specialist
    A:
    Please Select Your Vehicle model to see if part number 12561721 is suitable before ordering.
    Posted by ChevyPartsGiant Specialist
    Q:
    How to Service and Replace a Camshaft on a Cadillac Escalade? Posted by Customer
    A:
    Start by elevating the hood to servicing position then remove hood hinge bolts before raising until vertical and tightening the bolts in service position. Once the radiator support is removed, technicians should take out the Timing Chain, Camshaft sprocket, and valve lifters from both cylinder heads. Removing the Camshaft sensor bolt allows access to the sensor but also requires removal of Camshaft retainer bolts before extracting the retainer. All Camshaft journals share uniform dimensions so handle the parts carefully to avoid Camshaft bearing damage. Installation of three m8-1.25 x 100 mm (M8-1.25 x 4.0 inch) bolts into the front bolt holes provides a handle for carefully rotating the Camshaft out of the engine block after which the bolts are removed. Before replacing the Camshaft and its bearings clean them properly and also change the valve lifters when you decide to swap out these parts. Install three m8-1.25 x 100 mm (M8-1.25 x 4.0 inch) bolts into the front bolt holes before carefully placing the Camshaft inside the engine block while using the bolts as a handle. Remove the bolt afterward. Place the retainer plate into its position so that the sealing gasket touches the engine block while maintaining complete cleanliness of the gasket surface. After installation of the retainer and bolts apply torque to a 25 nm (18 ft. Lbs.) setting. Check if the o-ring seal of the Camshaft sensor remains intact. The Camshaft sensor alongside its bolt needs clean engine oil during installation. After application of the oil you must tighten the sensor bolt to 25 nm (18 ft. Lbs.). First install the Timing Chain followed by the Camshaft sprocket and then continue with the valve lifter installation until complete with the radiator support. Fit the hood hinge bolts into their normal position following service bolt removal and complete the installation by tightening them to 25 nm (18 ft. Lbs.).
    Posted by ChevyPartsGiant Specialist
    Q:
    How to replace the camshaft on Cadillac Escalade? Posted by Customer
    A:
    The process starts with raising the hood to service position followed by hood hinge bolt removal. Position the hood vertically while tightening the serves-position hinge bolts. Begin by removing the radiator support and front cover and valve lifters and Camshaft sensor bolt and sensor. Rotate the Crankshaft to position its timing marks with the Camshaft sprocket timing marks. Then remove the Camshaft sprocket bolts. Never rotate the Crankshaft assembly post-timing chain removal because it will cause damage to the piston assemblies and valves. First remove the Camshaft sprocket then position the Timing Chain before installing the Camshaft retainer bolts with the retainer while ensuring you do not damage the Camshaft bearings because all Camshaft journals have identical diameters. Begin extraction of the Camshaft by inserting three m8-1.25 x 100 mm (M8-1.25 x 4.0 inch) bolts through the front holes of the Camshaft's bolt pattern. Use these bolts as handles to safely rotate and pull the Camshaft from the engine block before discarding the bolts. You should clean the Camshaft after it undergoes inspection. Before installation apply clean engine oil to the Camshaft journals and bearings followed by the original three bolts to properly set the Camshaft into its position in the engine block then remove the bolts. Install the retainer plate so the sealing gasket faces the engine block with careful attention to maintain a clean surface free of debris. First tighten the Camshaft retainer bolts to 25 nm (18 ft. Lbs.) while installing them before moving on to secure the Camshaft sprocket and Timing Chain with sprocket bolts torqued to 35 nm (26 ft. Lbs.). Check the Camshaft sensor's o-ring seal for signs of damage. The Camshaft sensor needs clean engine oil for lubrication before installation when the sensor is in good condition. Tighten the Camshaft sensor bolt to 25 nm (18 ft. Lbs.). After valve lifter installation users should put together the front cover and radiator support. End the procedure by first taking out the service position hood hinge bolts then bring the hood down to its natural position and reinstall the hood hinge bolts using 25 nm (18 ft. Lbs.) torque.
    Posted by ChevyPartsGiant Specialist
    Q:
    How to replace the camshaft on Cadillac Escalade EXT? Posted by Customer
    A:
    To replace the Camshaft, first, open the hood to the service position and remove the hood hinge bolts but lift the hood up until it becomes vertical and apply the hinge bolting in the attainment position. Next, take out the radiator support, front cover, valve lifters, and the bolt and sensor for the Camshaft sensor. Turn the Crankshaft to have the timing marks on the Crankshaft sprocket and Camshaft sprocket aligning, and remove the Camshaft sprocket bolts. It is highly important not to rotate the Crankshaft assembly when the Timing Chain has been undone to avoid damaging the piston assemblies or the valves. Take out the Camshaft sprocket and realign the Timing Chain and take out the retainer bolts of the Camshaft and retainer. Be careful when removing or installing the Camshaft to prevent the damage from the Camshaft bearings, then install three m8-1.25 x 100mm (M8-1.25 x 4.0 inches) bolts into the bolt holes at the front of the Camshaft, using it as a veritable handle to slow rotate and pull the Camshaft out of the engine block before removing the bolts. If necessary, clean and check the Camshaft and the bearings. For install ensure that the Camshaft journals and bearings are lubricated with clean engine oil and install thee bolts to the front of the Camshaft and carefully fit the same to the engine block and remove bolts post the installation. Install the retainer plate with its sealing gasket facing toward the engine block, ensuring the gasket surface is clean and devoid of debris, and bolt the Camshaft retainer and screws down to a 25 nm (18 ft. Lbs.) torque. Next, fit the Camshaft sprocket and align the Timing Chain, followed by the Camshaft sprocket bolts that will need to be tightened to 35 nm (26 ft. Lbs.). Check the Camshaft sensor o-ring seal for damage; if it is not damaged, lubricate it with clean engine oil and fit the Camshaft sensor and bolt, tightening the bolt to 25 nm (18 ft lbs). Go ahead and install the valve lifters, front cover, and radiator support. Lastly lift the hood back into the normal position and put the bolts for the hood that were removed back into place and tighten it to 25 nm (18 ft. Lbs.).
    Posted by ChevyPartsGiant Specialist
    Q:
    How to replace the camshaft on Chevrolet Suburban 1500? Posted by Customer
    A:
    Service position hood raising begins with hood hinge bolt removal followed by raising the hood until vertical position then tightening the bolts for service orientation. The following work steps include separating the radiator support and front cover and valve lifters and the Camshaft sensor bolt with sensor. Use a rotating motion on the Crankshaft to line up its marks with those on the Camshaft sprocket. After alignment, unscrew the sprocket bolt. After Timing Chain removal operators should avoid rotating the Crankshaft assembly because this action could cause damage to piston assemblies or valves. First remove the Camshaft sprocket before you relocate the Timing Chain. After this step remove the Camshaft retainer bolts as well as the retainer. The procedure demands careful Camshaft handling because it could damage Camshaft bearings. To extract the Camshaft, insert three m8 1.25 x 100 mm bolts (M8 1.25 x 4.0 inch) into the front bolt holes and use these bolts as handles to pull the Camshaft from the engine block before removing the bolts. Make cleaning and inspection of both the Camshaft components and bearings part of your maintenance process. When installing the Camshaft first apply clean engine oil to the journal and bearing surfaces before installing the Camshaft with these three bolts serving as handles but remove them after installation. Place the retainer plate so its gasket points toward the engine block. Clean the gasket surface before placing the plate. Then set the Camshaft retainer with its bolts and tighten them at a torque of 25 nm (18 ft. Lbs.). To continue with installation place the Camshaft sprocket then position the Timing Chain before tightening the Camshaft sprocket bolts to 35 nm (26 ft. Lbs.). Check the o-ring seal of the Camshaft sensor for any damage; clean engine oil must be applied to the Camshaft sensor prior to installation of the sensor along with its bolt while torque is set to 25 nm (18 ft. Lbs.). The next step involves the installation of valve lifters and then front cover and radiator support. The final step involves removing the hood hinge bolts from their service location before dropping the hood into its normal position followed by bolting and torquing the hinges to 25 nm (18 ft. Lbs.).
    Posted by ChevyPartsGiant Specialist
    Q:
    How to replace the camshaft on Chevrolet Silverado 2500? Posted by Customer
    A:
    Begin by putting the hood in service position then remove the hinge bolts before raising the hood vertically until the bolts are tight in the service position. Proceed with the removal of the radiator support followed by removing the front cover along with valve lifters and Camshaft sensor bolt and sensor. First align the timing marks on Crankshaft and Camshaft sprockets following proper Crankshaft rotation before you uninstall the Camshaft sprocket bolts. The Crankshaft assembly must not receive any rotating force after taking out the Timing Chain because it will cause damage to piston assemblies or valves. Start by removing the Camshaft sprocket and relocating the Timing Chain after which you can install the Camshaft retainer bolts and retainer. All Camshaft journals share the same diameter so keep them in mind to stop causing damage to the Camshaft bearings when removing the Camshaft. Install three m8-1.25 x 100 mm (M8-1.Three bolts (M8-1.25 x 100 mm (M8-1.25 x 4.0 inch)) should be installed into the front bolt holes of the Camshaft before using these bolts as handles to gently extract the Camshaft from the engine block and then removing them. Clean and inspect the Camshaft and bearings only when needed. Install clean engine oil on every Camshaft journal and bearing prior to putting the same three bolts into their correct positions in the engine block to install the Camshaft. Install and tighten the Camshaft retainer plate by placing this element with its gasket surface facing the engine block while maintaining a debris-free condition of the gasket surface before installing the retainer plate and its bolts to a torque setting of 25 nm (18 ft. Lbs.). Place the Camshaft sprocket onto its position followed by installing the Timing Chain. Secure the Camshaft sprocket bolts at 35 nm (26 ft. Lbs.). Examine the Camshaft sensor o-ring seal to check for signs of damage. For an undamaged sensor apply engine oil before placing the Camshaft sensor while its bolt requires 25 nm (18 ft. Lbs.) torque. End your installation with the valve lifters and front cover and radiator support components. Complete the installation by lowering the hood and reinstalling its bolts according to a torque setting of 25 nm (18 ft. Lbs.).
    Posted by ChevyPartsGiant Specialist
    Q:
    How to replace the camshaft on Chevrolet Silverado 3500? Posted by Customer
    A:
    First, lift the hood to service position and remove the hood hinge-bolts, raise the hood until vertical, and tighten the hinge bolts when the hood is in the service position. Then extract the radiator support, front cover, valve lifters, and the bolt, and sensor for the Camshaft sensor. Take off the Camshaft sprocket bolts after rotating the Crankshaft till the timing marks on the crank and the Camshaft sprockets coincide. Do not turn the Crankshaft assembly once you are through with the cutting of the Timing Chain and avoid damage of the piston assemblies or valves, then you remove the Camshaft sprocket and place the Timing Chain back. Remove the Camshaft retainer bolts and retainer carefully not to harm the Camshaft bearings because all the Camshaft journals are of the same diameter. Mount three m8-1.25 x 100mm (M8-1.25 x 4.0 inch) bolts into front bolt holes of the Camshaft and use them as a handle to pull the Camshaft out of the engine block, taking care to remove the bolts after. If required, clean and inspect the Camshaft and bearings. For installation, lubricate the Camshaft journals and bearings with clean engine oil, then replace again the bolts to cautiously install the Camshaft into the engine block and remove the bolts. Make sure the retainer plate is fitted from the side of the sealing gasket against the engine block, and keep the surface of the gasket clean and then fitting the Camshaft retainer and the bolt with tightened at 25 nm (18 ft. Lbs.). Following that, fit the Camshaft sprocket, arrange the Timing Chain, then the Camshaft sprocket bolts, which must be tightened to 35 nm (26 ft. Lbs.). Check for damaged Camshaft sensor o-ring seal; if it is intact, drip oil and clean engine at it and install Camshaft sensor and bolt, tighten it at 25 nm (18 ft. Lbs). Mount the valve lifters, then use the radiator support. Lastly, remove the hood hinge bolts from the service position, lower the hood to the normal position and replace the hood hinge bolts torquing to 25 nm (18 ft. Lbs.).
    Posted by ChevyPartsGiant Specialist
    Q:
    How to replace the camshaft on Chevrolet Suburban 2500? Posted by Customer
    A:
    Start by removing the grille while also removing the air conditioning (A/C) condenser followed by valve lifters and Timing Chain and sprocket and Camshaft retainer bolts before extracting the Camshaft retainer. Insert three 8 - 1.25 x 100 mm bolts into each Camshaft front hole prior to pulling the Camshaft from the engine block by using the bolts as handles. Throw away the bolts afterward. Apply lubricant gm U.S. P/N 12345501, canada P/N 992704, or equivalent to the Camshaft bearing journals, Camshaft lobes and bearings during installation and removal operations. Use extra caution when working around bearings since all Camshaft journals maintain the same diameter dimension. Before installation of the Camshaft, place three 8 - 1.25 x 100 mm bolts into each threaded bolt hole to use as a handle. Then carefully insert the Camshaft before removing the bolts again. Begin by installing the Camshaft retainer with bolts at 12 nm (106 inch lbs.) torque. Then add the Timing Chain and sprocket together with the valve lifters and A/C Condenser before finishing with the grille.
    Posted by ChevyPartsGiant Specialist
    Q:
    How to replace the camshaft on Chevrolet Silverado 1500 Classic? Posted by Customer
    A:
    To replace the Camshaft do the following: remove the Radiator, air conditioning (A/C) condenser, lifters, timing chain, and cam shaft sprocket, and then balance shaft drive gear. Second, remove the retaining bolts for the Camshaft and the retainer while being careful not to damage Camshaft bearings because all the Camshaft journals are of the same diameter. Insert three 5/16-18 x 4.0 inches bolts into the front bolt holes of the engine Camshaft, and use it as a grip on which to rotate and pull the engine Camshaft out of the bearings before then removing the bolts. Polish and check the Camshaft or bearings as necessary. When replacing a new Camshaft, it is advisable to change the engine oil and filter, as wells as add the engine oil supplement. Oiling engine Camshaft lobes, Camshaft bearing journals, and Camshaft bearings. Turn the engine Camshaft using the bolts to act as a handle and then take off the bolts. In case of reused fasteners, put threadlock on the threads of the Camshaft retainer bolts. Mount the Camshaft retainer along with the bolts and tighten the nuts to 12 nm (106 inch lbs) followed by the balance shaft drive gear, timing chain, Camshaft sprocket, lifters, a/c condenser, and finaly the Radiator.
    Posted by ChevyPartsGiant Specialist
    Q:
    How to replace the camshaft on Chevrolet Silverado 3500 Classic? Posted by Customer
    A:
    Begin replacement of the Camshaft by lifting the hood to service position, removing the hood hinge bolts before raising the hood vertically to secure the bolts for service position. Begin the replacement process by taking out the radiator support along with front cover and valve lifters and Camshaft sensor bolt and sensor. After aligning the timing marks on both Crankshaft and Camshaft sprockets rotate the Crankshaft. Proceed to unscrew the Camshaft sprocket bolts. One should not rotate the Crankshaft assembly once you remove the Timing Chain because it will harm piston assemblies and valves. Begin the process by taking out the Camshaft sprocket then reposition the Timing Chain. Afterward detach the Camshaft retainer bolts along with the retainer for removal. To prevent Camshaft bearing damage during installation or removal proceed with caution before sliding the Camshaft out from the engine block using 3 m8-1.25 x 100 mm (M8-1.25 x 4.0 inch) bolts in the front bolt holes. You should proceed with cleaning and evaluating the Camshaft and bearings if needed. The procedure for camera installation begins by applying clean engine oil to journal and bearing surfaces of the Camshaft followed by a controlled bolted insertion until the bolts reach full removal. Take the time to install the retainer plate so its sealing gasket faces the engine block with the gasket surface clean before tightening the Camshaft retainer bolts to 25 nm (18 ft. Lbs.). Before moving forward place the Camshaft sprocket in position and secure the Timing Chain and then complete the process by tightening the Camshaft sprocket bolts to 35 nm (26 ft. Lbs.). Check if the Camshaft sensor o-ring seal is damaged before moving forward. Clean engine oil must lubricate the Camshaft sensor before its installation alongside the bolt where tightness must reach 25 nm (18 ft. Lbs.). Place the valve lifters alongside the front cover before installing the radiator support. Complete the installation by first removing hood hinge bolts from service position then lowering the hood into its normal position before bolt tightening to 25 nm (18 ft. Lbs.).
    Posted by ChevyPartsGiant Specialist
    Q:
    How to replace the camshaft on GMC Sierra 3500? Posted by Customer
    A:
    The replacement of a Camshaft begins by removing the grille and air conditioning condenser and valve lifters and Timing Chain and sprocket along with the Camshaft retainer bolts and finally the Camshaft retainer. Start by threading three 8 - 1.25 x 100 mm bolts through the Camshaft front bolt holes for manipulation purposes. Carefully rotate and pull the Camshaft from the engine block before removing these front bolts. Before applying gm p/n 12345501 (Canadian P/N 992704) lubricant to the Camshaft components, thoroughly clean and inspect all parts. Handle carefully every Camshaft journal to prevent any damage from occurring. After threading three 8 - 1.25 x 100 mm bolts into the Camshaft threaded bolt holes, use these as a tool to safely install the Camshaft before removing front bolts. Use 12nm (106 inch lbs.) torque for the Camshaft retainer bolts before putting on the Timing Chain and sprocket, valve lifters, a/c condenser then finish with the grille installation.
    Posted by ChevyPartsGiant Specialist
    Q:
    What tools are required to replace the camshaft on LY6, L76, and L92 engines on GMC Sierra 3500 Classic? Posted by Customer
    A:
    The ensemble of necessary tools for ly6, l76 and l92 Camshaft replacement consists of en 46330 timing belt tensioner retaining pin (EN 46330), j 42386-a flywheel holding tool (J 42386-A) and j 45059 angle meter (J 45059). Remove the radiator support together with valve lifters and engine front cover and Starter motor. Attach the j 42386-a tool to the engine flywheel after its teeth match properly and bolt it to the position then torque it to 50 n.m (37 lb ft). Align the crankshaft sprocket rotation until both the Camshaft position actuator alignment mark and the crankshaft sprocket alignment mark become parallel. The servicing technician should first remove the cmp actuator solenoid valve (234) before removing the cmp actuator (235) and Timing Chain (208). Loosen and remove the Camshaft retainer bolts (204) along with the retainer (203) while remaining cautious about the Camshaft bearing safety. Using the Camshaft sprocket bolt you can safely turn and remove the Camshaft from the engine block. Then apply clean engine oil on the Camshaft journals and bearings before reinstalling the Camshaft. Use the first design hex head bolts to fasten the Camshaft retainer (203) and bolts (204) while tightening them to 25 n.m (18 lb ft). Second design torx(R) head bolts should be tightened to 15 n.m (11 lb ft). Install the en 46330 after compressing its tensioner guide. The cmp actuator should be correctly installed onto the Camshaft locating pin so the sprocket teeth perfectly match Timing Chain teeth and the alignment marks are in their proper position. Safely position the cmp actuator (235) together with Timing Chain (208) before securing a new cmp actuator solenoid valve (234) and ensuring tight fastening. Tighten the cmp actuator solenoid valve to 65 n.m (48 lb ft) initially and finish it by rotating to 90 degrees using j 45059 before removing the en 46330. Check sprocket alignment. First detach the Starter motor and engine front cover while also removing valve lifters along with the radiator support. Then reinstall both bolts together with the Starter motor and engine front cover and radiator support.
    Posted by ChevyPartsGiant Specialist
    Q:
    How to Replace a Camshaft on GMC Yukon XL 2500? Posted by Customer
    A:
    To change the Camshaft, firstly, open the hood to the service position and take off the hood hinge bolts, then raise the hood to the vertical and hold the hinge bolt in position for service." second, you have to remove the radiator support, front cover, and valve lifters. Unscrew the Camshaft sensor bolt and sensor, then rotate the Crankshaft until the Crankshaft and Camshaft sprockets timing marks will align. Unscrew the Camshaft sprocket bolts, then do not rotate the Crankshaft assembly once the Timing Chain is freed to avoid damaging the piston assemblies and valves. Remove the Camshaft sprocket and reposition the Timing Chain followed by the removal of the Camshaft retainer bolts and retainer while preventing damage to the Camshaft bearings as a result of uniform diameter of all Camshaft journals. To remove the Camshaft, place three m8-1.25 x 100 mm (M8-1.25 x 4.0 inch) bolts into the front bolt holes of the Camshaft, using them as a handle to carefully rotate and pull Camshaft out from the engine block then remove the bolts. If required, clean and inspect Camshaft and bearings. For the installation apply clean engine oil to lubricate the Camshaft journals and bearings, then it can carefully be installed to engine block using same three bolts and then release the bolts. Make sure that the retainer plate is installed with the sealing gasket on the side of the engine block and the sealing gasket surface cleaned. Install the Camshaft retainer and bolts adding 25 nm (18 ft lbs.) to the bolts followed by Camshaft sprocket and Timing Chain, after which the bolts are added to 35 nm (26 ft lbs.). Check the damage of the Camshaft sensor o-ring seal; if not damaged, lubricate it with clean engine oil, put the Camshaft sensor and bolt in place and tighten it further up to 25nmm (18ft. Lbs.). Mount the valve lifters, then front cover and radiator support, then do the hood hinge bolts so bring hood hinges down from service position to normal position, then install and tighten hood hinge bolts to 25 nm (18 ft. Lbs.).
    Posted by ChevyPartsGiant Specialist
    Q:
    How to replace the camshaft on GMC Yukon XL 1500? Posted by Customer
    A:
    First, raise the hood to the servicing position and remove the hood hinge bolts then raise the hood until vertical and snug the hinge bolts in the service position. Then take off the radiator support, timing chain and the cam shaft sprocket, thereafter the valve lifters at both cylinder ends are removed. Refrain from turning the writing while still seated in a comfortable position. Instead, the hand is lowered over a sheet of paper or into a writing pad. Take caution because the Camshaft journals are all the same diameter, thus preventing damage to Camshaft bearings. Unscrew the Camshaft by installing three m8-1.25 x100mm (M8-1.25 x 4.0 inch) bolts into the front bolt holes, as it can be used as a Camshaft handle to rotate it out slightly and pull it out of the engine block, then unscrew the bolts. Clean and check the Camshaft and bearings, in case of replacement make also sure that valve lifters are replaced. Apply clean engine oil on the Camshaft journals and bearings, install 3 bolts of m 8-1.25 x 100 mm (M 8-1.25 x 4.0 inches) in the three front holes on the engine block and then carefully place the Camshaft into the engine block using the bolts as a handle and then remove the bolts. Mount the retainer plate with sealing gasket facing the engine block, making sure the facing has been kept clean. Install the Camshaft retainer and bolts and tighten them to 25 nm (18 ft. Lbs.). Check the Camshaft sensor o-ring seal for any damage; if intact, fill it with clean engine oil, and fix the Camshaft sensor and bolt, screwing it to 25 nm (18 ft. Lbs.). Move on to the installation of the Timing Chain and Camshaft sprocket, valve lifters, and radiator support. Lastly, take off the hood hinge bolts from the service position, lower the hood to the normal position, and fasten the hood hinge bolts to 25 nm (18 ft. Lbs.).
    Posted by ChevyPartsGiant Specialist
    Q:
    What should be done after removing the camshaft for the 2002 Chevrolet Camaro? Posted by Customer
    A:
    Inspect the camshaft and bearings.
    Posted by ChevyPartsGiant Specialist
    See expert answers on similar Camshaft
    Q:
    What should be done after installing the camshaft and thrust plate for the 2001 Chevrolet Camaro? Posted by Customer
    A:
    Install the balance shaft drive gear onto the camshaft, align the timing marks on the balance shaft gear and the balance shaft drive gear, and finally, install the timing chain, sprockets, and valve lifters.
    Posted by ChevyPartsGiant Specialist
    See expert answers on similar Camshaft
    Q:
    What is the final assembly process for the 2004 Chevrolet Corvette? Posted by Customer
    A:
    Install a NEW crankshaft front oil seal, followed by the valve lifters, right and left cylinder heads, valve rocker arms, push rods, and right and left valve rocker arm covers. Finally, install the coolant air bleed pipe, intake manifold, water pump, left and right exhaust manifolds, oil level indicator tube, crankshaft balancer, and the engine assembly.
    Posted by ChevyPartsGiant Specialist
    See expert answers on similar Camshaft
    Q:
    How do you secure the crankshaft balancer for the 2001 Chevrolet Corvette? Posted by Customer
    A:
    Install the J41476 and crankshaft balancer bolt to the front cover, aligning the tapered legs of the J41476 with the machined alignment surfaces on the front cover, and snug the crankshaft balancer bolt without overtightening.
    Posted by ChevyPartsGiant Specialist
    See expert answers on similar Camshaft
    Q:
    What final steps should be taken after reinstalling components for the 2005 Chevrolet Express 2500? Posted by Customer
    A:
    Fill the engine cooling system, recharge the air conditioning system, install the engine cover, and finally connect the battery negative cable.
    Posted by ChevyPartsGiant Specialist
    See expert answers on similar Camshaft
    Q:
    What are the final steps after installing the camshaft sensor for the 2005 Chevrolet Express 3500? Posted by Customer
    A:
    Install the valve lifters, front cover, and radiator support.
    Posted by ChevyPartsGiant Specialist
    See expert answers on similar Camshaft
    Q:
    What should be done if necessary after removing the camshaft for the 2003 GMC Savana 3500? Posted by Customer
    A:
    Clean and inspect the camshaft and bearings.
    Posted by ChevyPartsGiant Specialist
    See expert answers on similar Camshaft
    Q:
    What is the lubrication process for installation for the 2003 GMC Savana 2500? Posted by Customer
    A:
    Lubricate the camshaft journals and bearings with clean engine oil.
    Posted by ChevyPartsGiant Specialist
    See expert answers on similar Camshaft
    Q:
    What is the next step after aligning the timing marks for the 2007 GMC Savana 2500? Posted by Customer
    A:
    Remove the camshaft sprocket and reposition the timing chain.
    Posted by ChevyPartsGiant Specialist
    See expert answers on similar Camshaft
    Q:
    What is the correct way to install the camshaft for the 2005 GMC Sierra 1500? Posted by Customer
    A:
    Use the same three bolts to carefully install the camshaft into the engine block and then remove the bolts afterward.
    Posted by ChevyPartsGiant Specialist
    See expert answers on similar Camshaft
    Q:
    How should the engine camshaft be installed for the 2006 GMC Sierra 1500? Posted by Customer
    A:
    Use the three bolts as a handle to install the engine camshaft, then remove the bolts.
    Posted by ChevyPartsGiant Specialist
    See expert answers on similar Camshaft
    Q:
    What steps should be taken when installing a new camshaft for the 2007 GMC Sierra 1500 Classic? Posted by Customer
    A:
    Change the engine oil and filter, add engine oil supplement, and lubricate the engine camshaft lobes, camshaft bearing journals, and camshaft bearings.
    Posted by ChevyPartsGiant Specialist
    See expert answers on similar Camshaft
    If you have any questions about this product, please don't hesitate to ask us. We will be happy to help you!

OEM GM 12561721, Excellent Performance and Perfect Fitment

To ensure reliability, purchase GM part # 12561721 Camshaft. It is sometimes referred to as GM Camshaft. Choosing OEM parts is the optimal decision for guaranteeing superior quality and perfect performance. These components undergo stringent quality checks and are carefully constructed to comply with GM's factory specifications, ensuring a smooth installation process.

ChevyPartsGiant.com is a leading supplier of genuine GM parts such as GM 12561721 Camshaft. Our website boasts an extensive inventory of OEM GM parts, available at highly competitive prices in the market. Should you require any new genuine GM parts, rest assured we will deliver them swiftly and efficiently to your doorstep. Furthermore, all our parts come with the assurance of a manufacturer's warranty. For detailed Chevy parts information, click here.
Choose ChevyPartsGiant for discounted prices, exceptional service and fast delivery