Popular OEM Chevrolet Express 3500 Parts
- Body & Hardware Parts View More >
- Steering Parts View More >
- Electrical Parts View More >
- Air & Fuel Delivery Parts View More >
- Charging & Starting Parts View More >
- Engine Parts View More >
- Belts & Cooling Parts View More >
- Suspension Parts View More >
- Driveline & Axles Parts View More >
- Emission Control & Exhaust Parts View More >
- Transmission Parts View More >
- Brakes Parts View More >
Why Buy Genuine Chevrolet Express 3500 Parts From ChevyPartsGiant.com
Looking for real Chevrolet Express 3500 parts? ChevyPartsGiant.com may be a better choice to find genuine parts at wallet-friendly prices. We sell only OEM Chevrolet Express 3500 parts, ensuring perfect fit, reliability, and long-term performance. With our website, you can easily get access to the same parts found at local Chevrolet stores. All components are produced by Chevrolet and are exclusively fitted on Chevrolet Express 3500 automobiles. By shopping at our store, you can enjoy the quality of the Chevrolet factory without the high prices of brick-and-mortar facilities. We achieve this because we are an online store operating at lower costs, which we pass on to you. We also have a user-friendly platform where you can find and order genuine Chevrolet Express 3500 parts swiftly. We are here to make your process of restoring a Chevrolet Express 3500 or dealing with simple repairs quick and inexpensive. We also make it easy to obtain Chevrolet Express 3500 parts at competitive shipping prices and a team of knowledgeable staff ready to take your order. Choose ChevyPartsGiant.com to save time and money, as well as keep your Chevrolet Express 3500 in the good condition.
The Chevrolet Express 3500 entered production lines in 1996 as a multi-purpose one-ton van designed mainly for commercial needs such as vehicle transportation. The Express 3500 offers a selection of door options which extends from three-door to four-door configurations with different access arrangements for sides and back. Power comes from a range of V6 and V8 engines, depending on model year and trim. The Express 3500 offers a powerful Vortec 8100 engine, which was Chevrolet's larger and more capable motor choice until 2002, making it suitable for multiple applications. The 4L80E automatic transmission found in the Express 3500 performs reliably within various demanding operational conditions through its four-speed automatic functionality. Better performance and capabilities emerged for the Chevrolet Express 3500 vehicle when they added new engines while instituting the standard four-speed automatic transmission in 2003. The Chevrolet Express 3500 provides space for between 12 and 15 passengers depending on the model selection and lets users change the vehicle layout between passenger seating and cargo compartment. Throughout its lifespan the vehicle received two major updates such as traction control in 2004 together with stability control in 2008 which substantially advanced handling capabilities while enhancing vehicle safety. The Chevrolet Express 3500 design has advanced through the years with new steering wheel technology and an improved instrument cluster to provide better contemporary functionality. Maintenance should involve Chevrolet Express 3500 genuine parts since they follow strict Chevrolet quality requirements to preserve the vehicle's performance quality and reliability.
Chevrolet Express 3500 presents three clusters, engine cooling, fuel level sensing, and engine sealing. When the water pump leaks, the Express 3500 loses coolant, overheats, and leaves pink crust at seams. Replace the water pump, pressure test the system, bleed carefully, and verify fan command and cap integrity. For fuel level sensing, the Express 3500 may show erratic readings and surprise low warnings during routes. A worn sender inside the fuel pump module misreports volume, so range and refueling schedules become unreliable. Install a new fuel pump on high mileage Express 3500 vans, inspect wiring, and confirm gauge calibration with a scan. For engine sealing, the Express 3500 can leak oil or coolant at the intake manifold gasket. Internal seepage mixes fluids, thins lubrication, and risks bearing damage during extended idling or towing. Replace the intake manifold gasket, check flatness, retorque in sequence, and refill with the correct coolant. After repairs, road test the Express 3500, watch temperatures and trims, and check for remaining leaks. Use Chevrolet service information for torque values, bleeding steps, and sensor verification during validation. Record baselines, update Chevrolet maintenance schedules, and confirm Chevrolet modules sleep with proper battery voltage.
Chevrolet Express 3500 Parts and Q&A
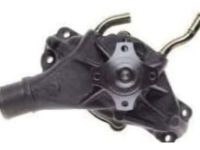
- Q: How to service and repair a water pump on Chevrolet Express 3500?A:In order to adjust and repair the water pump, disconnect the battery negative cable, take off the air cleaner assembly and empty the engine cooling system. Take out the required elements, and take off the water pump and gasket. Wipe the surfaces and replace the gasketed water pump and re-connect all the hoses and parts. Lastly, refill the coolant system and battery back again.
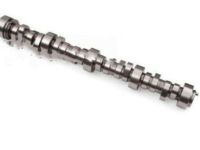
- Q: How to replace the camshaft on Chevrolet Express 3500?A:In order to change the camshaft, take out the radiator support, engine front cover, and valve lifters. Make the timing marks, and then take out the retainer bolts and the camshaft sprocket. Removal of the camshaft by the use of bolts as handles. Clean and inspect, lubricate and re-install camshaft, retainer and sensor. Lastly, fit in the valve lifters and covers.
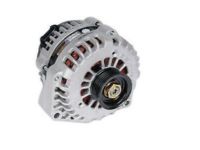
- Q: How to replace the alternator on Chevrolet Express 3500?A:To replace the generator, disconnect the negative battery cable and remove the accessory drive belt. Disconnect the generator electrical connector and cable, then remove the generator bolts and take out the generator. For installation, secure the generator and reconnect the cables, then reinstall the drive belt and battery cable.


