
Popular OEM Cadillac Escalade ESV Parts
- Body & Hardware Parts View More >
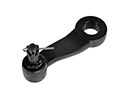
- Steering Parts View More >
- Electrical Parts View More >
- Air & Fuel Delivery Parts View More >
- Charging & Starting Parts View More >
- Engine Parts View More >
- Belts & Cooling Parts View More >
- Suspension Parts View More >
- Driveline & Axles Parts View More >
- Emission Control & Exhaust Parts View More >
- Transmission Parts View More >
- Brakes Parts View More >


Why Buy Genuine Cadillac Escalade ESV Parts From ChevyPartsGiant.com
Looking for real Cadillac Escalade ESV parts? ChevyPartsGiant.com may be a better choice to find genuine parts at wallet-friendly prices. We sell only OEM Cadillac Escalade ESV parts, ensuring perfect fit, reliability, and long-term performance. With our website, you can easily get access to the same parts found at local Cadillac stores. All components are produced by Cadillac and are exclusively fitted on Cadillac Escalade ESV automobiles. By shopping at our store, you can enjoy the quality of the Cadillac factory without the high prices of brick-and-mortar facilities. We achieve this because we are an online store operating at lower costs, which we pass on to you. We also have a user-friendly platform where you can find and order genuine Cadillac Escalade ESV parts swiftly. We are here to make your process of restoring a Cadillac Escalade ESV or dealing with simple repairs quick and inexpensive. We also make it easy to obtain Cadillac Escalade ESV parts at competitive shipping prices and a team of knowledgeable staff ready to take your order. Choose ChevyPartsGiant.com to save time and money, as well as keep your Cadillac Escalade ESV in the good condition.
The Cadillac Escalade ESV has introduced five overall versions since 2003 as designers have consistently improved luxury attributes and technological capabilities and enhanced performance capabilities. The Cadillac Escalade ESV becomes appealing to customers with its 6.2-liter V8 motor because it creates 420 horsepower together with 460 lb-ft torque which delivers exceptional acceleration alongside robust towing capabilities. The automatic 10-speed transmission delivers both improved performance through automatic gear changes and better MPG results to the vehicle. Customers can choose between rear wheel drive (RWD) or four wheel drive (4WD) in the Cadillac Escalade ESV model which equips them with better road grip during off-road explorations and wet weather situations. From 2003 to 2006 the Cadillac Escalade ESV launched with its 6.0L V8 engine before the engineers switched to equip it with the larger and more potent 6.2L V8 engine. Later generations optimized interior layout to enhance cabin and cargo space. The manufacturing process of the Cadillac Escalade ESV takes place at GM Arlington plant in Texas due to its commitment to make vehicles with high-quality components for the luxury SUV sector. The Cadillac Escalade ESV benefits from genuine parts produced to stick to factory standards which guarantee reliability and extended lifespan for the vehicle. OEM parts carry manufacturer-backed warranties because the quality control commitment appears in the availability of genuine original specifications.
The Cadillac Escalade ESV cluster gets grouped into valve train, engine management behavior, and drivetrain behavior. When the cylinder is deactivated, Escalade ESV can tick, misfire, and idle roughly on cylinder deactivation. Faulty folds in lifters on the deactivation bank will cause a reduction in the lift and will complain with P0300 under light load. Replace lifters and cam as necessary, update oiling hardware and check the condition of the filter. The engine management Escalade ESV can go into reduced power with a warning and code P2135. Problems with a failing throttle position sensor or a damaged connector skew correlation and restrict throttle authority. Check the wiring, verify the volt reference, replace the throttle position sensor, and route the harness. With regard to drivetrain control, Escalade ESV has the tendency to shudder at 35 and 70 miles per hour. The aged fluid interferes with the lockup and the aged fluid disturbs clutch glazing and cause a light throttle surge. Refill with new fluid, perform a TCC relearn, and change the torque converter in case. Once any repair is done, the Escalade ESV should pass through a clean road test without any stored faults. Follow Cadillac procedures, update calibrations and record pressures and temperatures to be applied later in Cadillac diagnostics. Stable grounds and charging output mean that Cadillac modules will sleep normally during long parking. Complete with a final inspection and verify software versions of the Escalade ESV in all drivetrain and body systems.
Cadillac Escalade ESV Parts and Q&A
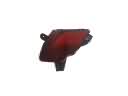
- Q: How to replace the rear bumper fascia on Cadillac Escalade ESV?A:To replace the rear bumper fascia, take the top retainers off and unconnect the license plate lamp harness. Raise the vehicle using safety stands and then remove the push-pin retainers and take off the fascia. Line up the fascian and the impact bar, press in the retainers, lower the car, and reconnect the harness.
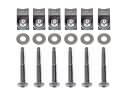
- Q: What tools are required to replace the camshaft for RPOs LY6/L76/L92 on Cadillac Escalade ESV?A:The Engagement tools that need to be used in order to replace the camshaft of RPOs LY6/L76/L92 include the EN 46330 Timing Belt Tensioner Retaining Pin, J 42386-A Flywheel Holding Tool, and J 45059 Angle Meter. Take out required parts, match marks, and fit the camshaft and all the attendant parts making sure that the whole process has correct torque and alignment.
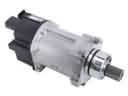
- Q: How to replace the alternator on Cadillac Escalade ESV?A:To replace the generator, disconnect the negative battery cable and take off the accessory drive belt. Remove the generator connector and generator cable. Remove the generator and the generator bolts. To install, place the generator, install and tighten the bolts, reattach the cable, and reassemble.


