ChevyParts
My Garage
My Account
Cart
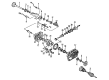
OEM Cadillac Escalade ESV CV Joint
CV Joint Axle- Select Vehicle by Model
- Select Vehicle by VIN
Select Vehicle by Model
orMake
Model
Year
Select Vehicle by VIN
For the most accurate results, select vehicle by your VIN (Vehicle Identification Number).
5 CV Joints found

Cadillac Escalade ESV C.V. Joint, Front Part Number: 26058362
$249.99 MSRP: $405.72You Save: $155.73 (39%)

Cadillac Escalade ESV Inner CV Joint, Front Part Number: 84814583
$80.05 MSRP: $125.40You Save: $45.35 (37%)Ships in 1-3 Business DaysCadillac Escalade ESV C.V. Joint, Front Part Number: 22928970
$135.51 MSRP: $215.15You Save: $79.64 (38%)Ships in 1-2 Business Days
Cadillac Escalade ESV Inner CV Joint, Front Part Number: 26062617

Cadillac Escalade ESV Inner CV Joint, Front Part Number: 15295246
Cadillac Escalade ESV CV Joint
Want to cut long-term maintenance and repair costs? Choose OEM CV Joint. Those parts deliver top durability you can trust. On our site, you'll find a huge catalog of genuine Cadillac Escalade ESV parts. Prices are unbeatable, so you can keep more in your pocket. Every OEM Cadillac Escalade ESV CV Joint includes a manufacturer's warranty. You can also get an easy return policy that keeps buying risk free. Fast delivery, get your car on the road quickly. It's simple to search, compare, and order. Stop guessing about quality or fit. Order today and save with parts that last.
Cadillac Escalade ESV CV Joint Parts Questions & Experts Answers
- Q: How to replace the outer CV Joint and seal on Cadillac Escalade ESV?A:To replace the wheel drive shaft outer joint and seal, collect the required tools: snap ring pliers (J 8059), seal clamp tool (J 35910), as well as drive axle clamp swage tool (J 36652), but as stated, there was no mention of any expiry date. The first step is to use a hand grinder to slice through the swage ring, and after that cut off the small boot clamp with side cutters. Slide the boot down the halfshaft bar and off the CV Joint outer race scooping out any grease. Separate the ears of the halfshaft bar retaining snap ring from the inside race of the inner race with the use of snap ring pliers (J 8059). Take off the CV Joint and boot from the halfshaft bar and discard the old boot. Use a brass drift to delicately strike and rotate the CV Joint cage in order to remove all six chrome alloy balls. Clean the inner and outer race assemblies, CV Joint cage and chrome alloy balls with cleaning solvent to make sure all the old grease and contaminants are erased, and then dry all the parts and check for wear or damage. Apply a thin layer of grease on the inner and outer race grooves, dovetail the inner race with the cage, and insert it. Install the cage and inner race into the outer race and thereafter use the brass drift to install the chrome alloy balls. Apply the pre-measured grease from the kit while packing the CV Joint boot and assembly, and put on the new small boot clamp on the CV Joint seal then slip the boot over the halfshaft bar ensuring it is torqued to 136 nm (100 ft. Lbs) using the seal clamp tool (J 35910). Make sure that the retaining ring side of the inner race CV Joint is towards the halfshaft bar and then slide the CV Joint to it and pull on to it to confirm engagement. Finally, slip the large diameter of the CV Joint boot over the CV Joint outer race and secure it tightly using the drive axle clamp swage tool (J 36652) and tighten the bolts while aligning tension and finally pull off the half heave assembly from the tool.

Related Cadillac Escalade ESV Parts
 Cadillac Escalade ESV CV Boot
 Cadillac Escalade ESV Differential
 Cadillac Escalade ESV Differential Bearing
 Cadillac Escalade ESV Differential Cover
 Cadillac Escalade ESV Differential Seal
 Cadillac Escalade ESV Drive Shaft
 Cadillac Escalade ESV Driveshaft Yokes
 Cadillac Escalade ESV Pinion Bearing
 Cadillac Escalade ESV Pinion Washer
 Cadillac Escalade ESV Slip Yoke
 Cadillac Escalade ESV Universal Joint