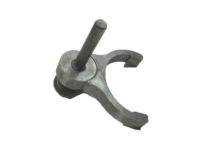
Make sure this part fits

GM 84814583
Inner CV Joint, Front

1998-2020 GM

Customer Questions & Expert Answers (21)
GM 84814583 Inner CV Joint, Front
  • Part Description
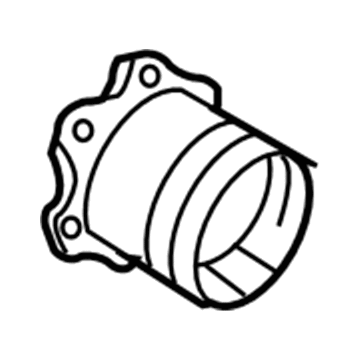
    Joint, Front Axle U Joint; CV Joint
  • Position
    Front
  • Replaces
    26056763, 22928968, 15295245, 26062616
  • Manufacturer
    General Motors
Make sure this part fits
$80.05 MSRP: $125.40
You Save: $45.35 (37%)
Ships in 1-3 Business Days
1
ADD TO CART
  • Vehicle Fitment

    Year Make Model Trim Engine
    2002-2020, 1999-2000 Cadillac EscaladeBase, Hybrid, Hybrid Platinum, Luxury, Platinum, Premium, Premium Luxury8 Cyl 5.3 L GAS, 8 Cyl 5.7 L GAS, 8 Cyl 6.0 L FULL HYBRID EV-FLEX (FHEV), 8 Cyl 6.0 L FULL HYBRID EV-GAS (FHEV), 8 Cyl 6.0 L GAS, 8 Cyl 6.2 L FLEX, 8 Cyl 6.2 L GAS
    2003-2020 Cadillac Escalade ESVBase, Luxury, Platinum, Premium, Premium Luxury8 Cyl 6.0 L GAS, 8 Cyl 6.2 L FLEX, 8 Cyl 6.2 L GAS
    2002-2013 Cadillac Escalade EXTBase, Luxury, Premium8 Cyl 6.0 L GAS, 8 Cyl 6.2 L FLEX, 8 Cyl 6.2 L GAS
    2007-2013 Chevrolet AvalancheBlack Diamond LS, Black Diamond LT, Black Diamond LTZ, LS, LT, LTZ8 Cyl 5.3 L FLEX, 8 Cyl 5.3 L GAS, 8 Cyl 6.0 L GAS
    2002-2006 Chevrolet Avalanche 1500Base, LS, LT, North Face, On Road Edition, WBH, Z66, Z718 Cyl 5.3 L FLEX, 8 Cyl 5.3 L GAS
    2002-2006 Chevrolet Avalanche 2500Base, LS, LT8 Cyl 8.1 L GAS
    1998-1999 Chevrolet C1500Cheyenne, LS, Silverado, WT6 Cyl 4.3 L GAS, 8 Cyl 5.0 L GAS, 8 Cyl 5.7 L GAS, 8 Cyl 6.5 L DIESEL
    1998-1999 Chevrolet C1500 SuburbanBase, LS, LT8 Cyl 5.7 L GAS, 8 Cyl 6.5 L DIESEL
    1998-1999 Chevrolet C2500 SuburbanBase, LS8 Cyl 5.7 L GAS, 8 Cyl 6.5 L DIESEL, 8 Cyl 7.4 L GAS
    1998-1999 Chevrolet K1500Cheyenne, LS, Silverado, WT6 Cyl 4.3 L GAS, 8 Cyl 5.0 L GAS, 8 Cyl 5.7 L GAS, 8 Cyl 6.5 L DIESEL
    View More
    Warning: California's Proposition 65
  • Customer Questions & Expert Answers

    Q:
    Is 84814583 compatible with my car? Posted by ChevyPartsGiant Specialist
    A:
    Please Select Your Vehicle model to see if part number 84814583 is suitable before ordering.
    Posted by ChevyPartsGiant Specialist
    Q:
    What tools are required to service and repair the CV Joint Boot for the Wheel Drive Shaft Outer Joint and Seal Replacement on Chevrolet Avalanche 2500? Posted by Customer
    A:
    Constant velocity joint boot service and repair; specifically the wheel drive shaft outer joint and seal replacement requires: snap ring pliers (J 8059), seal clamp tool (J 35910), drive axle clamp swage tool (J 36652-1), and drive axle clamp swage tool (J 36652-2). These tools are essential for bnsf railway mechanics, as they will be used to change the snap rings, seals, and drives of the vehicles, ultimately maintaining maximum efficiency of the vehicles. Start by using a hand grinder, cutting through the swage ring, and removing the small boot clamp with the use side cutters. Slide the boot down the half shaft bar and clean the CV Joint. Open the snap ring ears with the snap ring pliers (J 8059), and take out the CV Joint and the boot from the halfshaft bar, discard the old boot. Remove the chrome alloy balls from the cv joints cage also and ensure that all components are clean. Check for wear or damages and replace parts as needed. Put grease into the inner and outer race grooves, align and install the inner race in the cage to install it into the outer race. Install chrome alloy balls; pack the CV Joint boot and assembly with grease; and in order now attach the small boot clamp with seal clamp tool (J 35910) to the given torque. Make sure the CV Joint inner race retaining ring side is turned to the halfshaft bar before mounting the CV Joint over it. Finally, use the drive axle clamp swage tool (J 36652-1 or J 36652-2) to clamp the CV Joint boot on to the outer race so that it is aligned properly and clamp the CV Joint assembly in place with the bolts provided.
    Posted by ChevyPartsGiant Specialist
    Q:
    How to replace the front drive axle's CV joint and CV boot on Chevrolet K3500? Posted by Customer
    A:
    Before you change the shaft and its outer boot, make sure to secure one end of the halfshaft in a vise with safety covers. Trim the swage ring with a hand tool carefully so that you don't damage the cv joint outside the race. Remove the small boot clamp, put the boot over the halfshaft bar and use a clean cloth to wipe off the cv joint face. Pull the halfshaft bar retaining snap ring ears apart using j8059 and then remove the cv joint and the old boot from the halfshaft bar. Use the brass drift to gently strike and push the cage while it is tilted to send all the chrome alloy balls out. Turn the whole setup upside down and remove the assemblies by 90 degrees. After that, clean the inner and outer race, cv joint cage and the chrome alloy balls with solvent to remove any old grease. See if the tire has any signs of wear or damage and change parts that show defects. Once everything is ready, check the parts once more and coat their grooves on both sides with a thin layer of grease. Line up the inner race with the cage windows, insert it and then place both into the outer race. Slant the cage to fit the alloy balls inside and as you do, pack the boot with the grease from the kit. Attach the new clamp from j35910 to the shaft after tightening it to 136 nm (100 ft. Lbs.) and before putting on the cv boot, have the retaining ring part of the inner race facing the halfshaft. Squeeze the large swage ring onto the large diameter of the boot to put it over the cv joint outer race, ensuring you line up the assembly and swage ring properly as you move forward. After this, install the upper section of j36652, twist the bolts one way, then the other until they are touching, loosen them again and take out the halfshaft from the tool.
    Posted by ChevyPartsGiant Specialist
    Q:
    What Tools Are Required to Service and Repair the CV Joint Boot for the Wheel Drive Shaft Inner Joint and Seal Replacement on Chevrolet Silverado 1500 Classic? Posted by Customer
    A:
    The following tools are required to service and repair the constant velocity joint boot, in this particular instance dealing with the wheel drive shaft inner joint and seal replacement: pliers for the drive axle seal clamp (J 35910), a drive axle clamp swage tool (J 36652-1), and axle swage tool (J 36652-98). Start by removing the wheel drive shaft, wheel drive shaft seal cover if any is present, etc. With a hand grinder, cut through the swage ring and remove the tripot housing from the halfshaft and be sure to wipe and degrease the assembly properly then allow it to dry. Use side cutters to remove the small boot retaining clamp and remove the spacer ring, tripot spider assembly from the half shaft bar, and the tripot boot. Clean halfshaft bar using a wire brush and check the needle rollers, needle bearings, and trunnion and remove and replace damaged parts with the correct service kit. For installation, position the new small seal clamp onto the joint seal and press it onto the halfshaft bar, and using the drive axle seal clamp pliers (J 35910), bring it to a torque of 136 nm (100 ft. Lbs.). Assemble the tripot joint with the convolute retainer in the correct position, make sure to catch the required convolutions for the specific models. Mount the tripot spider assembly and spacer ring, in addition to packing the tripot seal and housing with the supplied grease. Keep pinching the swage ring just a little bit, slide it and position it on the seal. For the 1500 models, place the base of the axle swage tool (J 36652-98) into a vise, and for the 2500 and 3500 models, the drive axle clamp swage tool (J 36652-1). Place the interior end of the halfshaft assembly into the proper position in the tool base, install the top half, align the swage ring and clamp, and then tighten the bolts by hand. Variable tightening until both parts of the tool touch, and check the stroke position inboard by the specified dimensions to each model. Lastly, take out the convolute retainer tool, install the wheel drive shaft seal cover if necessary, and re-install the wheel drive shaft.
    Posted by ChevyPartsGiant Specialist
    Q:
    How to Service and Repair the CV Joint Boot on Chevrolet Silverado 3500 Classic? Posted by Customer
    A:
    Insufficient CV Joint boot servicing requires the following tools: the necessary tools for boot servicing include snap ring pliers (J 8059) and drive axle seal clamp pliers (J 35910) together with drive axle clamp swage tool (J 36652-1) and axle swage tool (J 36652-2). Snap ring pliers (J 8059), drive axle seal clamp pliers (J 35910), drive axle clamp swage tool (J 36652-1), and axle swage tool (J 36652-2). First remove both the wheel drive shaft followed by the wheel drive shaft seal cover if present. Cut the swage ring with a hand grinder before extracting the small boot clamp with side cutters. Pull the boot downward along the shaft bar before moving it away from the CV Joint race and wiping the joint face completely clean. Use snap ring pliers to separate the ears of the halfshaft bar retaining snap ring. Pull the CV Joint with boot out from the halfshaft bar for disposal of old boot. A brass drift tool should be used to orient the CV Joint cage while removing the six chrome alloy balls. Reverse all parts of the CV Joint by carefully washing them with cleaning solvent before drying every component to inspect for wear signs or damage. A wire brush should clean the halfshaft bar. All inspection parts receive light grease application intended for inner and outer race grooves. Feed the inner race into the cage before setting it inside the outer race assembly. Position the cage using the brass drift so you can install chrome alloy balls. Use the grease included with the replacement kit to pack the CV Joint boot along with assembly components. Then use the drive axle seal clamp pliers to install the new small boot clamp and apply 136 nm of torque (100 ft. Lbs.). Deform the new swage ring to an oval configuration before placing it across the boot. Before inserting the CV Joint on the halfshaft bar check that the retaining ring side of the CV Joint inner race points toward the retaining ring and confirm joint engagement by pulling on the joint. Use a swage ring to clamp the large boot diameter of the CV Joint around its outer race until it becomes tightly secure. Secure the base of drive axle clamp swage tool (J 36652-1) in a vise while assembling support plate and bolts for 1500 models. For 2500 and 3500 models use the axle swage tool (J 36652-2). The tool positions its CV Joint end so you can align the CV Joint boot with the assembly and ring. After setting top block of tool in position along with swage ring adjustment attach bolts with alternating turns until both tool sections contact each other. Next after removing the halfshaft from the tool install the wheel drive shaft seal cover if needed before reattaching the wheel drive shaft.
    Posted by ChevyPartsGiant Specialist
    Q:
    How to Service and Repair the CV Joint Boot on GMC Sierra 1500 Classic? Posted by Customer
    A:
    Insufficient CV Joint boot servicing requires the following tools: the necessary tools for boot servicing include snap ring pliers (J 8059) and drive axle seal clamp pliers (J 35910) together with drive axle clamp swage tool (J 36652-1) and axle swage tool (J 36652-2). Snap ring pliers (J 8059), drive axle seal clamp pliers (J 35910), drive axle clamp swage tool (J 36652-1), and axle swage tool (J 36652-2). First remove both the wheel drive shaft followed by the wheel drive shaft seal cover if present. Cut the swage ring with a hand grinder before extracting the small boot clamp with side cutters. Pull the boot downward along the shaft bar before moving it away from the CV Joint race and wiping the joint face completely clean. Use snap ring pliers to separate the ears of the halfshaft bar retaining snap ring. Pull the CV Joint with boot out from the halfshaft bar for disposal of old boot. A brass drift tool should be used to orient the CV Joint cage while removing the six chrome alloy balls. Reverse all parts of the CV Joint by carefully washing them with cleaning solvent before drying every component to inspect for wear signs or damage. A wire brush should clean the halfshaft bar. All inspection parts receive light grease application intended for inner and outer race grooves. Feed the inner race into the cage before setting it inside the outer race assembly. Position the cage using the brass drift so you can install chrome alloy balls. Use the grease included with the replacement kit to pack the CV Joint boot along with assembly components. Then use the drive axle seal clamp pliers to install the new small boot clamp and apply 136 nm of torque (100 ft. Lbs.). Deform the new swage ring to an oval configuration before placing it across the boot. Before inserting the CV Joint on the halfshaft bar check that the retaining ring side of the CV Joint inner race points toward the retaining ring and confirm joint engagement by pulling on the joint. Use a swage ring to clamp the large boot diameter of the CV Joint around its outer race until it becomes tightly secure. Secure the base of drive axle clamp swage tool (J 36652-1) in a vise while assembling support plate and bolts for 1500 models. For 2500 and 3500 models use the axle swage tool (J 36652-2). The tool positions its CV Joint end so you can align the CV Joint boot with the assembly and ring. After setting top block of tool in position along with swage ring adjustment attach bolts with alternating turns until both tool sections contact each other. Next after removing the halfshaft from the tool install the wheel drive shaft seal cover if needed before reattaching the wheel drive shaft.
    Posted by ChevyPartsGiant Specialist
    Q:
    What Tools Are Required to Replace the Front Wheel Drive Shaft Inner CV Joint and Seal on GMC Yukon XL 2500? Posted by Customer
    A:
    The task of replacing wheel drive shaft inner joint and seal demands three specific waco tools: j 35910 seal clamp tool (J 35910) along with j 36652 drive axle clamp swage tool (J 36652) followed by j 36652-98 axle swage tool (J 36652-98). First cut the swage ring with a hand grinder to take out the tripot housing from the halfshaft and wash away all contaminants before allowing it to dry. The process begins with removing the small boot retaining clamp using side cutters followed by extraction of the spacer ring together with tripot spider assembly and tripot boot from the halfshaft bar. A wire brush removes rust from the halfshaft bar enabling an inspection for damage to needle rollers and needle bearings as well as trunnion components. Replace all damaged parts with the recommended service kits. To ensemble the system place the new small seal clamp onto the joint seal then compress it onto the halfshaft bar with the j 35910 tool which must be tightened to 136 nm (100 ft. Lbs.). Position the correct number of convolutions on the convolute retainer tool over the inboard joint seal according to the model specifications. Fitting the tripot spider assembly to the spacer ring requires packing the tripot seal and housing with supplied grease before assembling the tripot housing with its seal. Use the j 36652-01 base in a vise for the 1500 models (not including 1500 HD) except the 1500 hd, 2500, 3500, hummer h2 models should use the j 36652-98. Insert the inboard halfshaft assembly end into the selected base then place the top tool section into position before aligning the swage ring and clamp and tightening the bolts by hand. Following alignment of the tripot boot and housing along with the swage ring the bolts should be tightened in a weaved pattern to ensure the tool makes full contact. The team should examine the inboard stroke placement using specified dimensions for all models before removing the convolute retainer device from the boot.
    Posted by ChevyPartsGiant Specialist
    Q:
    What should be done to the halfshaft bar before reassembly for the 2003 Cadillac Escalade? Posted by Customer
    A:
    Clean the halfshaft bar with a wire brush to eliminate rust in the seal mounting area and inspect the needle rollers, needle bearings, and trunnion for wear or damage, replacing any faulty parts with the appropriate service kit.
    Posted by ChevyPartsGiant Specialist
    See expert answers on similar CV Joint
    Q:
    What tools are used to clamp the CV joint boot for the 2007 Cadillac Escalade? Posted by Customer
    A:
    Use the Drive Axle Clamp Swage Tool or Axle Swage Tool to clamp the CV joint boot tightly to the CV joint outer race.
    Posted by ChevyPartsGiant Specialist
    See expert answers on similar CV Joint
    Q:
    What is the first step in the replacement process for the 2004 Cadillac Escalade ESV? Posted by Customer
    A:
    Use a hand grinder to cut through the swage ring, then cut off the small boot clamp with side cutters.
    Posted by ChevyPartsGiant Specialist
    See expert answers on similar CV Joint
    Q:
    What is the tightening process for the bolts for the 2006 Cadillac Escalade EXT? Posted by Customer
    A:
    Alternate tightening each bolt until both halves of the tool touch, then loosen the bolts to remove the halfshaft assembly.
    Posted by ChevyPartsGiant Specialist
    See expert answers on similar CV Joint
    Q:
    What should you ensure before sliding the CV joint onto the halfshaft bar for the 2003 Chevrolet Avalanche 1500? Posted by Customer
    A:
    Ensure the retaining ring side of the CV joint inner race faces the halfshaft bar.
    Posted by ChevyPartsGiant Specialist
    See expert answers on similar CV Joint
    Q:
    What is the first step to replace the outer joint and seal of the constant velocity joint boot for the 2004 Chevrolet Silverado 3500? Posted by Customer
    A:
    Begin by removing the wheel drive shaft and the wheel drive shaft seal cover if applicable.
    Posted by ChevyPartsGiant Specialist
    See expert answers on similar CV Joint
    Q:
    How should the halfshaft be secured for the procedure for the 2002 Chevrolet Suburban 2500? Posted by Customer
    A:
    Secure the halfshaft in a vise with protective covers.
    Posted by ChevyPartsGiant Specialist
    See expert answers on similar CV Joint
    Q:
    How do you remove the chrome alloy balls from the CV joint for the 2009 Chevrolet Silverado 1500? Posted by Customer
    A:
    Use a brass drift to gently tap and tilt the CV joint cage to remove the chrome alloy balls, repeating until all six are removed.
    Posted by ChevyPartsGiant Specialist
    See expert answers on similar CV Joint
    Q:
    How should the halfshaft be secured for the replacement process for the 2001 Chevrolet Suburban 1500? Posted by Customer
    A:
    Place protective covers over the vise jaws and secure the halfshaft in the vise, ensuring not to damage the CV joint outer race.
    Posted by ChevyPartsGiant Specialist
    See expert answers on similar CV Joint
    Q:
    How do you install the chrome alloy balls back into the CV joint for the 2004 Chevrolet Silverado 2500? Posted by Customer
    A:
    Use a brass drift to tilt the cage and install the chrome alloy balls one by one.
    Posted by ChevyPartsGiant Specialist
    See expert answers on similar CV Joint
    Q:
    How do you install the convolute retainer tool for the 2002 Chevrolet Tahoe? Posted by Customer
    A:
    Install it over the inboard joint seal, ensuring to capture the correct convolutions for the model.
    Posted by ChevyPartsGiant Specialist
    See expert answers on similar CV Joint
    Q:
    What is the first step in the process for the 2006 GMC Yukon? Posted by Customer
    A:
    Begin by using a hand grinder to cut through the swage ring and side cutters to remove the small boot clamp.
    Posted by ChevyPartsGiant Specialist
    See expert answers on similar CV Joint
    Q:
    How do you prepare the halfshaft bar for the 2009 GMC Sierra 1500? Posted by Customer
    A:
    Clean the halfshaft bar with a wire brush to remove rust in the seal mounting area.
    Posted by ChevyPartsGiant Specialist
    See expert answers on similar CV Joint
    Q:
    What is the procedure for assembly for the 2001 GMC Yukon XL 1500? Posted by Customer
    A:
    Place the new small seal clamp onto the joint seal, compress it onto the halfshaft bar, and secure it with the Seal Clamp Tool, tightening to 136 Nm (100 ft. lbs.).
    Posted by ChevyPartsGiant Specialist
    See expert answers on similar CV Joint
    If you have any questions about this product, please don't hesitate to ask us. We will be happy to help you!

OEM GM Inner CV Joint, Front 84814583 Designed for Proper Fit and Performance

Original OEM GM parts deliver superior quality and meet all performance standards needed for optimal automotive operation. The authentic part identified by 84814583 Inner CV Joint, Front is available in the market under the name GM CV Joint. This genuine product has a full warranty coverage from the manufacturer available at all authorized GM dealers throughout the United States. This part 84814583 Inner CV Joint, Front fits certain Chevrolet Tahoe, Avalanche, Silverado 1500 models, as well as GMC Sierra 1500, Yukon, Sierra 2500 HD. Additionally, it is compatible with Cadillac Escalade, Escalade ESV, Escalade EXT models.
The original GM component designated by manufacturer part number 84814583 maintains top performance when functioning as the Joint, Front Axle U Joint; CV Joint unit at its Front. The component 84814583 is constructed from durable material. The Direct Replacement component is ready in New condition to ensure full compatibility with your vehicle system. This component receives the designation of Spider Assembly; Inner Joint; Tripot Housing; Housing. The part 84814583 has available replacement options 26056763, 22928968, 15295245, 26062616. GM manufacturer provides a warranty that ensures reliable operation of this product. The Shipping Policy and Return Policy pages outline complete details regarding shipping procedures and return processes.
If you want to save money in the long run on maintenance and repairs, you should choose OEM products because they're of the top level of durability. Are you on the quest of finding GM parts, our site is worth a visit. We stock an endless selection of high-quality GM components including things like ignition coils all the way through to fan shrouds and all at prices that can not be matched. You have nothing to worry about because all our OEM parts are covered with a manufacturer warranty, which guarantees superior quality and value.