ChevyParts
My Garage
My Account
Cart
OEM Cadillac Escalade Muffler
Exhaust Muffler- Select Vehicle by Model
- Select Vehicle by VIN
Select Vehicle by Model
orMake
Model
Year
Select Vehicle by VIN
For the most accurate results, select vehicle by your VIN (Vehicle Identification Number).
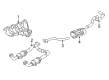
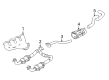
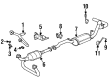
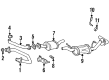
26 Mufflers found

Cadillac Escalade Rear Muffler, Driver Side Part Number: 87824233
$887.67 MSRP: $1333.10You Save: $445.43 (34%)Ships in 1-3 Business Days

Cadillac Escalade Rear Muffler Part Number: 84707619
$500.64 MSRP: $751.87You Save: $251.23 (34%)Ships in 1-3 Business Days
Cadillac Escalade Exhaust Pipe Part Number: 87842263
$709.47 MSRP: $1065.48You Save: $356.01 (34%)Ships in 1-3 Business Days
Cadillac Escalade Muffler & Pipe Part Number: 22818060
$327.35 MSRP: $489.41You Save: $162.06 (34%)Ships in 1-3 Business DaysCadillac Escalade Rear Muffler, Passenger Side Part Number: 87824236
$926.99 MSRP: $1392.16You Save: $465.17 (34%)Ships in 1-3 Business Days
Cadillac Escalade Muffler & Pipe Part Number: 25924428
$896.70 MSRP: $1225.25You Save: $328.55 (27%)Ships in 1-2 Business DaysCadillac Escalade Exhaust Pipe Part Number: 87842262
$699.78 MSRP: $1050.93You Save: $351.15 (34%)Ships in 1-3 Business Days
Cadillac Escalade Muffler & Pipe Part Number: 22812178
$428.84 MSRP: $641.14You Save: $212.30 (34%)
Cadillac Escalade Muffler Part Number: 15232531

Cadillac Escalade Muffler Part Number: 10398387
Cadillac Escalade Muffler Part Number: 15232528

Cadillac Escalade Muffler Part Number: 15232529

Cadillac Escalade Exhaust Pipe Part Number: 22751285

Cadillac Escalade Muffler W/Tpipe Part Number: 15738754


Cadillac Escalade Muffler Part Number: 19122418

Cadillac Escalade Muffler & Pipe Part Number: 15734393
Cadillac Escalade Muffler & Pipe Part Number: 25940555
Cadillac Escalade Muffler Part Number: 15208740
Cadillac Escalade Muffler & Pipe Part Number: 20779917
Cadillac Escalade Muffler & Pipe Part Number: 20757529
| Page 1 of 2 |Next >
1-20 of 26 Results
Cadillac Escalade Muffler
Want to cut long-term maintenance and repair costs? Choose OEM Muffler. Those parts deliver top durability you can trust. On our site, you'll find a huge catalog of genuine Cadillac Escalade parts. Prices are unbeatable, so you can keep more in your pocket. Every OEM Cadillac Escalade Muffler includes a manufacturer's warranty. You can also get an easy return policy that keeps buying risk free. Fast delivery, get your car on the road quickly. It's simple to search, compare, and order. Stop guessing about quality or fit. Order today and save with parts that last.
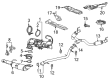
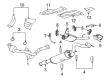
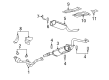
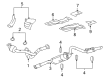
Cadillac Escalade Muffler is a highly essential and functional part of the Cadillac luxury SUV vehicle's exhaust system recognized for its resilience and proficiency. Manufactured to properly channel exhaust gases away from the Cadillac engine and the interior of the car, the Muffler additionally suppresses noise from the combustion process of the engine, thus offering the occupant a quiet ride while at the same time protecting them from noxious fumes like carbon monoxide. Throughout the years, many Cadillac Escalade models used mufflers manufactured from stainless steel or aluminized steel; some of these mufflers came as direct bolt-ons while others were universal mufflers. The OE Muffler is designed to perfectly fit on your vehicle and maintain the factory sound of your exhaust; on the other hand, the performance mufflers are for those who want more flow and sound from their exhaust as well as their engine. Thanks to this characteristic it is perfectly suited to various performance and aesthetic requirements of Muffler. In addition, the Cadillac Escalade is gifted with potent engine choices; the basic 6.2-liter V8, the better 3-liter turbo diesel inline-six; the design of the muffler is efficient, therefore contributing to the general efficiency of the engine. Thus, the Muffler not only improves the performance of the car but also makes the roads safer for driving. This Muffler has new features and it can be used in most Escalade models and thus it stands out in auto market which Cadillac represent the luxury and superior technology.
Cadillac Escalade Muffler Parts Questions & Experts Answers
- Q: How to replace the exhaust muffler on those equipped with L92 on Cadillac Escalade?A:Vehicles equipped with l92 need their exhaust Muffler replacement started by taking out the right rear wheel together with its tire. You must disconnect the electrical connector responsible for chassis wiring from the right rear wheel speed sensor wiring harness electrical connector . To replace the exhaust Muffler on vehicles with rpo z55 the technician should detach the chassis wiring harness electrical connector from both the right rear Shock Absorber and the right rear air line from the Shock Absorber. Separate the frame clip of the right rear wheel speed sensor wiring harness electrical connector while keeping the rear suspension sensor link rod on the position sensor ball stud. Ensure the sensor lever has adequate support before twisting the link rod ball to disconnect it from the ball stud on the sensor. Support the rear axle using an adjustable jack before you remove the right axle tie rod bolt and nut , the rear axle vent hose alongside the vent hose swivel clip off the rear brake crossover pipe if required. Start by removing the right rear stabilizer shaft link to frame bolt and nut followed by the right rear stabilizer shaft link from the frame. To access the Muffler you must first lower the right side of the rear axle by removing the right rear Shock Absorber lower bolt and nut . Proceed to remove the Muffler to catalytic converter nuts before separating the hanger. To optimize removal of the Muffler assembly on yukon denali or escalade vehicles, apply lubricant to the hanger insulators before helper personnel remove exhaust system hangers (4 and 5) and the resonator insulator. Repeat the protocol you performed on the insulators (3, 4, and 5) and resonator insulator before you take out the Muffler assembly for yukon xl, yukon denali xl, escalade esv, and escalade ext vehicles. After vehicle removal it is necessary to keep the flex coupler from overstretching to guard against internal harm. The procedure requires lubrication for all insulators when installing a yukon xl, yukon denali xl, escalade esv or escalade ext. Assistance is needed to install the Muffler assembly and insulators to exhaust system hangers (3, 4, and 5) and the insulator near the resonator. For yukon denali and escalade owners using this repair procedure they should first need to lubricate the insulators following installation of the Muffler assembly onto the exhaust system hangers (2 and 3). Install Muffler to catalytic converter nuts and tighten them to 45 nm (33 lb ft) before securing the insulator to the hanger. Create the necessary height for the rear axle by using an adjustable jack before installing and securing both the right rear Shock Absorber lower bolt and nut at 95 nm (70 lb ft) torque and the right rear stabilizer shaft link to the frame and its bolt and nut at 65 nm (48 lb ft). Tighten the right rear axle tie rod bolt and nut to 105 nm (77 lb ft) then reinstall the rear axle vent hose and its swivel clip if required. First use the j 38185 to attach the right rear link rod between the ball studs and sensors before securing corresponding clips to the frame and Control Arm Bracket. Next, position the right rear wheel speed sensor wiring harness electrical connector clip to the frame. An rpo z55-equipped vehicle requires the right rear air line and chassis wiring harness electrical connector connections between Shock Absorber and right rear wheel speed sensor wiring harness electrical connector . Install the right rear tire together with the wheel as the final step.

Related Cadillac Escalade Parts
 Cadillac Escalade Catalytic Converter
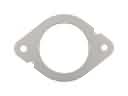 Cadillac Escalade Catalytic Converter Gasket
 Cadillac Escalade EGR Valve
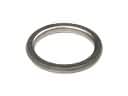 Cadillac Escalade Exhaust Flange Gasket
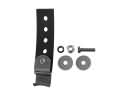 Cadillac Escalade Exhaust Hanger
 Cadillac Escalade Exhaust Heat Shield
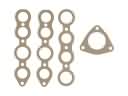 Cadillac Escalade Exhaust Manifold
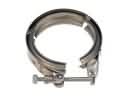 Cadillac Escalade Exhaust Manifold Clamp
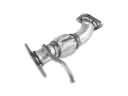 Cadillac Escalade Exhaust Pipe
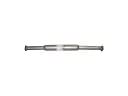 Cadillac Escalade Exhaust Resonator
 Cadillac Escalade Muffler Hanger Straps
 Cadillac Escalade Tail Pipe