
Popular OEM Chevrolet Blazer Parts
- Body & Hardware Parts View More >
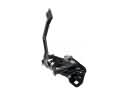
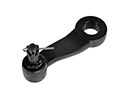
- Steering Parts View More >
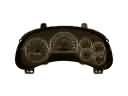
- Electrical Parts View More >
- Air & Fuel Delivery Parts View More >
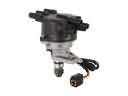
- Charging & Starting Parts View More >
- Engine Parts View More >
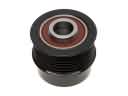
- Belts & Cooling Parts View More >
- Suspension Parts View More >
- Driveline & Axles Parts View More >
- Emission Control & Exhaust Parts View More >
- Transmission Parts View More >
- Brakes Parts View More >


Why Buy Genuine Chevrolet Blazer Parts From ChevyPartsGiant.com
Looking for real Chevrolet Blazer parts? ChevyPartsGiant.com may be a better choice to find genuine parts at wallet-friendly prices. We sell only OEM Chevrolet Blazer parts, ensuring perfect fit, reliability, and long-term performance. With our website, you can easily get access to the same parts found at local Chevrolet stores. All components are produced by Chevrolet and are exclusively fitted on Chevrolet Blazer automobiles. By shopping at our store, you can enjoy the quality of the Chevrolet factory without the high prices of brick-and-mortar facilities. We achieve this because we are an online store operating at lower costs, which we pass on to you. We also have a user-friendly platform where you can find and order genuine Chevrolet Blazer parts swiftly. We are here to make your process of restoring a Chevrolet Blazer or dealing with simple repairs quick and inexpensive. We also make it easy to obtain Chevrolet Blazer parts at competitive shipping prices and a team of knowledgeable staff ready to take your order. Choose ChevyPartsGiant.com to save time and money, as well as keep your Chevrolet Blazer in the good condition.
In December 2018 General Motors Company launched its mid-size Chevrolet Blazer crossover followed by the beginning of its initial sales in January 2019. The Chevrolet Blazer adopts parts from the Chevrolet Camaro while presenting a sporty profile which sizes the vehicle between the Equinox and Traverse. Three power engine choices exist for Chevrolet Blazer customers: 2.0 L LSY I4 turbo and two options that involve 2.5 L LCV I4 and 3.6 L LGX V6 engine units. Premium performance at any time from zero to sixty miles-per-hour is provided by the V6 engine which delivers direct fuel injection coupled with DOHC 24-valve design and aluminum block/hand construction to generate 308 hp at 6700 rpm alongside 270 lb-ft of torque at 5000 rpm. Each Chevrolet Blazer engine type comes with specific towing limits where the 4-cylinder offers 1500 pound capacity while the V6 engine reaches 4500 pounds capacity. The manual shifting 9-speed automatic transmission operation includes front-wheel drive and all-wheel drive systems based on its compatibility with four-cylinder and V6 engine choices. The Blazer maintains good stability during driving through its precise steering capabilities enabled by its front strut suspension system that combines with multilink rear suspension. The Chevrolet Blazer achieves 19 mpg city/27 mpg highway with front-wheel drive and 19 mpg city/26 mpg highway with all-wheel drive according to its fuel efficiency ratings. All Chevrolet Blazer editions benefit from genuine parts provided by the Chevrolet vehicle production department according to factory specifications for precise results.
Chevrolet Blazer concerns center on evaporative emissions, body electrical, and engine sealing, which streamlines diagnosis. In the emissions system, a loose gas cap triggers the check engine light on the Chevrolet Blazer. Inspect the cap gasket, check for cracks, reseat it firmly, then replace the gas cap and confirm readiness. Body electrical faults hinder windows on the Chevrolet Blazer during daily use. An overheating window regulator motor slows travel or stops mid stroke until it cools. Measure current draw, lubricate guides, verify the switch, then replace the window regulator motor and retest. Engine sealing problems on the Chevrolet Blazer often involve a leaking intake manifold gasket. Watch for external coolant seepage, milky oil, overheating, and rough running after cold starts. Pressure test the cooling system, inspect oil condition, and replace the intake manifold gasket, then bleed air. These issues affect emissions integrity, window operation, and engine reliability on the Blazer. Address EVAP faults first, then windows, then seals, to protect the Blazer. With timely service, the Blazer delivers clear diagnostics, smooth windows, and sealed cooling passages. Complete a road test at temperature and recheck for leaks and code readiness.
Chevrolet Blazer Parts and Q&A
- Q: How to replace the water pump on a 4.3L engine on Chevrolet Blazer?A:In order to change the water pump in a 4.3L engine, empty the cooling system, loosen the water pump pulley bolts, and disassemble the cooling fan and drive belt. Removal of the pump and gaskets of water pump and cleaning of the surfaces followed by a replacement of the pump and gaskets. Reconnect parts and test leakages.
- Q: How to replace the starter motor on Chevrolet Blazer?A:The battery negative cable will be required to be disconnected and the vehicle raised to remove the starter motor. Either remove the differential carrier shield (when fitted) and then remove the starter mounting bolts, disconnecting the wires. Install the new starter and use shims as necessary and tighten all bolts. Install the shield again and re-connect the battery.
- Q: How to replace the engine oil and oil filter on Chevrolet Blazer?A:To install a new Mass Air Flow Sensor (MAF), the electrical connectors of both IAT and MAF sensor are to be disconnected and the PCV valve tube of the air cleaner intake duct is to be pulled out. Take out throttle body air cleaner intake duct with the MAF. After starting the engine, check the components and ascertain the presence of leaks.


