ChevyParts
My Garage
My Account
Cart
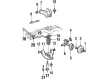
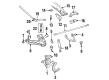
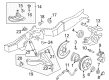
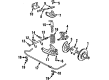
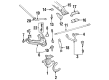
OEM Chevrolet Blazer Ball Joint
Control Arm Joint- Select Vehicle by Model
- Select Vehicle by VIN
Select Vehicle by Model
orMake
Model
Year
Select Vehicle by VIN
For the most accurate results, select vehicle by your VIN (Vehicle Identification Number).
8 Ball Joints found


Chevrolet Blazer Ball Joint, Front Upper Part Number: 88911387
$34.06 MSRP: $60.81You Save: $26.75 (44%)Ships in 1-3 Business Days
Chevrolet Blazer Ball Joint, Front Lower Part Number: 19416895
$20.58 MSRP: $50.23You Save: $29.65 (60%)
Chevrolet Blazer Lower Ball Joint, Front Part Number: 15687079
$44.20 MSRP: $88.75You Save: $44.55 (51%)
Chevrolet Blazer Lower Ball Joint Part Number: 88967425
$65.21 MSRP: $107.41You Save: $42.20 (40%)Ships in 1-2 Business Days


Chevrolet Blazer Ball Joint, Lower Part Number: 9766423


Chevrolet Blazer Upper Ball Joint Part Number: 19146901
Chevrolet Blazer Upper Ball Joint, Front Part Number: 19416903

Chevrolet Blazer Upper Ball Joint, Front Part Number: 19133669
Chevrolet Blazer Ball Joint
Want to cut long-term maintenance and repair costs? Choose OEM Ball Joint. Those parts deliver top durability you can trust. On our site, you'll find a huge catalog of genuine Chevrolet Blazer parts. Prices are unbeatable, so you can keep more in your pocket. Every OEM Chevrolet Blazer Ball Joint includes a manufacturer's warranty. You can also get an easy return policy that keeps buying risk free. Fast delivery, get your car on the road quickly. It's simple to search, compare, and order. Stop guessing about quality or fit. Order today and save with parts that last.
Chevrolet Blazer Ball Joint is one of the essential suspension and steering system part that is comprised of control arms and the steering knuckle. Usually located in the front suspension of the car these ball joints offer unconstrained rotation in a two plane way but no translation. Made of steel, these are the bearing stud and nut conforming with the socket enclosed within a protective shelter to keep off dust. Modern designs of ball joints have slowly replaced earlier kingpin designs and provide much better adjustability of the caster and camber angles while not compromising on the stability and comfort. Due to improvements in bearing design and the dust boot seals, ball joints in Chevrolet Blazers do not need servicing and hence they are sealed for life, increasing the safety of the vehicles on the road.
Chevrolet Blazer Ball Joint Parts Questions & Experts Answers
- Q: How to replace the lower ball joint on a 4WD on Chevrolet Blazer?A:Start your 4wd lower Ball Joint replacement by lifting the car and supporting it before you take off the tire and wheel. Take off the Torsion Bar and take out the wheel drive shaft. Begin by drilling 1/8-inch diameter holes for 1/4-inch deep through the lower Ball Joint rivets before eliminating their heads using a 1/2-inch drill. You need to use a pin punch to push out the rivets as you take out the lower Ball Joint from its position in the Control Arm below. After setting the new lower Ball Joint in the Control Arm, follow the fastener notice in service precautions before installing bolts and nuts. Tighten lower Ball Joint nuts to 23 nm (17 ft. Lbs.) according to specifications. Replace the drive shaft wheel along with the loaded torsion member into the vehicle before installing the tire and wheel and then lowering the car. During the final step examine the wheel's position first of all.

Related Chevrolet Blazer Parts
 Chevrolet Blazer Drive Shaft
 Chevrolet Blazer Alignment Bolt
 Chevrolet Blazer Axle Support Bushings
 Chevrolet Blazer Coil Spring Insulator
 Chevrolet Blazer Coil Springs
 Chevrolet Blazer Control Arm Bolt
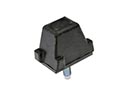 Chevrolet Blazer Control Arm Bumper
 Chevrolet Blazer Control Arm Bushing
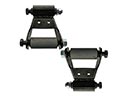 Chevrolet Blazer Leaf Spring Shackle
 Chevrolet Blazer Spindle
 Chevrolet Blazer Sway Bar Bushing
 Chevrolet Blazer Wheel Cover