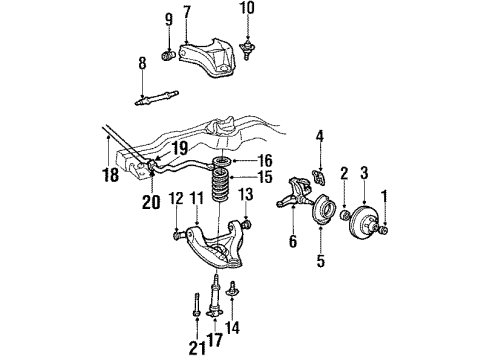
Make sure this part fits

GM 88911387
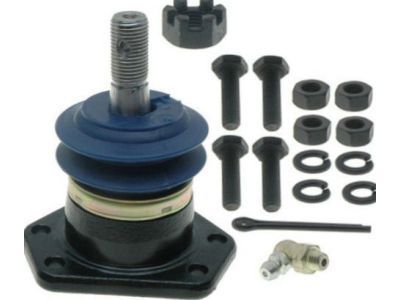
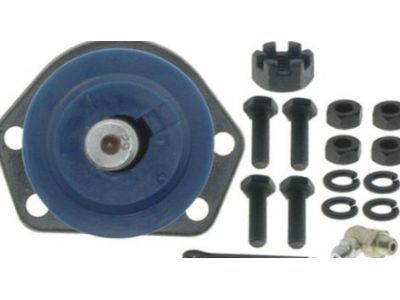
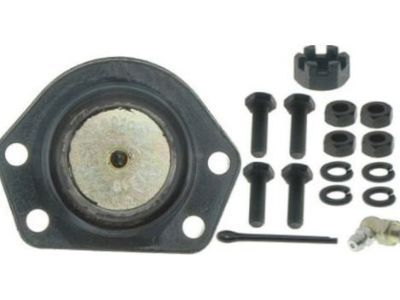
Ball Joint, Front Upper

1984-2005 GM

Customer Questions & Expert Answers (15)
GM 88911387 Ball Joint, Front Upper
  • Part Description
    Joint Kit, Front Upper Control Arm Ball; Suspension Ball Joint
  • Position
    Front Upper
  • Replaced By
    19460397
  • Manufacturer
    General Motors
Make sure this part fits
$34.06 MSRP: $60.81
You Save: $26.75 (44%)
Ships in 1-3 Business Days
1
ADD TO CART
  • Vehicle Fitment

    Year Make Model Trim Engine
    1991-1996 Buick Commercial ChassisBase8 Cyl 5.0 L GAS, 8 Cyl 5.7 L GAS
    1984-1989 Buick ElectraEstate Wagon, Limited, Park Avenue6 Cyl 4.1 L GAS, 8 Cyl 5.0 L GAS, 8 Cyl 5.7 L DIESEL
    1984-1990 Buick LeSabreCollector's Edition, Custom, Estate Wagon, Limited6 Cyl 3.8 L GAS, 6 Cyl 4.1 L GAS, 8 Cyl 5.0 L GAS, 8 Cyl 5.7 L DIESEL
    1984-1987 Buick RegalBase, GNX, Grand National, Limited, T-Type6 Cyl 3.8 L GAS, 6 Cyl 4.1 L GAS, 6 Cyl 4.3 L DIESEL, 8 Cyl 5.0 L GAS, 8 Cyl 5.7 L DIESEL
    1991-1996 Buick RoadmasterBase, Collector's Edition, Estate Wagon, Estate Wagon Collector's Edition, Limited, Limited Collector's Edition8 Cyl 5.0 L GAS, 8 Cyl 5.7 L GAS
    1987-1992 Cadillac BroughamBase, d'Elegance8 Cyl 5.0 L GAS, 8 Cyl 5.7 L GAS
    1984-1987 Cadillac DeVilleBase, Cabriolet, d'Elegance, Touring8 Cyl 4.1 L GAS, 8 Cyl 5.7 L DIESEL
    1993-1996, 1990, 1984-1986 Cadillac Fleetwood60 Special, Base, Brougham, Brougham d'Elegance, Formal8 Cyl 4.1 L GAS, 8 Cyl 4.5 L GAS, 8 Cyl 5.0 L GAS, 8 Cyl 5.7 L DIESEL, 8 Cyl 5.7 L GAS, 8 Cyl 6.0 L GAS
    1985-2005 Chevrolet AstroBase, CL, CS, LS, LT4 Cyl 2.5 L GAS, 6 Cyl 4.3 L GAS
    1995-2005 Chevrolet BlazerBase, LS, LT, Trailblazer, Xtreme, ZR26 Cyl 4.3 L GAS
    View More
    Warning: California's Proposition 65
  • Customer Questions & Expert Answers

    Q:
    Is 88911387 compatible with my car? Posted by ChevyPartsGiant Specialist
    A:
    Please Select Your Vehicle model to see if part number 88911387 is suitable before ordering.
    Posted by ChevyPartsGiant Specialist
    Q:
    How to replace the upper ball joint on Chevrolet Astro? Posted by Customer
    A:
    Before starting upper Ball Joint replacement work raise the vehicle and keep the floor jack under the lower Control Arm to secure the assembly during the process and avoid any safety risks. Put your safety stand under the lower end of the Control Arm and take off the tire and wheel. You need to unfasten both brake hose and speed sensor brackets from the upper Control Arm. Drill two 6.35 mm deep holes into the upper Ball Joint rivets using a 3.175 mm bit and then remove the rivet heads with a 12.7 mm drill. Before removal use a pin punch to break the rivets; next extract the cotter pin plus upper Ball Joint retaining nut. Use the j 36607 Ball Joint separator (J 36607) to disconnect the upper Ball Joint from the Steering Knuckle by placing it on the Ball Joint and Steering Knuckle. Move the upper Control Arm away from the Steering Knuckle while you take out the upper Ball Joint. Install the new upper Ball Joint onto the upper Control Arm and fasten it with mounting bolts and nuts tightened to 30 nm (22 ft.lbs). Please install the speed sensor bracket first then the brake hose bracket on the upper Control Arm by using 16 nm (12 ft. Lbs.) torque settings. Secure the upper Ball Joint to the Steering Knuckle using the retaining nut and tighten it to 98 nm (72 ft. Lbs.). Thread in the new cotter pin until it goes through the upper Ball Joint stud before tightening the nut and bending the pin against the nut flats. Thread the upper Ball Joint grease fitting into place and apply grease until it shows at the seal using a grease gun. Reinstall the tire and wheel afterward then take off the safety stand and lower the vehicle to inspect front wheel alignment.
    Posted by ChevyPartsGiant Specialist
    Q:
    How to replace the upper ball joint on Chevrolet S10? Posted by Customer
    A:
    Secure a vehicle lift and safety stands underneath in preparation for replacing the upper Ball Joint. Take off the Torsion Bar and disconnect the wheel speed sensor wiring harness bracket and brake hose bracket by removing their mounting bolt and nut from the upper Control Arm. Take the brackets away from the upper Control Arm and remove the cotter pin before the retaining nut at the Ball Joint. With a pry bar under the Control Arm push up then a helper hits the knuckle stud near the Ball Joint to loosen it. Support the upper Control Arm and Steering Knuckle with a block to keep them aside when you take the upper Ball Joint from the Steering Knuckle before suspending the Steering Knuckle to prevent Brake Line damage. Pozisyon the upper Ball Joint from the Steering Knuckle by drilling 12.7 mm (1/2 inch) holes into rivet heads then removing them with a pin punch and upper Ball Joint. Insert the new upper Ball Joint onto the upper Control Arm and tighten retaining bolts and nuts to 23 nm (17 ft. Lbs.). Thread in the upper Ball Joint to the Steering Knuckle and bolt it with a retaining nut until it reaches 83 nm (61 ft lbs.), making sure the Ball Joint stays aligned for the cotter pin without going beyond the one sixth turn limit. Install a fresh cotter pin into the Ball Joint stud system and form both ends to engage with the nut facility. Reattach the wheel speed sensor wiring harness and brake hose bracket to their positions on the Control Arm using the mounting bolt and nut which needs 24 nm (18 ft. Lbs.) torque. Put the Torsion Bar back in place, mount the tire and wheel, lower the vehicle, then inspect the steering wheel alignment.
    Posted by ChevyPartsGiant Specialist
    Q:
    What tools are required to service and repair the ball joint on GMC Safari? Posted by Customer
    A:
    The following tools are needed to service and repair the Ball Joint: Ball Joint separator (J 36607). Start by lifting the vehicle while ensuring a floor jack is beneath the control lower arm to make sure it stays in place and protects the user from injury. Safely support the lower Control Arm using a safety stand, remove tire and wheel. Then, remove the brake hose bracket and the speed sensor bracket off from the upper Control Arm. Punch out the rivets mounting the upper Ball Joint to the upper Control Arm. Drill three 3.175 mm (1/8 inch) diameter x 6.35 mm (1/4 inch) in hole depth each rivet. Drill the rivet heads off with a 12.7 mm (1/2 inch) drill bit and remove the rivets with a pin punch. Remove the cotter pin and the upper Ball Joint retaining nut, and then use the Ball Joint separator (J 36607) attached to the upper Ball Joint and Steering Knuckle and remove the upper Ball Joint from the Steering Knuckle. Pull the upper Control Arm out of the Steering Knuckle and remove the upper Ball Joint. For installation, mount the upper Ball Joint on the upper Control Arm; using the mounting bolts and nuts, tighten them down to 30 nm (22 ft. Lbs.). Reinstall the speed sensor bracket and the brake hose bracket on the upper Control Arm and tighten corresponding nuts to 16 nm (12 ft. Lbs.). Attach upper Ball Joint to Steering Knuckle, and assembly it using retaining nut as well as secure with tightening it to 98 nm (72 ft. Lbs.). Install a new cotter pin and tighten nut on additional 1/6 to thread the cotter pin through the upper Ball Joint stud and bending according the nut flats. Lastly, install the upper Ball Joint grease fitting, grease the upper Ball Joint till grease comes out at the grease seal, reinstall the tire and wheel, take off the safety stand, lower the vehicle, and perform a front wheel alignment check.
    Posted by ChevyPartsGiant Specialist
    Q:
    What needs to be removed to access the tie rods for the 2000 Chevrolet Astro? Posted by Customer
    A:
    The front splash shield, which requires the removal of two bolts and pivoting the shield.
    Posted by ChevyPartsGiant Specialist
    See expert answers on similar Ball Joint
    Q:
    How do you prepare the rivets for removal for the 2004 Chevrolet Blazer? Posted by Customer
    A:
    Drill a pilot hole in the lower ball joint rivets using a 3.175 mm (1/8 inch) drill to create a 6.35 mm (1/4 inch) deep hole in the center of each rivet, then drill the rivet heads away with a 12.7 mm (1/2 inch) drill.
    Posted by ChevyPartsGiant Specialist
    See expert answers on similar Ball Joint
    Q:
    What is the process for installing the new upper ball joint for the 2004 Chevrolet Blazer? Posted by Customer
    A:
    Attach the new upper ball joint to the upper control arm, securing it with retaining bolts and nuts tightened to 23 Nm (17 ft. lbs.).
    Posted by ChevyPartsGiant Specialist
    See expert answers on similar Ball Joint
    Q:
    What should be done after securing the upper ball joint for the 2005 Chevrolet Blazer? Posted by Customer
    A:
    Insert a new cotter pin into the upper ball joint stud and bend the ends against the nut.
    Posted by ChevyPartsGiant Specialist
    See expert answers on similar Ball Joint
    Q:
    What should be done regarding the lower ball joint for the 2004 Chevrolet S10? Posted by Customer
    A:
    Remove the safety stand from under the lower control arm and visually inspect the lower ball joint for wear, noting that the housing should project 1.27 mm (0.050 inch) beyond the ball joint cover on a new joint. If the housing is flush or recessed, replace the lower ball joint.
    Posted by ChevyPartsGiant Specialist
    See expert answers on similar Ball Joint
    Q:
    What is the first step to service and repair the lower ball joint for the 2000 GMC Jimmy? Posted by Customer
    A:
    Raise and support the vehicle under the lower control arms with safety stands, ensuring the floor jack remains under the lower control arm during removal and installation.
    Posted by ChevyPartsGiant Specialist
    See expert answers on similar Ball Joint
    Q:
    How do you secure the lower ball joint during installation for the 2001 GMC Jimmy? Posted by Customer
    A:
    Install the lower ball joint retaining bolts and nuts, tightening them to 23 Nm (17 ft. lbs.).
    Posted by ChevyPartsGiant Specialist
    See expert answers on similar Ball Joint
    Q:
    What is the procedure for installing the cotter pin for the 2000 GMC Safari? Posted by Customer
    A:
    Install a new cotter pin, tightening the nut an additional 1/6 amount to insert the cotter pin through the upper ball joint stud, and bend the pin against the nut flats.
    Posted by ChevyPartsGiant Specialist
    See expert answers on similar Ball Joint
    Q:
    How do you remove the rivets for the 2002 Chevrolet S10? Posted by Customer
    A:
    Use a pin punch to remove the rivets and take out the lower ball joint from the lower control arm.
    Posted by ChevyPartsGiant Specialist
    See expert answers on similar Ball Joint
    Q:
    What should be done to prevent straining the brake line for the 2001 GMC Jimmy? Posted by Customer
    A:
    Place a block under the upper control arm to keep it and the steering knuckle out of the way while suspending the steering knuckle.
    Posted by ChevyPartsGiant Specialist
    See expert answers on similar Ball Joint
    Q:
    How do you install the new lower ball joint for the 2004 GMC Sonoma? Posted by Customer
    A:
    Position the new lower ball joint onto the lower control arm, following the Fastener Notice in Service Precautions, then install the retaining bolts and nuts.
    Posted by ChevyPartsGiant Specialist
    See expert answers on similar Ball Joint
    If you have any questions about this product, please don't hesitate to ask us. We will be happy to help you!

OEM GM Ball Joint, Front Upper 88911387 Designed for Proper Fit and Performance

Original OEM GM parts deliver superior quality and meet all performance standards needed for optimal automotive operation. The authentic part identified by 88911387 Ball Joint, Front Upper is available in the market under the name GM Ball Joint. This genuine product has a full warranty coverage from the manufacturer available at all authorized GM dealers throughout the United States. This part 88911387 Ball Joint, Front Upper fits certain Chevrolet S10, Impala, Caprice models, as well as GMC Sonoma, Typhoon, Syclone. Additionally, it is compatible with Cadillac DeVille, Fleetwood, Brougham and Buick Regal, LeSabre, Roadmaster models.
The original GM component designated by manufacturer part number 88911387 maintains top performance when functioning as the Joint Kit, Front Upper Control Arm Ball; Suspension Ball Joint unit at its Front Upper. The component 88911387 is constructed from durable material and its dimensions span 4.3 x 4.0 x 3.7 inches while weighing 1.80 Pounds. The Direct Replacement component is ready in New condition to ensure full compatibility with your vehicle system. This component receives the designation of Upper Ball Joint; Stud Kit, Steering Knuckle Control Arm; Ball Joint Kit. The part 88911387 has available replacement options listed under 19460397. Each vehicle needs 2 units of the part marked as SKU 88911387. GM manufacturer provides a warranty that ensures reliable operation of this product. The Shipping Policy and Return Policy pages outline complete details regarding shipping procedures and return processes.
If you want to save money in the long run on maintenance and repairs, you should choose OEM products because they're of the top level of durability. Are you on the quest of finding GM parts, our site is worth a visit. We stock an endless selection of high-quality GM components including things like ignition coils all the way through to fan shrouds and all at prices that can not be matched. You have nothing to worry about because all our OEM parts are covered with a manufacturer warranty, which guarantees superior quality and value.