Popular OEM Cadillac DeVille Parts
- Body & Hardware Parts View More >
- Steering Parts View More >
- Electrical Parts View More >
- Air & Fuel Delivery Parts View More >
- Charging & Starting Parts View More >
- Engine Parts View More >
- Belts & Cooling Parts View More >
- Suspension Parts View More >
- Driveline & Axles Parts View More >
- Emission Control & Exhaust Parts View More >
- Transmission Parts View More >
- Brakes Parts View More >
Why Buy Genuine Cadillac DeVille Parts From ChevyPartsGiant.com
Looking for real Cadillac DeVille parts? ChevyPartsGiant.com may be a better choice to find genuine parts at wallet-friendly prices. We sell only OEM Cadillac DeVille parts, ensuring perfect fit, reliability, and long-term performance. With our website, you can easily get access to the same parts found at local Cadillac stores. All components are produced by Cadillac and are exclusively fitted on Cadillac DeVille automobiles. By shopping at our store, you can enjoy the quality of the Cadillac factory without the high prices of brick-and-mortar facilities. We achieve this because we are an online store operating at lower costs, which we pass on to you. We also have a user-friendly platform where you can find and order genuine Cadillac DeVille parts swiftly. We are here to make your process of restoring a Cadillac DeVille or dealing with simple repairs quick and inexpensive. We also make it easy to obtain Cadillac DeVille parts at competitive shipping prices and a team of knowledgeable staff ready to take your order. Choose ChevyPartsGiant.com to save time and money, as well as keep your Cadillac DeVille in the good condition.
Since its first appearance as the "Coupe DeVille" at the 1949 General Motors Motorama Cadillac DeVille grew into a symbol of American luxury while experiencing multiple significant modifications. The 331 cubic-inch (5.4L) V8 engine provided early Cadillac DeVille models with powerful and smooth operation. The mid-1950s development of the Cadillac DeVille allowed it to enhance market standing through the addition of sedan and coupe models. The redesigned eighth generation 2000 model displayed aerodynamic enhancements to its shape along with the traditional elegance found within the Cadillac collection. Introduced as the first production sedan for this technology Cadillac DeVille 2000 came equipped with an automotive Night Vision system that used infrared sensors to boost nighttime visibility and safety. The Hydra-Matic automatic transmission system enabled smooth gear shifts in early Cadillac DeVille models which boosted the vehicle's overall performance and features. Owners can maintain their car's original superior performance features through access to genuine DeVille parts. Owners who aim to maintain the vehicle's original condition should rely on OEM parts because they adhere precisely to Cadillac's factory requirements.
Cadillac DeVille reveals three clusters that are based around the body electronics, HVAC air distribution, and engine sealing. In body electronics, the DeVille windows can fall into the door or halt midway. The window regulator has worn cables and motors, causing binding of the regulator and loss of support. Replacing the window regulator, cleaning of tracks is necessary, ensuring that smooth movement is restored on the DeVille. In the case of HVAC, DeVille may blow the incorrect temperature or remain on the floor or in defrost mode only. A faulty AC mode door actuator loses the position feedback and air is directed over the plenum. Re-program the system and replace the AC mode door actuator in case of error in travel. In engine sealing, DeVille can spill oil at the bottom of the crankcase and the bellhousing region. A damaged back-half seal and a leaking oil pan gasket will emit drips and smoke traces on the back of the drives. Clean up the area and verify the source of the leakage again by putting dye in the hole and resealing the gasket of the oiled pan with caution. The DeVille needs the powertrain cradle to be lowered in order to conduct some repairs. Conclude with a test drive, check that there are no patches under Cadillac. Clear codes, test actuator calibration, and record starting voltages to be applied in future Cadillac service. Through these measures, Cadillac DeVille will have smooth windows, proper air movement and dry undersides.
Cadillac DeVille Parts and Q&A
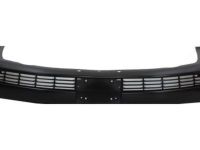
- Q: How to replace the rear bumper fascia on Cadillac DeVille?A:In order to fit the rear bumper fascia, put the car up, and take the extensions of the rear wheelhouse off. Unplug the ultrasonic rear park assist harness, the rear compartment sill plate, and side trim panel. Disassemble the rear bumper fascia, attach the new fascia and reconnect all the parts then lower the vehicle.
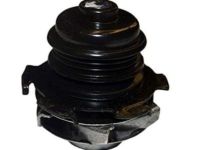
- Q: How to replace the water pump on Cadillac DeVille?A:To change the water pump drain the cooling system and remove the parts that are required to be changed. Unplug hoses, pull down the water pump cover and insert the Water Pump Remover to take out the pump. Wipe clean, replace the new pump with the seal and reassemble all components making sure they are tight. Lastly, replenish the cooling system.
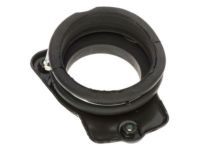
- Q: How to remove and install the intake manifold on Cadillac DeVille?A:To remove the intake manifold, firstly, remove the sight shield and unhook different items from the camshaft covers and fuel rail. Remove the fuel rail and injector assembly, the intake manifold. Clean and inspect it before installing it, including the right connections and tightening bolts in order. Check for any fuel leaks before reattaching the sight shield.


