Make sure this part fits

GM 19418996
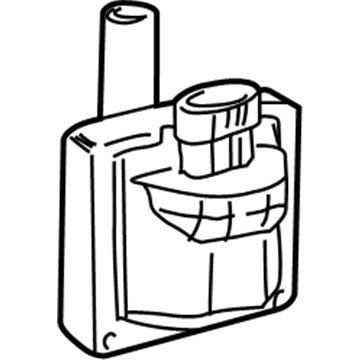
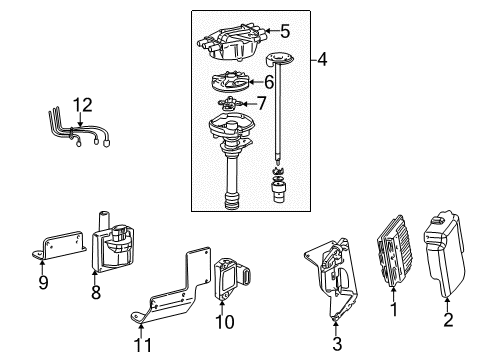
Ignition Coil

1996-2007 GM

Customer Questions & Expert Answers (30)
GM 19418996 Ignition Coil
  • Part Description
    Coil Assembly, Ignition
  • Replaces
    10489421, 19207138
  • Manufacturer
    General Motors
Make sure this part fits
$77.31 MSRP: $158.88
You Save: $81.57 (52%)
Ships in 1-3 Business Days
1
ADD TO CART
  • Related Parts
  • Product Specifications
  • Vehicle Fitment
  • Customer Questions & Expert Answers
  • Product Specifications

    BrandGenuine GM
    Manufacturer Part Number19418996
    Part DescriptionCoil Assembly, Ignition
    Other NamesCoil, Ignition Coil
    Item Dimensions8.3 x 6.1 x 4.1 inches
    Item Weight2.30 Pounds
    ConditionNew
    Fitment TypeDirect Replacement
    Replaces10489421, 19207138
    ManufacturerGeneral Motors
    SKU19418996
    WarrantyThis genuine GM part is guaranteed by GM's factory warranty.
    Shipping & ReturnShipping Policy Return Policy
    Warning: California's Proposition 65
  • Vehicle Fitment

    Year Make Model Trim Engine
    1996 Buick Commercial ChassisBase8 Cyl 5.7 L GAS
    1996 Buick RoadmasterCollector's Edition, Estate Wagon Collector's Edition, Limited Collector's Edition8 Cyl 5.7 L GAS
    1999-2000 Cadillac EscaladeBase8 Cyl 5.7 L GAS
    1996 Cadillac FleetwoodBase, Brougham8 Cyl 5.7 L GAS
    1996-2005 Chevrolet AstroBase, LS, LT6 Cyl 4.3 L GAS
    1996-2005 Chevrolet BlazerBase, LS, LT, Trailblazer, Xtreme, ZR26 Cyl 4.3 L GAS
    1996-1999 Chevrolet C1500Base, Cheyenne, LS, Silverado, WT6 Cyl 4.3 L GAS, 8 Cyl 5.0 L GAS, 8 Cyl 5.7 L GAS, 8 Cyl 6.5 L DIESEL
    1996-1999 Chevrolet C1500 SuburbanBase, LS, LT8 Cyl 5.7 L GAS
    1996-2000 Chevrolet C2500Base, Cheyenne, LS, Silverado, WT8 Cyl 5.0 L GAS, 8 Cyl 5.7 L CNG, 8 Cyl 5.7 L GAS, 8 Cyl 6.5 L DIESEL, 8 Cyl 7.4 L GAS
    1996-1999 Chevrolet C2500 SuburbanBase, LS, LT8 Cyl 5.7 L GAS, 8 Cyl 7.4 L GAS
    View More
  • Customer Questions & Expert Answers

    Q:
    Is this 19418996 designed for my car? Posted by ChevyPartsGiant Specialist
    A:
    Please Select Your Vehicle model to see if part number 19418996 is suitable before ordering.
    Posted by ChevyPartsGiant Specialist
    Q:
    How to replace the ignition coil on Chevrolet Astro? Posted by Customer
    A:
    The first step to replace an Ignition Coil requires you to remove the engine cover followed by disconnecting all electrical connectors. Start by detaching the Ignition Coil wire from the Distributor before removing the studs which connect the bracket and Ignition Coil to the Intake Manifold. Drill and use a punch tool to remove the two bracket rivets holding the Ignition Coil in place before you can pull out both components from their holding position. Use the 2 screws included in the Ignition Coil replacement kit to install the coil onto its bracket after making sure to follow fastener notice in service precautions. Use the provided studs to mount the Ignition Coil and bracket to the Intake Manifold before tightening them to 11 n.m (97 lb in). After connecting the Ignition Coil wire avoid letting it contact any objects such as a dip stick because continuous contact may create a ground or short circuit in the future. Next connect all electrical connectors and reattach the engine cover.
    Posted by ChevyPartsGiant Specialist
    Q:
    How to Replace an Ignition Coil on Chevrolet Blazer? Posted by Customer
    A:
    Begin by removing the air cleaner assembly's nut followed by detaching electrical connectors from both components. Finally remove the Distributor's Ignition Coil wire before replacement. Secondly remove the accelerator cable bracket before you detach the bracket and Ignition Coil studs which fasten to the Intake Manifold and then disconnect the bracket and coil. Pierce the two bracket rivets with a drill before punching them out to remove the Ignition Coil from its bracket. Use the provided 2 screws from the replacement Ignition Coil kit to connect the bracket with the Ignition Coil while carefully following fastener notice in service precautions. Reattach the Ignition Coil along with its bracket to the Intake Manifold by threading the studs then torque them to 11 n.m (97 lb in). Resite the accelerator control bracket by securing its nuts and studs to 12 n.m (8.9 lb ft). Attach the Ignition Coil wire taking care to avoid touching the dip stick to prevent long-term grounding or shorting events before reconnecting electrical connectors and reinstalling the air cleaner assembly and its securing nut.
    Posted by ChevyPartsGiant Specialist
    Q:
    How to service and repair the ignition coil on Chevrolet Express 2500? Posted by Customer
    A:
    Begin Ignition Coil service by removing the air cleaner assembly and its retaining nut before disconnecting wiring and extracting the Distributor wire from the coil. After removing the accelerator cable bracket's studs you must detach the bracket from the Intake Manifold while simultaneously extracting the Ignition Coil from its position. Use a drill and punch to remove the two rivets holding the Ignition Coil to its bracket before completely separating the coil from the bracket. Follow the replacement Ignition Coil kit instructions to mount the Ignition Coil on the bracket by screwing in the two supplied hardware pieces. Place the Ignition Coil and bracket onto the Intake Manifold using the studs before securing them with 11 n.m (97 lb in) of torque. Secure the accelerator control bracket by tightening its nuts and studs to 12 n.m of torque (106 lb in). Reconnect the Ignition Coil wire but ensure it stays away from all components including the dip stick to avoid long-term grounding and shorting. Finally secure the air cleaner assembly with its nut.
    Posted by ChevyPartsGiant Specialist
    Q:
    How to service and repair the ignition coil on Chevrolet Express 3500? Posted by Customer
    A:
    Service and repair of the Ignition Coil requires engine cover removal when present along with both air cleaner assembly and nut. Start by disconnecting electrical connectors before removing the Ignition Coil wire connected to the Distributor. The first step requires removing studs holding the bracket and Ignition Coil onto the Intake Manifold while you remove these two components from the system. The two rivets securing the Ignition Coil to its bracket need drilling and punching before separating the Ignition Coil from the bracket. The new Ignition Coil installation kit contains two screws to mount the Ignition Coil onto its bracket. Attach the Ignition Coil to its bracket using screws before tighten the studs to 11 n.m (8 lb ft) torque specifications when you mount the Ignition Coil assembly to the Intake Manifold. When connecting the Ignition Coil wire make sure it stays away from the dip stick component to avoid long-term grounding or shorting. When finished replace the engine cover if present while setting it all back with the correct nut on the air cleaner assembly and reconnecting all electrical connectors.
    Posted by ChevyPartsGiant Specialist
    Q:
    How to replace the ignition coil on Chevrolet Express 1500? Posted by Customer
    A:
    To add an Ignition Coil, first take off the engine cover, next take off Spark Plug Wires from ignition coils and the Ignition Coil harness connector. Then, the bolts that hold the Ignition Coil in its position should be removed, and the Ignition Coil should be brought out. For installation, secure the Ignition Coil onto the bracket, using the mounting bolts of 8 n.m (71 lb in) according to fastener notice in service precautions (SJK-1:3). Afterward, attach the Ignition Coil harness connector and the Spark Plug Wires at the ignition coils again, and topping it up, put the engine cover.
    Posted by ChevyPartsGiant Specialist
    Q:
    How to replace the ignition coil and ICM (HVS) on Chevrolet K3500? Posted by Customer
    A:
    To change the Ignition Coil and icm (HVS), one should remove the air cleaner assembly and nut , and then disconnect the electrical connectors. Second, remove the Ignition Coil wire from the Distributor and the studs that hold bracket and Ignition Coil to the Intake Manifold in place. Next, remove the bracket and Ignition Coil, drill and puncture the two rivets that secure the Ignition Coil to the bracket and remove the Ignition Coil from the bracket. To install, hang the Ignition Coil to the bracket by means of the two screws that are supplied with the replacement Ignition Coil kit, ensuring that your is adhered to the fastener notice in service precautions. Next, attach the Ignition Coil and bracket to the Intake Manifold with the studs, tightening the same with 11 n.m (8 lb ft). Restart the Ignition Coil wire so that it would not be in contact with items such as the dip stick to avoid grounding or short circuiting over time. Lastly, reconnect the electrical connectors, and reinstall the air cleaner assembly and nut.
    Posted by ChevyPartsGiant Specialist
    Q:
    How to service and repair the ignition coil on Chevrolet S10? Posted by Customer
    A:
    The service and repair of the Ignition Coil begins with removing the air cleaner assembly and its attachment nut followed by disconnecting all electrical connectors and removing the Distributor wire from the coil. The maintenance begins with removing the accelerator cable bracket and its studs from the Intake Manifold while also removing the Ignition Coil. Drill and punch out the two rivets which secure the Ignition Coil to its bracket and detach the coil from the bracket. Follow these steps for installation: use the 2 screws from the kit to mount the Ignition Coil onto its bracket and fasten both components to the Intake Manifold using studs tightening them to 11 n.m (97 lb in). Upon bracket installation the nuts and studs require tightening at 12 n.m (8.9 lb ft). Reconnect the Ignition Coil wire between components but make sure it avoids contact with the dip stick to stop future grounding or shorting issues. Install the electrical connectors and return the air cleaner assembly with its nut.
    Posted by ChevyPartsGiant Specialist
    Q:
    How to service and repair the ignition coil on GMC Safari? Posted by Customer
    A:
    Service and repair of the Ignition Coil requires removal of the air cleaner assembly with its attached nut followed by disconnecting all electrical connectors. After removing the Ignition Coil wire connected to the Distributor you must remove the two bracket-stud installations that hold the Ignition Coil and bracket to the Intake Manifold. The next step requires bracket separation followed by Ignition Coil removal from the bracket through drill and punch of the rivets which secure Ignition Coil to bracket. You can install the replacement Ignition Coil by using the two screws included in the kit to connect it to its bracket. Reattach the Ignition Coil and bracket onto the Intake Manifold using the studs while tightening them to 11 n.m (8 lb ft). Feed the Ignition Coil wire while avoiding contact with the dip stick or adjacent components to stop electrical ground and short circuits from developing. Complete the installation by reconnecting electrical connectors then reinstalling the air cleaner assembly and its nut.
    Posted by ChevyPartsGiant Specialist
    Q:
    How to replace the ignition coil on GMC Jimmy? Posted by Customer
    A:
    Start by removing the air cleaner assembly together with its nut before disconnecting electrical connectors followed by removing the Ignition Coil wire from the Distributor. Begin by first uninstalling the accelerator cable bracket after removing the studs which connect the bracket and Ignition Coil to the Intake Manifold. You can then remove the bracket and Ignition Coil when done. Drill and punch out the two rivets which connect the Ignition Coil to the bracket before removing the Ignition Coil from the bracket. The replacement Ignition Coil kit comes with 2 screws for bracket attachment during installation of the Ignition Coil. Connect the Ignition Coil to the Intake Manifold with studs then tighten each fastener to 11 n.m (97 lb in). Attach the accelerator control bracket to its position by tightening all nuts and studs to 12 n.m (8.9 lb ft) torque. When reconnecting the Ignition Coil wire position it in a way that will keep it away from all dip stick components to stop any potential shorting or grounding events. Reinstall the air cleaner assembly along with its nut after reattaching electrical connectors.
    Posted by ChevyPartsGiant Specialist
    Q:
    How to replace the ignition coil and ICM (HVS) on GMC C3500? Posted by Customer
    A:
    To change the Ignition Coil and icm (HVS), one should remove the air cleaner assembly and nut , and then disconnect the electrical connectors. Second, remove the Ignition Coil wire from the Distributor and the studs that hold bracket and Ignition Coil to the Intake Manifold in place. Next, remove the bracket and Ignition Coil, drill and puncture the two rivets that secure the Ignition Coil to the bracket and remove the Ignition Coil from the bracket. To install, hang the Ignition Coil to the bracket by means of the two screws that are supplied with the replacement Ignition Coil kit, ensuring that your is adhered to the fastener notice in service precautions. Next, attach the Ignition Coil and bracket to the Intake Manifold with the studs, tightening the same with 11 n.m (8 lb ft). Restart the Ignition Coil wire so that it would not be in contact with items such as the dip stick to avoid grounding or short circuiting over time. Lastly, reconnect the electrical connectors, and reinstall the air cleaner assembly and nut.
    Posted by ChevyPartsGiant Specialist
    Q:
    How to service and repair the ignition coil on GMC Savana 3500? Posted by Customer
    A:
    Service technicians must start by removing the engine cover if it exists before disconnecting cables and removing the Distributor wire from the Ignition Coil. To continue start by removing the studs from the bracket and Ignition Coil which connect to the Intake Manifold and then extract both the bracket and Ignition Coil. You need to drill two rivets from the Ignition Coil-bracket connection before you pull out the Ignition Coil device from its bracket. The replacement Ignition Coil kit features two screws that enable bracket attachment to the coil while securing both screws at 11 n.m (97 lb in). Secure the Ignition Coil and bracket on the Intake Manifold though its studs before tightening them to 11 n.m (97 lb in). Install the Ignition Coil wire while ensuring it avoids contact with the dip stick to stop grounding and shorting during extended periods. Last step requires reconnection of electrical connectors and replacement of engine cover if removed at any time.
    Posted by ChevyPartsGiant Specialist
    Q:
    How to replace the ignition coil on GMC Savana 1500? Posted by Customer
    A:
    Standards for replacing the Ignition Coil begin by cleaning out the air cleaner assembly and nut . Next disconnect the electrical connectors before removing the Ignition Coil wire attached to the Distributor. The process begins by taking off the accelerator cable bracket before you remove the studs holding the bracket and Ignition Coil to the Intake Manifold. Afterward, remove both the bracket and Ignition Coil. Drill and punch the Ignition Coil's two rivets which connect it to the bracket before removing the Ignition Coil from the bracket. When replacing the Ignition Coil use the 2 screws supplied in the kit to install it onto the bracket according to the fastener notice in service precautions specifications. Screw the Ignition Coil and bracket onto the Intake Manifold through the studs while tightening them to 11 n.m (97 lb in). Secure the accelerator control bracket using nuts and studs at 12 n.m (8.9 lb ft). Proceed with installation by connecting the Ignition Coil wire safely away from the dip stick to avoid shorting or ground faults in the future before connecting electric connectors and reinstalling the air cleaner assembly and its nut.
    Posted by ChevyPartsGiant Specialist
    Q:
    How to replace the ignition coil on GMC C2500? Posted by Customer
    A:
    To replace the Ignition Coil, first you should disconnect the Spark Plug Wires from ignition coils and then disconnect Ignition Coil harness connector. Do away with the Ignition Coil mounts and remove the Ignition Coil. For installation, set the Ignition Coil on the bracket with reference to the fastener notice in service precautions and install the Ignition Coil mounting bolts and tighten them to 8 n.m (71 lb in). Next, join the Ignition Coil harness and then reconnect the Spark Plug Wires to the ignition coils.
    Posted by ChevyPartsGiant Specialist
    Q:
    How to Replace an Ignition Coil on GMC Sonoma? Posted by Customer
    A:
    Begin by removing the air cleaner assembly's nut followed by detaching electrical connectors from both components. Finally remove the Distributor's Ignition Coil wire before replacement. Secondly remove the accelerator cable bracket before you detach the bracket and Ignition Coil studs which fasten to the Intake Manifold and then disconnect the bracket and coil. Pierce the two bracket rivets with a drill before punching them out to remove the Ignition Coil from its bracket. Use the provided 2 screws from the replacement Ignition Coil kit to connect the bracket with the Ignition Coil while carefully following fastener notice in service precautions. Reattach the Ignition Coil along with its bracket to the Intake Manifold by threading the studs then torque them to 11 n.m (97 lb in). Resite the accelerator control bracket by securing its nuts and studs to 12 n.m (8.9 lb ft). Attach the Ignition Coil wire taking care to avoid touching the dip stick to prevent long-term grounding or shorting events before reconnecting electrical connectors and reinstalling the air cleaner assembly and its securing nut.
    Posted by ChevyPartsGiant Specialist
    Q:
    What is the next step after removing the studs for the 2004 Chevrolet Astro? Posted by Customer
    A:
    After that, detach the bracket and ignition coil, then drill and punch out the two rivets that hold the ignition coil to the bracket.
    Posted by ChevyPartsGiant Specialist
    See expert answers on similar Ignition Coil
    Q:
    What is the next step after reinstalling the accelerator control bracket for the 2005 Chevrolet Blazer? Posted by Customer
    A:
    Connect the ignition coil wire, ensuring it does not touch any components like the dip stick.
    Posted by ChevyPartsGiant Specialist
    See expert answers on similar Ignition Coil
    Q:
    What should be done after attaching the ignition coil to the bracket for the 2005 Chevrolet Astro? Posted by Customer
    A:
    Then, secure the ignition coil and bracket to the intake manifold with the studs, tightening them to 11 N.m (97 lb in).
    Posted by ChevyPartsGiant Specialist
    See expert answers on similar Ignition Coil
    Q:
    How do you attach the ignition coil to the bracket during installation for the 2005 Chevrolet Express 2500? Posted by Customer
    A:
    Attach the ignition coil to the bracket using the 2 screws provided in the replacement ignition coil kit.
    Posted by ChevyPartsGiant Specialist
    See expert answers on similar Ignition Coil
    Q:
    What should be done after installing the ignition coil and bracket for the 2002 Chevrolet S10? Posted by Customer
    A:
    Reinstall the accelerator control bracket, tightening the nuts and studs to 12 N.m (8.9 lb ft).
    Posted by ChevyPartsGiant Specialist
    See expert answers on similar Ignition Coil
    Q:
    What is the next step after removing the cables from the throttle lever for the 2005 Chevrolet Silverado 1500? Posted by Customer
    A:
    Take off the accelerator control cable bracket nuts and remove the bracket with cables attached from the throttle body.
    Posted by ChevyPartsGiant Specialist
    See expert answers on similar Ignition Coil
    Q:
    How do you detach the ignition coil from the brackets for the 2007 Chevrolet Silverado 1500 Classic? Posted by Customer
    A:
    Remove the ignition coil bolts/nuts.
    Posted by ChevyPartsGiant Specialist
    See expert answers on similar Ignition Coil
    Q:
    How should the ignition coil be installed for the 2004 Chevrolet Silverado 1500? Posted by Customer
    A:
    Attach the brackets to either side of the ignition coil, then install and tighten the ignition coil bolts/nuts to 3.5 N.m (31 lb in).
    Posted by ChevyPartsGiant Specialist
    See expert answers on similar Ignition Coil
    Q:
    What is the first step in the installation process for the 2002 GMC Safari? Posted by Customer
    A:
    Attach the ignition coil to the bracket using the 2 screws provided in the replacement ignition coil kit.
    Posted by ChevyPartsGiant Specialist
    See expert answers on similar Ignition Coil
    Q:
    What should be done after removing the engine cover for the 2003 GMC Savana 2500? Posted by Customer
    A:
    Disconnect the spark plug wires at the ignition coils and the ignition coil harness connector.
    Posted by ChevyPartsGiant Specialist
    See expert answers on similar Ignition Coil
    Q:
    What is the next step after reinstalling the ignition coil bracket for the 2006 GMC Sierra 1500? Posted by Customer
    A:
    Tighten the nuts/stud to 12 N.m (106 lb in) and position the bracket and cables.
    Posted by ChevyPartsGiant Specialist
    See expert answers on similar Ignition Coil
    Q:
    What should be done after removing the studs for the 2001 GMC Savana 3500? Posted by Customer
    A:
    Remove the bracket and ignition coil.
    Posted by ChevyPartsGiant Specialist
    See expert answers on similar Ignition Coil
    Q:
    What is the first step to replace the ignition coil for the 2005 GMC Sierra 1500? Posted by Customer
    A:
    Disconnect the energy storage box (ESB) if equipped with regular production option (RPO) HP2.
    Posted by ChevyPartsGiant Specialist
    See expert answers on similar Ignition Coil
    Q:
    What should be disconnected after removing the engine cover for the 2003 GMC Safari? Posted by Customer
    A:
    Disconnect the electrical connectors and the ignition coil wire from the distributor.
    Posted by ChevyPartsGiant Specialist
    See expert answers on similar Ignition Coil
    Q:
    What is the order of reconnecting the cables for the 2007 GMC Sierra 1500 Classic? Posted by Customer
    A:
    Reconnect the accelerator cable and cruise control cable to the engine bracket, then the cruise control cable to the throttle lever and the accelerator cable slug to the throttle lever.
    Posted by ChevyPartsGiant Specialist
    See expert answers on similar Ignition Coil
    If you have any questions about this product, please don't hesitate to ask us. We will be happy to help you!

OEM GM 19418996, Excellent Performance and Perfect Fitment

To ensure reliability, purchase GM part # 19418996 Ignition Coil. It is sometimes referred to as GM Ignition Coil. Choosing OEM parts is the optimal decision for guaranteeing superior quality and perfect performance. These components undergo stringent quality checks and are carefully constructed to comply with GM's factory specifications, ensuring a smooth installation process.

ChevyPartsGiant.com is a leading supplier of genuine GM parts such as GM 19418996 Ignition Coil. Our website boasts an extensive inventory of OEM GM parts, available at highly competitive prices in the market. Should you require any new genuine GM parts, rest assured we will deliver them swiftly and efficiently to your doorstep. Furthermore, all our parts come with the assurance of a manufacturer's warranty. For detailed Chevy parts information, click here.
Choose ChevyPartsGiant for discounted prices, exceptional service and fast delivery