ChevyParts
My Garage
My Account
Cart
OEM GMC Sierra 1500 Classic Ignition Coil
Ignition Coil Resistor- Select Vehicle by Model
- Select Vehicle by VIN
Select Vehicle by Model
orMake
Model
Year
Select Vehicle by VIN
For the most accurate results, select vehicle by your VIN (Vehicle Identification Number).
3 Ignition Coils found


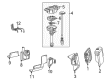
GMC Sierra 1500 Classic Ignition Coil Part Number: 19418993
$55.76 MSRP: $114.58You Save: $58.82 (52%)Ships in 1 Business Day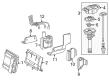
GMC Sierra 1500 Classic Ignition Coil Part Number: 19418992
$74.88 MSRP: $134.99You Save: $60.11 (45%)Ships in 1-2 Business Days
GMC Sierra 1500 Classic Ignition Coil Part Number: 19418996
$70.98 MSRP: $145.86You Save: $74.88 (52%)Ships in 1-3 Business Days
GMC Sierra 1500 Classic Ignition Coil
Want to cut long-term maintenance and repair costs? Choose OEM Ignition Coil. Those parts deliver top durability you can trust. On our site, you'll find a huge catalog of genuine GMC Sierra 1500 Classic parts. Prices are unbeatable, so you can keep more in your pocket. Every OEM GMC Sierra 1500 Classic Ignition Coil includes a manufacturer's warranty. You can also get an easy return policy that keeps buying risk free. Fast delivery, get your car on the road quickly. It's simple to search, compare, and order. Stop guessing about quality or fit. Order today and save with parts that last.
GMC Sierra 1500 Classic Ignition Coil Parts Questions & Experts Answers
- Q: How to replace the ignition coil on GMC Sierra 1500 Classic?A:When changing the Ignition Coil, take out the air cleaner outlet resonator and remove the Ignition Coil and Distributor Cap contact Ignition Coil wire. Then, remove Ignition Coil and Ignition Coil driver's electrical connectors. Take off the accelerator cable slug and cruise control cable from the throttle lever then take off the accelerator cable and cruise control cable from the engine bracket. Remove accelerator control cable bracket nuts and remove brick with cables connected from Throttle Body, retacing it out of the way. Unscrew the accelerator cable bracket nuts and stud and remove the accelerator cable bracket. Continue the process and take out the Ignition Coil bracket studs and the Ignition Coil together with the bracket. Remove the Ignition Coil bolts/nuts to release the Ignition Coil from the brackets. During installation, fit the brackets up either side of the Ignition Coil and fit Ignition Coil bolts/nuts and secure to 3.5 (31 lb in) n.m. Mount Ignition Coil and bracket and attach Ignition Coil bracket studs. Torque to 11 n.m (97 lb in). Re-install the accelerator cable bracket and tighten nuts/stud to 12 n.m (106 lb in), and put the bracket and cables in their positions. Install the accelerator control cable bracket with cables to Throttle Body, and tighten the nuts 10 n.m (89 lb in). Check and reconnect the accelerator cable and cruise control cable to the engine bracket while the brake cable to throttle lever and the accelerator cable slug on the throttle lever are connected. Fasten the electrical connectors for the Ignition Coil and Ignition Coil driver, making sure that the coil wire nipple is located no further than 60 or no less than 35 degrees aft from the perpendicular from the engine centerline on the outboard side of the coil. At last, connect the Ignition Coil wire to the Ignition Coil and the Distributor Cap, replace the air cleaner outlet resonator.

Related GMC Sierra 1500 Classic Parts
 GMC Sierra 1500 Classic Air Charge Temperature Sensor
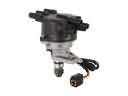 GMC Sierra 1500 Classic Distributor
 GMC Sierra 1500 Classic Distributor Cap
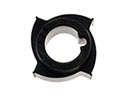 GMC Sierra 1500 Classic Distributor Reluctor
 GMC Sierra 1500 Classic Engine Control Module
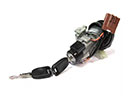 GMC Sierra 1500 Classic Igniter
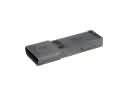 GMC Sierra 1500 Classic Ignition Control Module
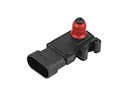 GMC Sierra 1500 Classic MAP Sensor
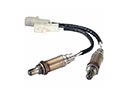 GMC Sierra 1500 Classic Oxygen Sensor
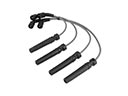 GMC Sierra 1500 Classic Spark Plug Wires
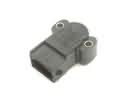 GMC Sierra 1500 Classic Throttle Position Sensor
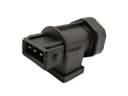 GMC Sierra 1500 Classic Vehicle Speed Sensor