Make sure this part fits

GM 19418993
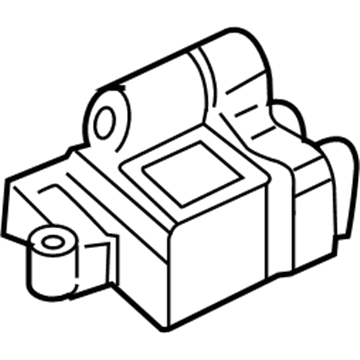
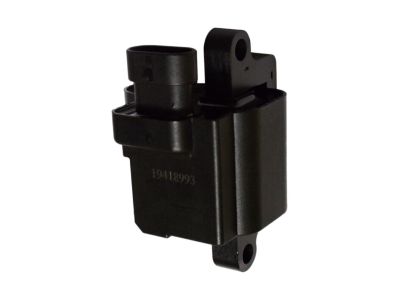
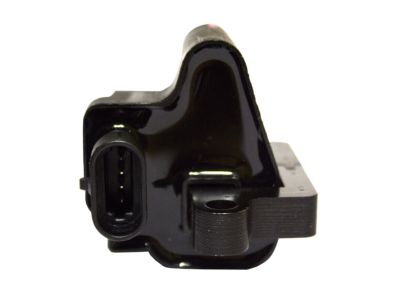
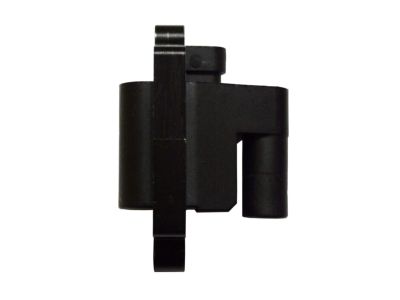
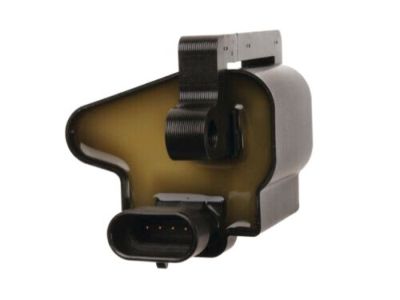
Ignition Coil

1999-2007 GM

Customer Questions & Expert Answers (19)
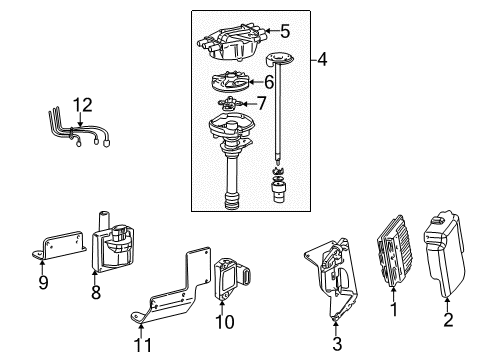
GM 19418993 Ignition Coil
  • Part Description
    Coil Assembly, Ignition
  • Replaces
    12558693, 19355500
  • Manufacturer
    General Motors
Make sure this part fits
$60.73 MSRP: $124.80
You Save: $64.07 (52%)
Ships in 1 Business Day
1
ADD TO CART
  • Related Parts
  • Product Specifications
  • Vehicle Fitment
  • Customer Questions & Expert Answers
  • Product Specifications

    BrandGenuine GM
    Manufacturer Part Number19418993
    Part DescriptionCoil Assembly, Ignition
    Other NamesCoil, Ignition Coil
    ConditionNew
    Fitment TypeDirect Replacement
    Replaces12558693, 19355500
    ManufacturerGeneral Motors
    SKU19418993
    WarrantyThis genuine GM part is guaranteed by GM's factory warranty.
    Shipping & ReturnShipping Policy Return Policy
    Warning: California's Proposition 65
  • Vehicle Fitment

    Year Make Model Trim Engine
    2002-2006 Cadillac EscaladeBase8 Cyl 5.3 L GAS, 8 Cyl 6.0 L GAS
    2003-2006 Cadillac Escalade ESVBase8 Cyl 6.0 L GAS
    2003-2006 Cadillac Escalade EXTBase8 Cyl 6.0 L GAS
    2003-2006 Chevrolet Avalanche 1500Base, LS, LT, North Face, On Road Edition, WBH, Z66, Z718 Cyl 5.3 L FLEX, 8 Cyl 5.3 L GAS
    2003-2006 Chevrolet Avalanche 2500Base, LS, LT8 Cyl 8.1 L GAS
    1999-2007 Chevrolet Silverado 1500Base, Hybrid, LS, LT, LTZ, SS, WT, Z71 Off-Road8 Cyl 4.8 L GAS, 8 Cyl 5.3 L FLEX, 8 Cyl 5.3 L FULL HYBRID EV-GAS (FHEV), 8 Cyl 5.3 L GAS, 8 Cyl 6.0 L GAS
    2007 Chevrolet Silverado 1500 ClassicHybrid, LS, LT, SS, WT8 Cyl 4.8 L GAS, 8 Cyl 5.3 L FLEX, 8 Cyl 5.3 L FULL HYBRID EV-GAS (FHEV), 8 Cyl 5.3 L GAS, 8 Cyl 6.0 L GAS
    2005-2006, 2001-2003 Chevrolet Silverado 1500 HDBase, LS, LT8 Cyl 6.0 L GAS
    2007 Chevrolet Silverado 1500 HD ClassicLT8 Cyl 6.0 L GAS
    1999-2004 Chevrolet Silverado 2500Base, LS, LT, WT8 Cyl 5.3 L GAS, 8 Cyl 6.0 L BI-FUEL, 8 Cyl 6.0 L CNG, 8 Cyl 6.0 L GAS
    View More
  • Customer Questions & Expert Answers

    Q:
    Is this 19418993 designed for my car? Posted by ChevyPartsGiant Specialist
    A:
    Please Select Your Vehicle model to see if part number 19418993 is suitable before ordering.
    Posted by ChevyPartsGiant Specialist
    Q:
    How to service and repair the ignition coil on Chevrolet Avalanche 1500? Posted by Customer
    A:
    So as to service and repair the Ignition Coil, you must remove the spark plug wire from the Ignition Coil first, then disconnect the Ignition Coil electrical connector. Then remove the Ignition Coil bolts and take out Ignition Coil. To install, put the Ignition Coil back in and screw it with the Ignition Coil bolts tighten it to 8 n.m (71 lb in). Then reconnect to the Ignition Coil electrical connector and then install the spark plug wire to the Ignition Coil.
    Posted by ChevyPartsGiant Specialist
    Q:
    How to replace the ignition coil on Chevrolet Avalanche 2500? Posted by Customer
    A:
    Begin by disconnecting the spark plug wire through a 1/2 turn rotation of the boot then extract the wire from the Ignition Coil. The Ignition Coil electrical connector must be disconnected first followed by the Ignition Coil bolts before pulling out the Ignition Coil. New Ignition Coil installation requires caution because self-tapping bolt(s) retain it in place initially until secure mounting becomes possible. Firmly attach the Ignition Coil using the Ignition Coil bolts and tighten these fittings to 12 n.m (106 lb in). Reinstall the spark plug wire to the Ignition Coil. Then reattach the Ignition Coil electrical connector. Check the wire installation by applying side pressure to the boot until it seats correctly and tighten any loose boots.
    Posted by ChevyPartsGiant Specialist
    Q:
    How to replace the ignition coil on Chevrolet Silverado 1500 Classic? Posted by Customer
    A:
    When changing the Ignition Coil, take out the air cleaner outlet resonator and remove the Ignition Coil and Distributor Cap contact Ignition Coil wire. Then, remove Ignition Coil and Ignition Coil driver's electrical connectors. Take off the accelerator cable slug and cruise control cable from the throttle lever then take off the accelerator cable and cruise control cable from the engine bracket. Remove accelerator control cable bracket nuts and remove brick with cables connected from Throttle Body, retacing it out of the way. Unscrew the accelerator cable bracket nuts and stud and remove the accelerator cable bracket. Continue the process and take out the Ignition Coil bracket studs and the Ignition Coil together with the bracket. Remove the Ignition Coil bolts/nuts to release the Ignition Coil from the brackets. During installation, fit the brackets up either side of the Ignition Coil and fit Ignition Coil bolts/nuts and secure to 3.5 (31 lb in) n.m. Mount Ignition Coil and bracket and attach Ignition Coil bracket studs. Torque to 11 n.m (97 lb in). Re-install the accelerator cable bracket and tighten nuts/stud to 12 n.m (106 lb in), and put the bracket and cables in their positions. Install the accelerator control cable bracket with cables to Throttle Body, and tighten the nuts 10 n.m (89 lb in). Check and reconnect the accelerator cable and cruise control cable to the engine bracket while the brake cable to throttle lever and the accelerator cable slug on the throttle lever are connected. Fasten the electrical connectors for the Ignition Coil and Ignition Coil driver, making sure that the coil wire nipple is located no further than 60 or no less than 35 degrees aft from the perpendicular from the engine centerline on the outboard side of the coil. At last, connect the Ignition Coil wire to the Ignition Coil and the Distributor Cap, replace the air cleaner outlet resonator.
    Posted by ChevyPartsGiant Specialist
    Q:
    How to service the ignition coil on Chevrolet Tahoe? Posted by Customer
    A:
    To service the Ignition Coil first disconnect the Spark Plug Wires from the ignition coils and from the Ignition Coil harness connector. Remove the Ignition Coil mounting bolts and pull the Ignition Coil out next. For installation, mount the Ignition Coil onto the bracket while observing the fastener notice in service precautions. Thereafter, fix the Ignition Coil mounting bolts and tighten them to 8 n.m (71 lb in). Lastly, reinstall the Ignition Coil harness connector and the Spark Plug Wires in the ignition coils.
    Posted by ChevyPartsGiant Specialist
    Q:
    How to replace the ignition coil on Chevrolet Silverado 2500? Posted by Customer
    A:
    A manufacturer should begin Ignition Coil replacement by disconnecting the energy storage box (ESB) whenever the vehicle has regular production option (RPO) hp2. First disconnect the spark plug wire along with the Ignition Coil electrical connector. As part of rpo hp2 installation remove auxiliary heater water pump bracket bolts followed by detaching the pump from studs before placing it back into position. You should begin by removing the starter/generator control module (SGCM) cover mounting bolts after which you must uninstall the cover. Then separate the 3-phase cable connectors and extract the cable from the sgcm. Third-phase cable bracket nuts should be removed when possible followed by relocating the cable and bracket. Keep working until you extract all Ignition Coil bolts and remove the Ignition Coil unit altogether. To install the Ignition Coil, first place it onto the studs then use bolts to secure it before tightening the bolts to 8 n.m (71 lb in). For vehicles with rpo hp2, position the cable with bracket while you install the 3-phase cable bracket to its studs then tighten the nuts to 15 n.m (11 lb ft). Screw the sgcm 3-phase cable to its positions while tightening the nuts up to 9 n.m (80 lb in). Install the sgcm cover after tightening its bolts to 9 n.m (80 lb in). Position the auxiliary heater water pump on the studs and bolt it down with bracket fixings that you will tighten to 15 n.m (11 lb ft). To complete the installation you must reconnect the Ignition Coil electrical connector and spark plug wire followed by reinstalling the energy storage box (ESB) if your vehicle has rpo hp2.
    Posted by ChevyPartsGiant Specialist
    Q:
    How to replace the ignition coil on Chevrolet Silverado 3500 Classic? Posted by Customer
    A:
    To replace the Ignition Coil, you need de-energize the energy box storage (ESB) if it is equipped with the regular production option (RPO) hp2, first. Take out the spark plug wire and Ignition Coil electrical connector. If rpo hp2 is there, remove the auxiliary heater water pump bracket bolts from there, then unhook the auxiliary heater water pump from the studs and relocate it. Then, undo the starter/generator control module cover bolts and the cover, as well as the 3-phase cable nuts and the cable from the sgcm. If rpo hp2 is installed, loosen the 3-phase cable bracket nuts and remove the bracket and reposition cable to the bracket. Take out the Ignition Coil bolts and Ignition Coil. For installation, insert the Ignition Coil and tighten with bolts to 8 n.m (71 lb in). With the presence of rpo hp2, position the cable with the bracket and install the 3-phase cable bracket to the studs and tighten the nuts to 15n.m (11 lb ft). The 3-phase cable should be installed to the sgcm and nuts should be tightened to 9 n.m (80 lb in). Put back the sgcm cover and bolts with tightness set to 9 n.m (80 lb in). If rpo32 hp2 is used, locate the auxiliary heater water pump onto the studs and bolt them to the bracket with the specified torque of 15 n.m (11 lb ft). Connect the Ignition Coil wiring, plug wire, and esb connection if necessary.
    Posted by ChevyPartsGiant Specialist
    Q:
    How to replace the ignition coil(s) and bracket on Chevrolet Suburban 1500? Posted by Customer
    A:
    Begin the Ignition Coil and bracket replacement process by first detaching the main electrical connector that powers the coils then disconnect the Spark Plug Wires from the coils. First remove the Ignition Coil bracket studs attached to the rocker arm cover before taking off the Ignition Coil bracket. Install the Ignition Coil and bracket assembly to the valve rocker arm cover while inserting threadlock gm p/n 12345382 or equivalent into the threads of the Ignition Coil and bracket assembly studs. Fasten the Ignition Coil mounting bracket studs with a torque setting of 12 n.m (106 lb in). Proceed to reconnect Spark Plug Wires to ignition coils followed by attachment of the harness connector for ignition coils and finally connect the main electrical connector for ignition coils before tightening the harness nut to 9 n.m (80 lb in).
    Posted by ChevyPartsGiant Specialist
    Q:
    How to replace the ignition coil on Chevrolet Silverado 3500? Posted by Customer
    A:
    To replace the Ignition Coil here is what one has to do first; disconnect the energy storage box (ESB) if they have regular production option (RPO) hp2. Unplug the spark plug wire and Ignition Coil. If rpo hp2 is present remove the aux hep water pump bracket bolts then the aux hep water pump from the studs and reposition it. Next, extract the starter/generator control module (SGCM) - cover bolts and the cover, 3-phase cable nuts and the cable from sgcm. In the presence of rpo hp2, take off the 3-phase cable bracket nuts and the bracket, then rearrange it for the presence of the cable and bracket. Free the Ignition Coil bolts and remove the Ignition Coil. For installation, mount the Ignition Coil and hold it with the bolts, which should be tightened to 8 n.m (71 lb in). If rpo hp2 is available, use cable with bracket with the positions and install the 3-phase cable bracket on the studs, using a nut-tightening force of 15 n.m (11 lb ft). Reconnect the 3-phase cable to the sgcm and fix it with nuts tightened to 9 n.m (80 lb in). Reinstall the sgcm cover and nuts, tightening those to 9 n.m (80 lb in). Rpo hp2 present, place the auxiliary heater water pump on the studs and fasten it to the bracket with the bolt tightened to 15 n.m (11 lb ft). Finally, connect the Ignition Coil electrical connector, replace the spark plug wire or reconnect the esb if necessary.
    Posted by ChevyPartsGiant Specialist
    Q:
    How to service and repair the ignition coil on Chevrolet Suburban 2500? Posted by Customer
    A:
    Service and repair of ignition coils requires users to first remove Spark Plug Wires from the coils and disconnect the Ignition Coil harness electrical connection before proceeding. First remove the Ignition Coil bolts then extract the Ignition Coil. Install the Ignition Coil according to service precautions but position it correctly before fastening it following the fastener notice. Premature self-tapping thread failure on Ignition Coil bolts must be strictly avoided when installing them. Install the Ignition Coil by securing bolts to a torque specification of 12 n.m (106 lb in) before reattaching the Ignition Coil harness electrical connector and linking the Spark Plug Wires to the coils.
    Posted by ChevyPartsGiant Specialist
    Q:
    How to replace the ignition coil on GMC Sierra 1500? Posted by Customer
    A:
    Begin the Ignition Coil replacement process by removing the energy storage box (ESB) when your vehicle has regular production option (RPO) hp2. Start by removing both components of the spark plug wire and the Ignition Coil electrical connection. When rpo hp2 is present remove the auxiliary heater water pump bracket bolts to extract the pump from its studs before readjusting its position. Start by removing bolts that secure both the starter/generator control module (SGCM) cover and its cover. Following that, remove the 3-phase cable nuts before disconnecting the cable from the sgcm. With rpo hp2 installation remove the 3-phase cable bracket nuts to regroup the cable alongside the bracket. First disconnect the Ignition Coil bolts then take out both the bolts and the Ignition Coil itself. During installation securely position the Ignition Coil using the bolts then tighten them to 8 n.m (71 lb in). When rpo hp2 exists, position both cable and bracket on their studs before tightening all the 3-phase cable bracket nuts to 15 n.m (11 lb ft). Fasten the 3-phase cable at the sgcm while tightening the nuts to 9 n.m (80 lb in). Secure the sgcm cover and bolts with final torque at 9 n.m (80 lb in). Market rpo hp2 variants require placement of the auxiliary heater water pump on studs followed by tightening bracket bolts to 15 n.m (11 lb ft). When finished, attach the Ignition Coil electrical connector after installing the spark plug wire and reconnecting the esb if present.
    Posted by ChevyPartsGiant Specialist
    Q:
    How to replace the ignition coil on GMC Sierra 1500 Classic? Posted by Customer
    A:
    When changing the Ignition Coil, take out the air cleaner outlet resonator and remove the Ignition Coil and Distributor Cap contact Ignition Coil wire. Then, remove Ignition Coil and Ignition Coil driver's electrical connectors. Take off the accelerator cable slug and cruise control cable from the throttle lever then take off the accelerator cable and cruise control cable from the engine bracket. Remove accelerator control cable bracket nuts and remove brick with cables connected from Throttle Body, retacing it out of the way. Unscrew the accelerator cable bracket nuts and stud and remove the accelerator cable bracket. Continue the process and take out the Ignition Coil bracket studs and the Ignition Coil together with the bracket. Remove the Ignition Coil bolts/nuts to release the Ignition Coil from the brackets. During installation, fit the brackets up either side of the Ignition Coil and fit Ignition Coil bolts/nuts and secure to 3.5 (31 lb in) n.m. Mount Ignition Coil and bracket and attach Ignition Coil bracket studs. Torque to 11 n.m (97 lb in). Re-install the accelerator cable bracket and tighten nuts/stud to 12 n.m (106 lb in), and put the bracket and cables in their positions. Install the accelerator control cable bracket with cables to Throttle Body, and tighten the nuts 10 n.m (89 lb in). Check and reconnect the accelerator cable and cruise control cable to the engine bracket while the brake cable to throttle lever and the accelerator cable slug on the throttle lever are connected. Fasten the electrical connectors for the Ignition Coil and Ignition Coil driver, making sure that the coil wire nipple is located no further than 60 or no less than 35 degrees aft from the perpendicular from the engine centerline on the outboard side of the coil. At last, connect the Ignition Coil wire to the Ignition Coil and the Distributor Cap, replace the air cleaner outlet resonator.
    Posted by ChevyPartsGiant Specialist
    Q:
    How to Replace and Install an Ignition Coil on GMC Yukon XL 2500? Posted by Customer
    A:
    Start by detaching the Ignition Coil electrical connector and removing the spark plug wire from the Ignition Coil. Beginning with Ignition Coil bolt removal leads to the Ignition Coil being extracted from the engine. Installation requires returning the Ignition Coil to its proper position then securing it by tightening the bolts to 8 n.m (71 lb in) based on fastener notice in service precautions. First connect the Ignition Coil electrical connector before installing the spark plug wire to the Ignition Coil.
    Posted by ChevyPartsGiant Specialist
    Q:
    How to replace the ignition coil on GMC Yukon XL 1500? Posted by Customer
    A:
    The replacement of an Ignition Coil begins by detaching Spark Plug Wires at the ignition coils followed by disconnecting the Ignition Coil harness connector. Start by taking out the Ignition Coil using mounting bolt removal. Start by positioning the Ignition Coil onto its bracket while following service precautions fastener notice instructions then secure the mounting bolts with 8 n.m (71 lb in) torque. Reconnect the Ignition Coil harness connector once you finish by connecting the Spark Plug Wires at the ignition coils.
    Posted by ChevyPartsGiant Specialist
    Q:
    How to replace the ignition coil on GMC Sierra 3500? Posted by Customer
    A:
    Follow these steps when changing the Ignition Coil: start by twisting and gently removing the spark plug wire connector from the Ignition Coil. The first step includes disconnecting the Ignition Coil electrical connector followed by removal of the Ignition Coil bolts before extraction of the Ignition Coil. Be careful when installing the new Ignition Coil because initial self-tapping bolt retention may break if handled roughly. Screw the Ignition Coil into its place then secure it with Ignition Coil bolts which need a torque of 12 n.m (106 lb in). Reconnect the electrical connector to the Ignition Coil and attach the spark plug wire to the Ignition Coil. After inspecting the wire seating you should check the boot fit by pushing it to the side and reposition any dislodged boot pieces.
    Posted by ChevyPartsGiant Specialist
    Q:
    How to replace the ignition coil on GMC Sierra 3500 Classic? Posted by Customer
    A:
    You will need to remove the intake manifold sight shield to replace the Ignition Coil. Unplug the Ignition Coil wiring harness electrical connector from the Ignition Coil and under the spark plug wire, twist the boot a 1/2 turn and pull only on the boot. Next, unbolt Ignition Coil with bolt and take Ignition Coil out from bracket, and observe that melco(R) Ignition Coil is square while delphi(R) is round in design along with brackets that match. For installation, align the Ignition Coil with the Ignition Coil bracket and then install and tighten the Ignition Coil bolts to 10 n.m (89 lb in). Reconnect the spark plug wire to the Ignition Coil, ensuring correct reinstallation by pressing on each of the boots to ensure that they are seated correctly and then reinstalling any boot that was loose. Finally, attach the Ignition Coil wiring harness electrical connector to coil and put off intake manifold sight shield.
    Posted by ChevyPartsGiant Specialist
    Q:
    What should be removed after the accelerator control cable bracket for the 2004 Chevrolet Silverado 1500? Posted by Customer
    A:
    Remove the accelerator cable bracket nuts and stud, then the bracket itself.
    Posted by ChevyPartsGiant Specialist
    See expert answers on similar Ignition Coil
    Q:
    What should be done after positioning the bracket and cables for the 2005 Chevrolet Silverado 1500? Posted by Customer
    A:
    Install the accelerator control cable bracket with cables attached to the throttle body and tighten the nuts to 10 N.m (89 lb in).
    Posted by ChevyPartsGiant Specialist
    See expert answers on similar Ignition Coil
    Q:
    How do you detach the ignition coil from the brackets for the 2006 GMC Sierra 1500? Posted by Customer
    A:
    Remove the ignition coil bolts/nuts.
    Posted by ChevyPartsGiant Specialist
    See expert answers on similar Ignition Coil
    If you have any questions about this product, please don't hesitate to ask us. We will be happy to help you!

OEM GM 19418993, Excellent Performance and Perfect Fitment

To ensure reliability, purchase GM part # 19418993 Ignition Coil. It is sometimes referred to as GM Ignition Coil. Choosing OEM parts is the optimal decision for guaranteeing superior quality and perfect performance. These components undergo stringent quality checks and are carefully constructed to comply with GM's factory specifications, ensuring a smooth installation process.

ChevyPartsGiant.com is a leading supplier of genuine GM parts such as GM 19418993 Ignition Coil. Our website boasts an extensive inventory of OEM GM parts, available at highly competitive prices in the market. Should you require any new genuine GM parts, rest assured we will deliver them swiftly and efficiently to your doorstep. Furthermore, all our parts come with the assurance of a manufacturer's warranty. For detailed Chevy parts information, click here.
Choose ChevyPartsGiant for discounted prices, exceptional service and fast delivery