ChevyParts
My Garage
My Account
Cart
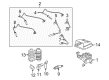
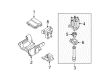
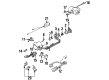
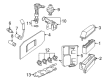
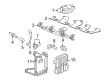
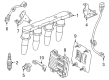
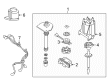
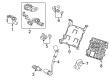
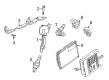
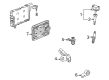
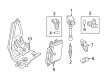
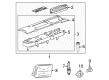
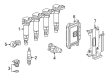
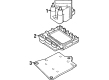
OEM Chevrolet Ignition Coil
Ignition Coil Resistor- Select Vehicle by Model
- Select Vehicle by VIN
Select Vehicle by Model
orMake
Model
Year
Select Vehicle by VIN
For the most accurate results, select vehicle by your VIN (Vehicle Identification Number).
60 Ignition Coils found


Chevrolet Ignition Coil, Green Line Part Number: 12638824
$43.33 MSRP: $76.08You Save: $32.75 (44%)Ships in 1-3 Business DaysProduct Specifications- Other Name: Coil Assembly-Ignition; Direct Ignition Coil; Coil; Coil, Ignition Coil
- Replaced by: 25206788
- Replaces: 12629646, 12578224


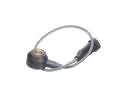
Chevrolet Ignition Coil Part Number: 10495089
$27.98 MSRP: $52.22You Save: $24.24 (47%)Ships in 1-3 Business DaysProduct Specifications- Other Name: Coil, Distributor Pick Up; Pick-Up Coil; Coil; Coil, Distributor Shaft; Coil, Ignition
- Replaces: 01987964, 1987964


Chevrolet Ignition Coil Part Number: 12632479
$56.15 MSRP: $115.40You Save: $59.25 (52%)Ships in 1-2 Business DaysProduct Specifications- Other Name: Coil, Ignition; Direct Ignition Coil; Coil On Plug Coil; Coil, Ignition Coil
- Replaces: 12590990, 12610626, 12618542


Chevrolet Ignition Coil Part Number: 19352925
$59.61 MSRP: $111.24You Save: $51.63 (47%)Product Specifications- Other Name: Coil, Ignition Coil; Ignition Coil Set; Coil
- Replaces: 10477602


Chevrolet Ignition Coil Part Number: 12611424
$79.39 MSRP: $163.16You Save: $83.77 (52%)Product Specifications- Other Name: Coil, Ignition; Direct Ignition Coil; Coil; Coil, Ignition Coil
- Replaced by: 12739916
- Replaces: 12570616


Chevrolet Ignition Coil Part Number: 12629472
$44.47 MSRP: $91.40You Save: $46.93 (52%)Ships in 1-2 Business DaysProduct Specifications- Other Name: Coil, Ignition; Ignition Control Module; Direct Ignition Coil; Ignition Module; Coil, Ignition Coil
- Replaced by: 19421261


Chevrolet Ignition Coil Part Number: 25198623
$126.49 MSRP: $259.94You Save: $133.45 (52%)Product Specifications- Other Name: Coil Assembly-Ignition; Coil, Ignition Coil
- Replaces: 55579072, 25195107

Chevrolet Ignition Coil Part Number: 10497133
$77.62 MSRP: $138.60You Save: $60.98 (44%)Ships in 1-2 Business DaysProduct Specifications- Other Name: Coil Assembly, Ignition
- Replaced by: 19435464

Chevrolet Ignition Coil Part Number: 19432144
$91.70 MSRP: $185.76You Save: $94.06 (51%)Ships in 1-3 Business DaysProduct Specifications- Other Name: Coil Assembly, Ignition; Ignition Module; Coil, Ignition Coil
- Replaces: 12587153, 12595088, 12568185


Chevrolet Ignition Coil Part Number: 10467067
$52.54 MSRP: $98.66You Save: $46.12 (47%)Ships in 1-2 Business DaysProduct Specifications- Other Name: Coil, Ignition; Coil, Ignition Coil

Chevrolet Ignition Coil Part Number: 12498335
$100.35 MSRP: $179.20You Save: $78.85 (44%)Product Specifications- Other Name: Coil, Ignition Coil; Coil
- Replaces: 01985473, 1985473

Chevrolet Ignition Coil Part Number: 12728713
$46.84 MSRP: $83.64You Save: $36.80 (44%)Ships in 1-2 Business DaysProduct Specifications- Other Name: Coil Assembly-Ignition; Coil, Ignition Coil

Chevrolet Ignition Coil Part Number: 55511559
$34.38 MSRP: $70.66You Save: $36.28 (52%)Ships in 1-2 Business DaysProduct Specifications- Other Name: Coil Assembly-Ignition; Coil, Ignition Coil
- Replaces: 55595516, 55493540

Chevrolet Ignition Coil Part Number: 55595166
$51.81 MSRP: $92.51You Save: $40.70 (44%)Ships in 1-3 Business DaysProduct Specifications- Other Name: Coil Assembly-Ignition; Coil, Ignition Coil

Chevrolet Ignition Coil Part Number: 12705399
$44.64 MSRP: $79.72You Save: $35.08 (44%)Ships in 1-3 Business DaysProduct Specifications- Other Name: Coil Assembly-Ignition; Coil, Ignition Coil
- Replaced by: 12710878

Chevrolet Ignition Coil Part Number: 19316340
$99.82 MSRP: $187.46You Save: $87.64 (47%)Ships in 1-2 Business DaysProduct Specifications- Other Name: Coil, Ignition; Coil, Ignition Coil

Chevrolet Ignition Coil Part Number: 12579177
$167.90 MSRP: $301.16You Save: $133.26 (45%)Ships in 1-3 Business DaysProduct Specifications- Other Name: Coil Assembly-Ignition; Direct Ignition Coil

Chevrolet Ignition Coil Part Number: 25190788
$120.24 MSRP: $217.62You Save: $97.38 (45%)Ships in 1-2 Business DaysProduct Specifications- Other Name: Coil Assembly-Ignition
- Replaced by: 28289935
Chevrolet Ignition Coil Part Number: 10472748
$54.32 MSRP: $101.99You Save: $47.67 (47%)Ships in 1-2 Business DaysProduct Specifications- Other Name: Coil, Ignition
- Replaced by: 19166375


Chevrolet Ignition Coil Part Number: 19166375
$54.32 MSRP: $101.99You Save: $47.67 (47%)Ships in 1 Business DayProduct Specifications- Other Name: Coil, Ignition; Coil; Coil, Ignition Coil
- Replaces: 10474481, 10457062, 10457109, 10472748
| Page 1 of 3 |Next >
1-20 of 60 Results
Chevrolet Ignition Coil
Want to cut long-term maintenance and repair costs? Choose OEM Ignition Coil. Those parts deliver top durability you can trust. On our site, you'll find a huge catalog of genuine Chevrolet parts. Prices are unbeatable, so you can keep more in your pocket. Every OEM Chevrolet Ignition Coil includes a manufacturer's warranty. You can also get an easy return policy that keeps buying risk free. Fast delivery, get your car on the road quickly. It's simple to search, compare, and order. Stop guessing about quality or fit. Order today and save with parts that last.
Chevrolet Ignition Coil Parts Questions & Experts Answers
- Q: How to replace the ignition coil on Chevrolet Colorado?A:First, remove the air cleaner resonator and outlet duct to change the ignition coil. Refrain from the engine wiring harness electrical connectors to the ignition coils; remove the bolts of the ignition coils and pull the ignition coils from the camshaft cover. When replacing the ignition coils, see that ignition coil seals are in place to the camshaft cover, then proceed to insert ignition coils to the camshaft cover. Mount the ignition coil bolts, then finish tightening them to 10 N.m (89 lb in). Reconnect the engine wiring harness electrical connectors to the ignition coils and lastly, reinstall the air cleaner resonator and outlet duct.
- Q: How to replace the ignition coil housing on Chevrolet Malibu?A:Begin by disconnecting the EI module harness connector while the ignition is OFF. First unscrew the ignition coil housing attachment bolts to remove the ignition coil housing and spark plug boot from the engine. Make sure you check that the interconnect is properly aligned before you install new ignition coil housing and verify that the interconnect seal remains in position. Spread dielectric compound on the spark plug boots while checking for any signs of corrosion. Position the ignition coil housing onto the cam cover before tightening the attachment bolts to 10 N.m (89 lb in). You should install the EI module by using its attachment screws following a tightness setting of 1.5 N.m (13 lb in). Connect the EI module harness connector while pushing it in to receive the click signal then verify positive attachment by pulling it back.
- Q: How to service and repair the ignition coil on Chevrolet S10?A:Begin by removing the air cleaner assembly's nut before disconnecting electrical connectors as well as the Distributor's Ignition Coil wire. Begin by removing the accelerator cable bracket followed by driving out the studs which maintain the bracket and Ignition Coil to the Intake Manifold before removing the bracket and Ignition Coil. The drill tool and punch job requires removal of both Ignition Coil retaining rivets before extracting the coil from the bracket. Use the 2 screws in the new Ignition Coil kit to attach the Ignition Coil to its bracket. Secure the Ignition Coil and bracket to the Intake Manifold through the studs then tighten each screw to 11 n.m (97 lb in). Securely place the accelerator control bracket while tightening the nuts and studs to 12 n.m (8.9 lb-ft). After checking that the wire can't touch the dip stick for long-term safety connect the Ignition Coil wire to resume operation then reinstall the air cleaner assembly with its nut in place.


Related Chevrolet Parts
 Chevrolet Knock Sensor
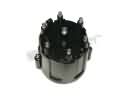 Chevrolet Distributor Cap
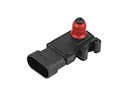 Chevrolet MAP Sensor
 Chevrolet Headlight Switch
 Chevrolet Cruise Control Switch
 Chevrolet Turn Signal Flasher
 Chevrolet Turn Signal Switch
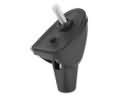 Chevrolet Antenna Base
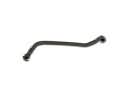 Chevrolet Crankcase Breather Hose
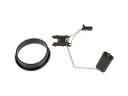 Chevrolet Fuel Level Sensor
 Chevrolet Igniter
 Chevrolet Washer Pump
Browse Chevrolet Ignition Coil by Models
Nova S10 Colorado C10 Tahoe Cruze Malibu Camaro Equinox Impala SS SSR Avalanche Silverado 1500 Silverado 2500 HD Caprice Classic Cobalt Suburban Traverse Blazer HHR Sonic Tracker Volt El Camino K10 Spark Trax Trailblazer Astro Cavalier Corvette C20 Aveo Beretta C1500 C2500 C30 C3500 Celebrity Chevette City Express Corsica Express 1500 Express 2500 Express 3500 G10 G20 G30 K1500 K20 K2500 K30 K3500 K5 Blazer Lumina Metro Monte Carlo P30 Prizm S10 Blazer Silverado 2500 Sprint Uplander Venture Lumina APV Silverado 3500 Suburban 1500 Trailblazer EXT Avalanche 1500 Avalanche 2500 Aveo5 C10 Suburban C1500 Suburban C20 Suburban C2500 Suburban Captiva Sport Citation II Cruze Limited Impala Limited K10 Suburban K1500 Suburban K20 Suburban K2500 Suburban Malibu Limited P20 R10 R10 Suburban R1500 Suburban R20 R20 Suburban R2500 R2500 Suburban R30 R3500 Silverado 1500 Classic Silverado 1500 HD Silverado 1500 HD Classic Silverado 1500 LD Silverado 1500 LTD Silverado 2500 HD Classic Silverado 3500 Classic Silverado 3500 HD Spark EV Spectrum Suburban 2500 Suburban 3500 HD V10 V10 Suburban V1500 Suburban V20 V20 Suburban V2500 Suburban V30 V3500