ChevyParts
My Garage
My Account
Cart
OEM Chevrolet Express 3500 Ignition Coil
Ignition Coil Resistor- Select Vehicle by Model
- Select Vehicle by VIN
Select Vehicle by Model
orMake
Model
Year
Select Vehicle by VIN
For the most accurate results, select vehicle by your VIN (Vehicle Identification Number).
7 Ignition Coils found


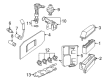
Chevrolet Express 3500 Ignition Coil Part Number: 12699382
$79.39 MSRP: $163.16You Save: $83.77 (52%)


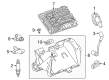
Chevrolet Express 3500 Ignition Coil Part Number: 12611424
$79.39 MSRP: $163.16You Save: $83.77 (52%)Chevrolet Express 3500 Ignition Coil Part Number: 19421259
$67.47 MSRP: $138.65You Save: $71.18 (52%)
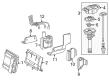
Chevrolet Express 3500 Ignition Coil Part Number: 12713668
$28.52 MSRP: $53.56You Save: $25.04 (47%)
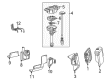
Chevrolet Express 3500 Ignition Coil Part Number: 19418992
$74.88 MSRP: $134.99You Save: $60.11 (45%)Ships in 1-2 Business Days
Chevrolet Express 3500 Ignition Coil Part Number: 19418996
$70.98 MSRP: $145.86You Save: $74.88 (52%)Ships in 1-3 Business DaysChevrolet Express 3500 Ignition Coil Part Number: 12708496
$78.58 MSRP: $161.49You Save: $82.91 (52%)
Chevrolet Express 3500 Ignition Coil
Want to cut long-term maintenance and repair costs? Choose OEM Ignition Coil. Those parts deliver top durability you can trust. On our site, you'll find a huge catalog of genuine Chevrolet Express 3500 parts. Prices are unbeatable, so you can keep more in your pocket. Every OEM Chevrolet Express 3500 Ignition Coil includes a manufacturer's warranty. You can also get an easy return policy that keeps buying risk free. Fast delivery, get your car on the road quickly. It's simple to search, compare, and order. Stop guessing about quality or fit. Order today and save with parts that last.
Chevrolet Express 3500 Ignition Coil Parts Questions & Experts Answers
- Q: How to service and repair the ignition coil on Chevrolet Express 3500?A:Service and repair of the Ignition Coil requires engine cover removal when present along with both air cleaner assembly and nut. Start by disconnecting electrical connectors before removing the Ignition Coil wire connected to the Distributor. The first step requires removing studs holding the bracket and Ignition Coil onto the Intake Manifold while you remove these two components from the system. The two rivets securing the Ignition Coil to its bracket need drilling and punching before separating the Ignition Coil from the bracket. The new Ignition Coil installation kit contains two screws to mount the Ignition Coil onto its bracket. Attach the Ignition Coil to its bracket using screws before tighten the studs to 11 n.m (8 lb ft) torque specifications when you mount the Ignition Coil assembly to the Intake Manifold. When connecting the Ignition Coil wire make sure it stays away from the dip stick component to avoid long-term grounding or shorting. When finished replace the engine cover if present while setting it all back with the correct nut on the air cleaner assembly and reconnecting all electrical connectors.

Related Chevrolet Express 3500 Parts
 Chevrolet Express 3500 Camshaft Position Sensor
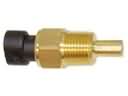 Chevrolet Express 3500 Coolant Temperature Sensor
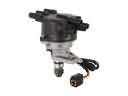 Chevrolet Express 3500 Distributor
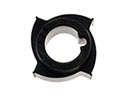 Chevrolet Express 3500 Distributor Reluctor
 Chevrolet Express 3500 Engine Control Module
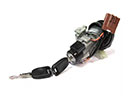 Chevrolet Express 3500 Igniter
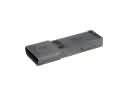 Chevrolet Express 3500 Ignition Control Module
 Chevrolet Express 3500 Intake Manifold Temperature Sensor
 Chevrolet Express 3500 Knock Sensor
 Chevrolet Express 3500 MAP Sensor
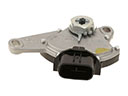 Chevrolet Express 3500 Neutral Safety Switch
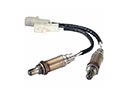 Chevrolet Express 3500 Oxygen Sensor