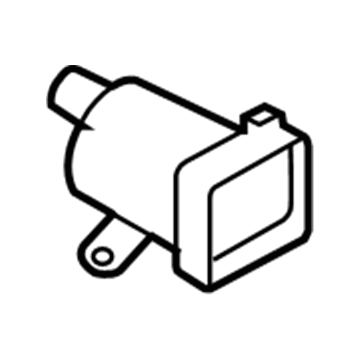
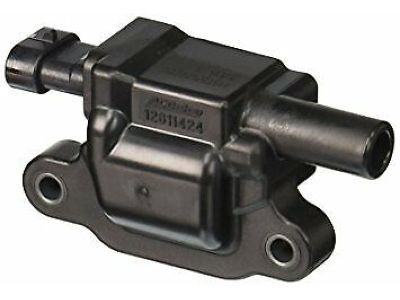
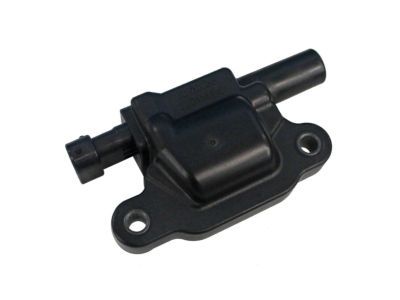
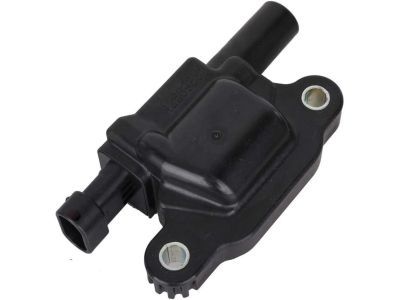
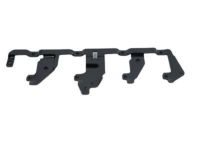
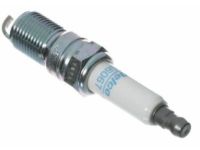
Make sure this part fits

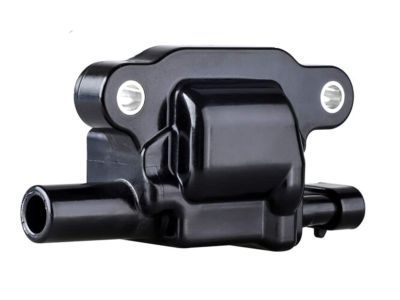
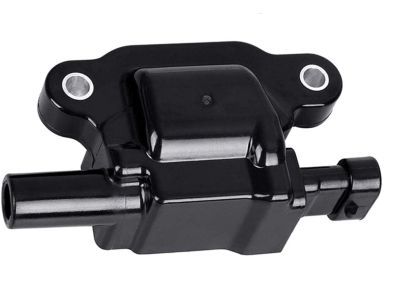
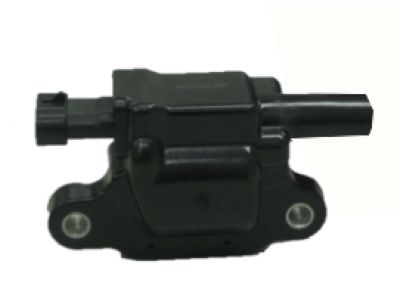
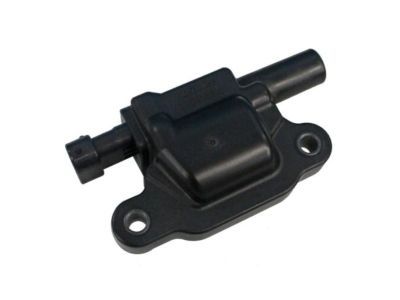
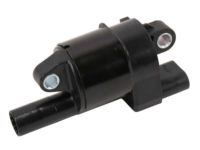
GM 12611424
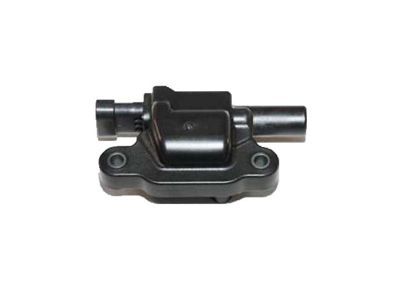
Ignition Coil

2005-2020 GM

Customer Questions & Expert Answers (26)
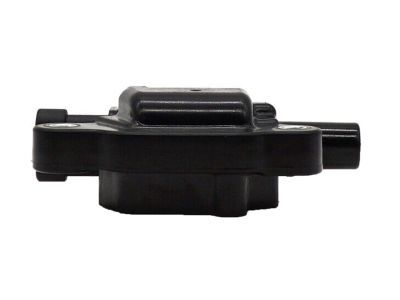
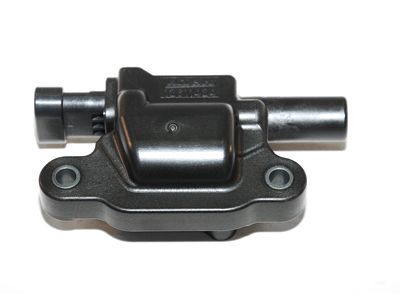
GM 12611424 Ignition Coil
  • Part Description
    Coil, Ignition; Direct Ignition Coil
  • Replaced By
    12699382
  • Replaces
    12570616
  • Manufacturer
    General Motors
Make sure this part fits
$87.58 MSRP: $151.66
You Save: $64.08 (43%)
1
ADD TO CART
  • Related Parts
  • Product Specifications
  • Vehicle Fitment
  • Customer Questions & Expert Answers
  • Product Specifications

    BrandGenuine GM
    Manufacturer Part Number12611424
    Part DescriptionCoil, Ignition; Direct Ignition Coil
    Other NamesCoil; Coil, Ignition Coil
    Item Dimensions4.9 x 2.9 x 1.7 inches
    Item Weight0.90 Pounds
    ConditionNew
    Fitment TypeDirect Replacement
    Replaces12570616
    ManufacturerGeneral Motors
    SKU12611424
    WarrantyThis genuine GM part is guaranteed by GM's factory warranty.
    Shipping & ReturnShipping Policy Return Policy
    Warning: California's Proposition 65
  • Vehicle Fitment

    Year Make Model Trim Engine
    2008-2009 Buick LaCrosseSuper8 Cyl 5.3 L GAS
    2005-2007 Buick RainierCXL, CXL Plus6 Cyl 4.2 L GAS, 8 Cyl 5.3 L GAS
    2009-2015, 2006-2007 Cadillac CTSV8 Cyl 6.0 L GAS, 8 Cyl 6.2 L GAS
    2007-2014 Cadillac EscaladeBase, Hybrid, Hybrid Platinum, Luxury, Platinum, Premium8 Cyl 6.0 L FULL HYBRID EV-FLEX (FHEV), 8 Cyl 6.0 L FULL HYBRID EV-GAS (FHEV), 8 Cyl 6.2 L FLEX, 8 Cyl 6.2 L GAS
    2007-2014 Cadillac Escalade ESVBase, Luxury, Platinum, Premium8 Cyl 6.2 L FLEX, 8 Cyl 6.2 L GAS
    2007-2013 Cadillac Escalade EXTBase, Luxury, Premium8 Cyl 6.2 L FLEX, 8 Cyl 6.2 L GAS
    2007-2013 Chevrolet AvalancheBlack Diamond LS, Black Diamond LT, Black Diamond LTZ, LS, LT, LTZ8 Cyl 5.3 L FLEX, 8 Cyl 5.3 L GAS, 8 Cyl 6.0 L GAS
    2010-2015 Chevrolet CamaroLS, LT, SS, Z/28, ZL16 Cyl 3.6 L GAS, 8 Cyl 6.2 L GAS, 8 Cyl 7.0 L GAS
    2011-2017 Chevrolet CapricePPV8 Cyl 6.0 L FLEX
    2010-2012 Chevrolet ColoradoLT8 Cyl 5.3 L GAS
    View More
  • Customer Questions & Expert Answers

    Q:
    Is this 12611424 designed for my car? Posted by ChevyPartsGiant Specialist
    A:
    Please Select Your Vehicle model to see if part number 12611424 is suitable before ordering.
    Posted by ChevyPartsGiant Specialist
    Q:
    How to replace the ignition coil on Buick Rainier? Posted by Customer
    A:
    In order to access and replace the ignition coil remove the air cleaner outlet resonator. Detach the ignition coil connectors from the ignition coils and take out the retaining bolts from the ignition coils. Then remove the ignition coils from the engine. For installation purposes, make sure the seals of the ignition coil are well seated on the valve cover before installing the ignition coil . Fit the ignition coil retaining bolts and tighten to 10 N.m (89 lb in). Finally re-connect the connectors of ignition coil and reinstall the air cleaner outlet resonator.
    Posted by ChevyPartsGiant Specialist
    Q:
    How to replace the ignition coil for Bank 2 on Buick LaCrosse? Posted by Customer
    A:
    The Ignition Coil replacement for bank 2 commences after turning off ignition and removing an engine cover to check parts without severing fuel pipes or hoses. Before changing the Ignition Coil for cylinder 2 you must disconnect the air cleaner duct from the Throttle Body as well as the positive crankcase ventilation (PCV) hose from the right bank camshaft cover but maintain the upper and lower intake manifolds in position. After removing the Intake Manifold bolts with bracing bolts (1 and 2) and the brace, reposition the upper Intake Manifold with the lower Intake Manifold to gain access for removing the ignition coils. First remove the Ignition Coil electrical connectors before taking out Ignition Coil bolts for Ignition Coil extraction. To install the coils put them back in their place according to the fastener notice and fasten the bolts to 10 n.m (89 lb in) torque and reattach the electrical connectors.
    Posted by ChevyPartsGiant Specialist
    Q:
    How to Replace an Ignition Coil Safely and Efficiently on Cadillac Escalade? Posted by Customer
    A:
    To replace Ignition Coil, begin by removing the sight shield in the intake manifold if necessary. If changing the back two ignition coils of the right side, then follow the next steps; otherwise, jump to the later steps. Always disable the high voltage system prior to any high voltage component or connection working to ensure personal protection equipment (PPE) are on. This procedure involves the process of disabling high voltage, testing for it's presence, and recognizing conditions where high voltage is present all the time. Inability to follow these procedures can yield grave injury or death. Start with service disconnect, after that, disconnect engine wiring harness electrical connector from the drive motor generator power inverter module cover. The drive motor generator power inverter module cover bolt and the cover need to be loosened and removed. Take off also the generator control module 3 phase cable clip nut and the clip from the engine bracket as well as pasturing the cables in a new position. Take off the right wheelhouse liner, drop the vehicle, and remove the engine bracket nut from the Ignition Coil bracket stud to remove the bracket. Remove the Ignition Coil wire harness electrical plug and pull back the boot of the spark plug wire, with twisting it a half turn. Set aside Ignition Coil bolts and remove the Ignition Coil off bracket. Note that two manufacturers manufacture the ignition coils hwnd: the melco (R) Ignition Coil has square shapes while delphi (R) Ignition Coil has round shapes. The melco(R) Ignition Coil bracket and the delphi(R) bracket are square and round respectively. The melco(R) Ignition Coil bracket is square in shape while the delphi(R) Ignition Coil bracket is round in shape. To install, when mounting the Ignition Coil on Ignition Coil bracket, insert the bolts for the ignition coils and tighten them to 10 nm (89 lb in). After that, without starting the engine, reinsulate the spark plug wire to the Ignition Coil by ensuring that it is properly done by pushing sideway to each boot in installation of any boot that is loose. Connect the Ignition Coil wiring horse electrical connector to the Ignition Coil. If it is one of the rear two ignition coils on the right side being replaced next steps are; otherwise, go to the final steps. Mount the engine bracket to the Ignition Coil bracket stud and tighten with nut, put it at 9 nm (80 lb in) of torque. Jack up the vehicle to an intermediate height and screw in the engine bracket bolts and tighten them to 50 nm (37 lb ft). Reinstall the right wheelhouse liner, connect the generator control module 3 phase cables to the bracket channel, and attach the cable clip to the tab on the engine bracket with the clip nut attached and tightened to 9 nm (80 lb in). Reassembly the drive motor generator power inverter module cover and secure the cover bolt 1.5 nm (13 lb in). Connect the engine wiring harness electrical connector to the drive motor generator power inverter module cover and install intake manifold sight shield as required. Finally, perform the service reconnect.
    Posted by ChevyPartsGiant Specialist
    Q:
    How to replace the ignition coil on Cadillac Escalade ESV? Posted by Customer
    A:
    Firstly you should remove the intake manifold sight shield to replace Ignition Coil. Remove the Ignition Coil terminal assembly wiring harness electrical connector from the Ignition Coil and pull down on the boot of the spark plug wire and rotate boot about a 1/2 turn. Then unfasten the bolts holding the Ignition Coil and withdraw the Ignition Coil from the bracket, taking note that while the melco(R) Ignition Coil is square in shape, the delphi(R) Ignition Coil is round, with similar brackets. For installation, mount the Ignition Coil on the Ignition Coil bracket and fasten and tighten the Ignition Coil bolts to 10 n.m (89 lb in). Replace the spark plug wire to the Ignition Coil while ensuring that it has been installed properly by pressing sideways on each boot to check that it is seated and replace loose boot. At the end, you should connect the Ignition Coil wiring harness electrical connector to the Ignition Coil to remount the intake manifold sight shield.
    Posted by ChevyPartsGiant Specialist
    Q:
    How to replace the ignition coil on Cadillac Escalade EXT? Posted by Customer
    A:
    In order to replace the Ignition Coil, it will first be necessary to remove the intake manifold sight shield. Unplug the Ignition Coil wiring harness electrical connector from the Ignition Coil and remove spark plug wire by twisting the boot a 1/2 turn and pull only on the boot. Then remove the Ignition Coil bolts and pull out the Ignition Coil from the bracket, but it should be recognized that there are two types of manufacturers of the ignition coils and the coil brackets: the melco(R) Ignition Coil is square whereas the delphi(R) Ignition Coil is round, while the melco(R) Ignition Coil bracket is also square and the delphi(R) Ignition Coil bracket is squire. For installation, mount the Ignition Coil to the Ignition Coil bracket, install Ignition Coil bolts, and tighten to 10 n.m (89 lb in). Next, hook up the spark plug wire to the Ignition Coil, and you should confirm the proper installation by making side pressure on each of the boots from the wire to inspect the seating or replace the out-of-seated boot. Last, join the Ignition Coil wiring harness electrical connector to the Ignition Coil and replace the intake manifold sight shield.
    Posted by ChevyPartsGiant Specialist
    Q:
    How to replace the ignition coil on Chevrolet Corvette? Posted by Customer
    A:
    Before replacing the Ignition Coil, first unplug the negative Battery Cable and take off the fuel rail cover. Subsequently, take out the connector from the Ignition Coil harness and disconnect the spark plug wire. Take out the Ignition Coil by removing the holding bolts from the coil. Install the Ignition Coil in the proper place and then attach the mounting bolts, tightening them to 12 n.m (106 lb in). Link the spark plug wire again to the Ignition Coil and the harness connector and tighten the harness bolt to 12 n.m (106 lb in). Reinstall the cover for the fuel rail, link the negative Battery Cable and finish by preparing the transmitters so they work.
    Posted by ChevyPartsGiant Specialist
    Q:
    How to replace the ignition coil on Chevrolet Silverado 1500? Posted by Customer
    A:
    To change Ignition Coil, first remove the air cleaner outlet resonator, then disconnect the chassis fuel feed pipe quick connect fitting from engine fuel feed pipe. Next, unplug the engine wiring harness electrical connector from the manifold absolute pressure (MAP) sensor as well as the connector from the evaporative emission (EVAP) canister purge solenoid valve. Pull off the engine wiring harness connector position assurance (CPA) retainer at the fuel meter body and disconnect the electrical connector from the fuel meter body. Take off clips (1, 2) from the engine harness brackets and the rear bracket bolts, and bracket. Mark the routing order of the spark plugs wires prior to removing them (1, 2) from the Ignition Coil, and reposition the wires out of the work space. Remove the engine wiring harness electrical connector from the Ignition Coil and re-arrange the harness branches accordingly. Daylight image ion coil bolts and coil from bracket and if necessary, disconnect Ignition Coil bracket bolts and bracket. For installation, routing, if necessary, install Ignition Coil bracket to the lower intake, install bolt, tighten to 12 nm (106 lb in). Mount the Ignition Coil on top of the bracket and bolt it with another bolt while tightening these to 12 nm (106 lb in). Position the engine wiring harness branches as required, connect the electrical connector to the Ignition Coil, position the Spark Plug Wires to the Ignition Coil. Attach the Spark Plug Wires (1, 2) to the Ignition Coil as indicated when removing. Mount the engine wiring harness rear bracket onto the upper Intake Manifold, and install the bolts with a torque of 10 nm (89 lb in). Clip the engine wiring harness clips (1,2) onto engine harness brackets, connect electric connector to fuel meter body, and install cpa retainer onto fuel meter body. Connect the evap canister purge solenoid valve and the MAP Sensor to the electrical connector. Finally, join the chassis fuel feed pipe quick connect fitting with the engulving fuel feed pipe and fix the air cleaner outlet resonator.
    Posted by ChevyPartsGiant Specialist
    Q:
    How to replace the ignition coil on Chevrolet SSR? Posted by Customer
    A:
    Beginning the Ignition Coil replacement requires engineers to remove the engine sight shield and disconnect Spark Plug Wires from both ignition coils and the Ignition Coil harness connector. First detach the Ignition Coil mounting bolts before removing the Ignition Coil from its mount. Place the Ignition Coil onto the bracket before tightening the mounting bolts to 8 n.m (71 lb in) according to the fastener notice in service precautions. The procedure ends with reconnecting the Ignition Coil harness connector and the Spark Plug Wires at these same ignition coils followed by reinstalling the engine sight shield.
    Posted by ChevyPartsGiant Specialist
    Q:
    How to replace the ignition coil on GMC Savana 2500? Posted by Customer
    A:
    The first step in replacing the Ignition Coil is to take off the engine cover. Subsequently, take off the Spark Plug Wires from the ignition coils as well as from the Ignition Coil harness connector. At this point, unscrew the Ignition Coil mounting bolts and take the Ignition Coil out. When installing, put the Ignition Coil on the bracket, but be sure to use the fastener cautions. Put the Ignition Coil mounting bolts back in place and tighten them to 8 nm (71 lb in). Connect the Ignition Coil harness as well as the Spark Plug Wires to the ignition coils, and then put the engine cover on.
    Posted by ChevyPartsGiant Specialist
    Q:
    How to replace the ignition coil on GMC Sierra 1500? Posted by Customer
    A:
    In order to change the Ignition Coil, you need to take out the intake manifold sight shield. Remove the Ignition Coil wiring harness electrical connector and also remove the spark plug wire, leaving the spark plug wire boot turned a 1/2 turn and remove only the boot. Next, remove the Ignition Coil bolts and pull the Ignition Coil out from the bracket, it is noted that both of them have two manufacturers for ignition coils and coil brackets: the melco(R) Ignition Coil has square shape while delphi(R) Ignition Coil has round shape, the melco(R) Ignition Coil bracket is square in shape while delphi (R) Ignition Coil bracket is round in shape. For installation, mount the Ignition Coil on the Ignition Coil bracket while following the fastener caution. Replace the Ignition Coil bolts and tighten them to the value of 10 nm (89 lb in). Reinstall the spark plug to the cylinder head, replacing any boot that is unscrewed or deformed. Last, hook the Ignition Coil wiring harness electrical connector to the Ignition Coil and install the intake manifold sight shield.
    Posted by ChevyPartsGiant Specialist
    Q:
    How to Replace an Ignition Coil Safely and Effectively on GMC Yukon? Posted by Customer
    A:
    The process of replacing ignition coils begins by uninstalling any intake manifold sight shield components. If replacing one of the rear two ignition coils on the right side, follow the subsequent steps; proceed directly to the subsequent steps if necessary. Perform the high voltage disabling procedure always before working on high voltage components alongside the required personal protection equipment (PPE). The procedure starts with recognizing the high voltage disable methods followed by tests to determine high voltage presence with additional information about locations where high voltage exists constantly. The failure to follow these safety protocols can lead to fatal results. Begin the process by completing a service disconnect and disconnect the engine wiring harness electrical connector from the drive motor generator power inverter module cover. Use a tool to loosen and remove the drive motor generator power inverter module cover bolt while taking off the cover. Take off the generator control module 3 phase cable clip nut from the engine bracket and relocate the cables. First lower the vehicle then remove the engine bracket nut from the Ignition Coil bracket stud to take off the bracket. Remove the Ignition Coil wiring harness electrical connector by disconnecting it, then extract the spark plug wire by twisting its boot half a turn before pulling the boot alone. First remove Ignition Coil bolts before extracting the coil assembly from its bracket position. Note that there are two manufacturers for the ignition coils: the ignition coils come in two types: the melco(R) features a square shape while the delphi(R) uses a round design with each having its dedicated bracket. To install the Ignition Coil position it to the bracket then fasten and tighten bolts to 10 nm (89 lb in) before attaching the spark plug wire to the coil by pressing each boot in a sideways direction for proper fitment. Connect the Ignition Coil wiring harness electrical connector through its designated port on the Ignition Coil. If replacing one of the rear two ignition coils on the right side, follow the next steps; proceed with the concluding procedures if the Ignition Coil replacement does not apply. Use a 9 nm (80 lb in) torque setting to fasten the nut between the Ignition Coil bracket stud and the engine bracket. Lift the vehicle halfway then install engine bracket bolts while turning them to a torque of 50 nm (37 lb ft). The procedure requires installation of the right wheelhouse liner while properly positioning generator control module 3 phase cables into the bracket channel followed by tab installation with clip nut tightening to 9 nm (80 lb in). Secure the cover bolt that attaches to the drive motor generator power inverter module while tightening it to 1.5 nm (13 lb in). As the last step, install the drive motor generator power inverter module cover then reconnect the engine wiring harness electrical connector before reinstalling the intake manifold sight shield when required.
    Posted by ChevyPartsGiant Specialist
    Q:
    How should the ignition coils be installed for the 2008 Buick LaCrosse? Posted by Customer
    A:
    Place the ignition coils back in, ensuring to tighten the ignition coil bolts to 10 N.m (89 lb in), and reconnect the ignition coil electrical connectors.
    Posted by ChevyPartsGiant Specialist
    See expert answers on similar Ignition Coil
    Q:
    What is the first step to replace the ignition coil for Bank 2 (SFI) (2.8L, 3.6L) for the 2009 Cadillac CTS? Posted by Customer
    A:
    Turn the ignition OFF and remove the engine cover without disconnecting the fuel pipes or hoses.
    Posted by ChevyPartsGiant Specialist
    See expert answers on similar Ignition Coil
    Q:
    What should be done after removing the fuel injector sight shield for the 2010 Cadillac CTS? Posted by Customer
    A:
    Disconnect the engine wiring harness electrical connector(s) from the ignition coil(s) and remove the ignition coil bolt(s).
    Posted by ChevyPartsGiant Specialist
    See expert answers on similar Ignition Coil
    Q:
    What is the next step after removing the necessary bolts for the 2007 Cadillac CTS? Posted by Customer
    A:
    Reposition the upper intake manifold with the lower intake manifold to gain sufficient clearance for ignition coil removal.
    Posted by ChevyPartsGiant Specialist
    See expert answers on similar Ignition Coil
    Q:
    What should be done if replacing the ignition coil for cylinder 2 for the 2010 Chevrolet Camaro? Posted by Customer
    A:
    Remove and reposition the intake manifold by disconnecting the air cleaner duct from the throttle body and the positive crankcase ventilation (PCV) hose from the right bank camshaft cover, ensuring not to separate the upper intake manifold from the lower intake manifold.
    Posted by ChevyPartsGiant Specialist
    See expert answers on similar Ignition Coil
    Q:
    What should be reconnected after installing the ignition coil for the 2006 Chevrolet Corvette? Posted by Customer
    A:
    Reconnect the spark plug wire and the ignition coil harness connector, ensuring the harness bolt is also tightened to 12 N.m (106 lb in).
    Posted by ChevyPartsGiant Specialist
    See expert answers on similar Ignition Coil
    Q:
    What is the procedure for installation of the ignition coil for the 2006 Chevrolet Impala? Posted by Customer
    A:
    Apply threadlock GM P/N 12345382 (Canadian P/N 10953489) or equivalent to the threads of the ignition coil bolts, then install the ignition coil(s) and secure them with the ignition coil bolts, tightening them to 8 N.m (71 lb in).
    Posted by ChevyPartsGiant Specialist
    See expert answers on similar Ignition Coil
    Q:
    What should be done with the engine wiring harness clips for the 2008 Chevrolet Silverado 1500? Posted by Customer
    A:
    Remove the engine wiring harness clips from the engine harness brackets.
    Posted by ChevyPartsGiant Specialist
    See expert answers on similar Ignition Coil
    Q:
    How do you remove the ignition coil for the 2005 Chevrolet Corvette? Posted by Customer
    A:
    Remove the ignition coil mounting bolts and take out the ignition coil.
    Posted by ChevyPartsGiant Specialist
    See expert answers on similar Ignition Coil
    Q:
    What is the final step in the process for the 2009 Chevrolet Silverado 1500? Posted by Customer
    A:
    Connect the chassis fuel feed pipe quick connect fitting to the engine fuel feed pipe and install the air cleaner outlet resonator.
    Posted by ChevyPartsGiant Specialist
    See expert answers on similar Ignition Coil
    Q:
    What should be disconnected after removing the intake manifold cover for the 2008 Chevrolet Impala? Posted by Customer
    A:
    Disconnect the manifold absolute pressure (MAP) sensor electrical connector and the ignition coil electrical connector.
    Posted by ChevyPartsGiant Specialist
    See expert answers on similar Ignition Coil
    Q:
    What should be ensured before installing the ignition coil for the 2009 Chevrolet Trailblazer? Posted by Customer
    A:
    Ensure that the ignition coil seals are properly seated to the valve cover before installing the ignition coil.
    Posted by ChevyPartsGiant Specialist
    See expert answers on similar Ignition Coil
    Q:
    What is the next step after disconnecting the electrical connectors for the 2010 GMC Canyon? Posted by Customer
    A:
    Remove the ignition coil bolts and take out the ignition coils from the camshaft cover.
    Posted by ChevyPartsGiant Specialist
    See expert answers on similar Ignition Coil
    Q:
    What should be done after installing the ignition coil for the 2005 GMC Envoy? Posted by Customer
    A:
    Install the ignition coil retaining bolts and tighten them to 10 N.m (89 lb in), following the Fastener Notice in Service Precautions.
    Posted by ChevyPartsGiant Specialist
    See expert answers on similar Ignition Coil
    If you have any questions about this product, please don't hesitate to ask us. We will be happy to help you!

OEM GM 12611424, Excellent Performance and Perfect Fitment

To ensure reliability, purchase GM part # 12611424 Ignition Coil. It is sometimes referred to as GM Ignition Coil. Choosing OEM parts is the optimal decision for guaranteeing superior quality and perfect performance. These components undergo stringent quality checks and are carefully constructed to comply with GM's factory specifications, ensuring a smooth installation process.

ChevyPartsGiant.com is a leading supplier of genuine GM parts such as GM 12611424 Ignition Coil. Our website boasts an extensive inventory of OEM GM parts, available at highly competitive prices in the market. Should you require any new genuine GM parts, rest assured we will deliver them swiftly and efficiently to your doorstep. Furthermore, all our parts come with the assurance of a manufacturer's warranty. For detailed Chevy parts information, click here.
Choose ChevyPartsGiant for discounted prices, exceptional service and fast delivery