
Popular OEM Chevrolet Colorado Parts
- Body & Hardware Parts View More >
- Steering Parts View More >
- Electrical Parts View More >
- Air & Fuel Delivery Parts View More >
- Charging & Starting Parts View More >
- Engine Parts View More >
- Belts & Cooling Parts View More >
- Suspension Parts View More >
- Driveline & Axles Parts View More >
- Emission Control & Exhaust Parts View More >
- Transmission Parts View More >
- Brakes Parts View More >


Why Buy Genuine Chevrolet Colorado Parts From ChevyPartsGiant.com
Looking for real Chevrolet Colorado parts? ChevyPartsGiant.com may be a better choice to find genuine parts at wallet-friendly prices. We sell only OEM Chevrolet Colorado parts, ensuring perfect fit, reliability, and long-term performance. With our website, you can easily get access to the same parts found at local Chevrolet stores. All components are produced by Chevrolet and are exclusively fitted on Chevrolet Colorado automobiles. By shopping at our store, you can enjoy the quality of the Chevrolet factory without the high prices of brick-and-mortar facilities. We achieve this because we are an online store operating at lower costs, which we pass on to you. We also have a user-friendly platform where you can find and order genuine Chevrolet Colorado parts swiftly. We are here to make your process of restoring a Chevrolet Colorado or dealing with simple repairs quick and inexpensive. We also make it easy to obtain Chevrolet Colorado parts at competitive shipping prices and a team of knowledgeable staff ready to take your order. Choose ChevyPartsGiant.com to save time and money, as well as keep your Chevrolet Colorado in the good condition.
Since 2004 Chevrolet Colorado has taken over from previous models through its historical two generations featuring upgraded engine and transmission components. Handing system owners a dual choice between the 2.8L LK5 I4 engine and the 3.5L I5 which came in the Z71 package marked the standard equipment for the initial generation trucks. When the second generation Chevrolet Colorado hit the market it introduced dual engine choices that included a 2.4L I4 gas-powered motor along with a 3.6L V6 which generated 230 kW (308 hp) and reached maximum torque at 275 lb-ft. The Chevrolet Colorado provided customers with two original transmission options which consisted of a 5-speed manual and a 4-speed automatic. The following versions of the transmission lineup became available when subsequent models included a 5-speed manual and 6-speed manual and both manual and automatic transmission models with 6-speed and 8-speed configurations for improved efficiency and vehicle dynamics. The Chevrolet Colorado offers regular, extended and crew cabin options which determine the vehicle wheelbase of between 111.2 inches to 140.5 inches across different generations and configurations. The Chevrolet Colorado ranges in curb weight from 3,920 pounds to 4,476 pounds according to its different construction standards. The performance and lifespan of a Chevrolet Colorado depend on using genuine factory-made components since these parts uphold strict manufacturing criteria for reliable and dependable operation in every element.
Chevrolet Colorado groups three concerns, HVAC electrical, fuel delivery, and ignition maintenance. In the HVAC system, Colorado may lose blower speeds or stop entirely. The usual Chevrolet cause is a failed blower motor resistor that overheats and opens circuits. Confirm with voltage drop tests, blower current checks, and inspection for melted connectors. Restore function on Colorado with a new blower motor resistor and a healthy blower motor. For fuel delivery, Colorado can show erratic gauge readings or hard starts after refueling. A worn fuel level sensor inside the tank often fails, and the Chevrolet recommendation favors module service. Replace the fuel pump assembly on high mileage Colorado trucks to prevent repeat visits. Verify pressure, check EVAP purge command, and confirm sender sweep before repairs. In the ignition system, Colorado may misfire during load or cruise. Chevrolet intervals call for fresh spark plugs near one hundred thousand miles. Swap wires where equipped, and retest with a wide open throttle pull. Finish all work on Colorado with clear documentation, a warm idle check, and a steady road test. Record baseline readings for future comparison, then schedule the next maintenance interval.
Chevrolet Colorado Parts Questions & Answers
- Q: How to replace the alternator on the LLV/LLR (2.9L/3.7L) on Chevrolet Colorado?A:The llv/llr generator replacement (2.9L/3.7L) must start with negative Battery Cable disconnection. Extract the Drive Belt and lift the vehicle for wheelhouse entry to the compressor. Lift up the vehicle and remove both the left front wheel and left wheelhouse liner. The process lacks requirements to evacuate a/c refrigerant so disconnect the A/C Compressor electrical connector. After disconnecting all bolts that secure the A/C Compressor except for the upper one keep the compressor attached lower the vehicle. The generator output bat terminal boot needs repositioning to expose the terminal before removing the terminal nut and separatiing the generator lead. Unplug the generator's wiring harness connector after that remove its three mounting bolts. Start by taking out the engine lift bracket to get clearance then move the A/C Compressor forward and finish by removing the generator from the engine. Operate by placing the generator in front of the engine after installing the engine lift bracket. Install the generator mounting bolts by following a sequence to achieve 50 nm (37 lb ft) torque values. Install the generator output bat terminal nut which must be tightened to 20 nm (15 lb ft) before pressing the protective boot onto the bat terminal. After connecting the wiring harness connector to the generator you can begin working on the A/C Compressor. Use the vehicle supports to reach the compressor then move it to the engine position allowing you to install and tighten the 50 nm (37 lb ft) mounting bolts. Reinstall the left wheelhouse liner along with the left front wheel while connecting the A/C Compressor electrical connector. The technician must lower the vehicle before installing the Drive Belt universal to the engine design then reconnect the battery negative lead.
- Q: How to replace the camshaft on Chevrolet Colorado?A:The initial step is to remove the Camshaft cover while rotating the Crankshaft clockwise until the #1 Piston reaches top dead center (TDC) on compression stroke and parallel alignment of "delphi" on the exhaust Camshaft position actuator toward the Cylinder Head to cam cover mating surface. The Camshaft holding tool j 44221 serves as a rear Camshaft support for the next step of extracting the intake and exhaust Camshaft sprocket bolts which get discarded. The Camshaft sprocket holding tool j 44222 should be installed on the Cylinder Head where the horizontal bolts function to sustain chain tension across the Camshaft sprockets. Pass the Camshaft sprockets with Timing Chain towards the j 44222 installation method. Loosen and tighten the Camshaft cap bolts alternately while releasing valve spring tension and arrange the Camshaft caps on a rack for correct placements. After removing Camshaft caps with j 44221 you should extract camshafts out of the Cylinder Head and proceed with cleaning along with inspections. Clean engine oil should be used to coat Camshaft journals thrust face and lobes before placing j 44221 onto Camshaft flats while the #1 Piston remains at tdc. Install the intake to exhaust camshafts in their original positions with caution by aligning the markings on the Camshaft caps appropriately. Install the Camshaft caps but begin fixing their bolts with an even distribution to compress the valve springs before final torque application at 12 nm (106 inch lbs.). A 25 mm (1 inch) wrench should rotate the hex-shaped camshafts towards each other to check that the alignment pins connect properly. Move the Timing Chain equipped sprockets from j 44222 to camshafts before removing j 44222. Screw the new intake Camshaft sprocket bolt along with the new exhaust Camshaft actuator bolt into place before tightening the intake bolt to 20 nm (15 ft. Lbs.) and following the angle meter (J 45059) procedure to perform additional 100-degree rotation. Benchmark the exhaust Camshaft actuator bolt at 25 nm (18 ft. Lbs.) before proceeding with the angle meter (J 45059) method that requires a 135-degree rotation. Place the cmp sensor followed by reinstallation of the Camshaft cover after removing j 44221 from camshafts.
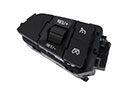
- Q: How to replace the Center Console in a small car with a manual transmission on Chevrolet Colorado?A:The first step for changing a console in a small vehicle with a manual transmission is to take off the retaining strips from the shift lever boot and afterward, remove the bolts securing the inside rear seat track on each front seat. Raise the console to free the 4 retainers and then take it out of the vehicle. During installation, make sure the console is lined up with the holes in the floor panel for the retainers. Hold down the console so the retainers lock in, then install the seat track bolts on both front seats, and tighten them to 53 n.m (39 lb ft). After that, secure the retaining strips onto the shift lever bezel.
- Q: How to replace the door emblem/nameplate on Chevrolet Colorado?A:Replace the door panel emblem on your Colorado by obtaining a Heat Gun (J 25070) and 3M(TM) scotch brite molding adhesive remover disk (3M(TM) P/N 07501). Secure the door area with tape to keep the emblem safe while you position it. Heat the emblem/nameplate surface using a Heat Gun J 25070 kept 152 mm away from the area for 30 seconds while moving it in circular motions. Use a plastic tool to delicately take off the emblem/nameplate from its position. Clear away all residue from its edges and the surface where it lay through the use of adhesive remover. Clean the door panel surface using varnish makers and painters (VMP) naptha product. Position the emblem at marks 166 mm (6.54 in) below and 117.4 mm (4.62 in) in front of the door bottom when no marks exist. Heat the door surface with the Heat Gun to reach at least 21°C (70°F) before separating the emblem/nameplate backing on its front part. After placing the emblem/nameplate on the door panel you should use your hands to roll it firmly against the panel as you peel off the backing. Determine proper bond of emblem/nameplate before removing tape that covered the door panel.


