Popular OEM GMC Canyon Parts
- Body & Hardware Parts View More >
- Steering Parts View More >
- Electrical Parts View More >
- Air & Fuel Delivery Parts View More >
- Charging & Starting Parts View More >
- Engine Parts View More >
- Belts & Cooling Parts View More >
- Suspension Parts View More >
- Driveline & Axles Parts View More >
- Emission Control & Exhaust Parts View More >
- Transmission Parts View More >
- Brakes Parts View More >
Why Buy Genuine GMC Canyon Parts From ChevyPartsGiant.com
Looking for real GMC Canyon parts? ChevyPartsGiant.com may be a better choice to find genuine parts at wallet-friendly prices. We sell only OEM GMC Canyon parts, ensuring perfect fit, reliability, and long-term performance. With our website, you can easily get access to the same parts found at local GMC stores. All components are produced by GMC and are exclusively fitted on GMC Canyon automobiles. By shopping at our store, you can enjoy the quality of the GMC factory without the high prices of brick-and-mortar facilities. We achieve this because we are an online store operating at lower costs, which we pass on to you. We also have a user-friendly platform where you can find and order genuine GMC Canyon parts swiftly. We are here to make your process of restoring a GMC Canyon or dealing with simple repairs quick and inexpensive. We also make it easy to obtain GMC Canyon parts at competitive shipping prices and a team of knowledgeable staff ready to take your order. Choose ChevyPartsGiant.com to save time and money, as well as keep your GMC Canyon in the good condition.
The GMC Canyon underwent two generational changes since its 2004 debut to demonstrate its engineering and performance development. The GMC Canyon initial design used GMT355 platform foundations to create a front-engine and four-wheel-drive vehicle system which offers excellent control in multiple conditions ready for street driving and off-road exploration. The standard GMC Canyon base engine uses a 2.8L I4 powertrain and the Z71 package supplies a 3.5L I5 engine to provide greater off-roading performance. The Canyon utilizes an automatic six-speed transmission instead of its previous manual six-speed transmission because it improves performance capability and alters the driving experience. Towing features in the GMC Canyon stand out due to its engine options which unite gas V6 with diesel four-cylinder engines along with customizable choices for users. GMC Canyon exists in several styles and its regular cab size reaches 190 inches with a 126-inch wheelbase whereas its extended cab reaches 205 inches with the same wheelbase length. Multiple airbags together with other safety elements enhance the vehicle's driving experience. Since GMC owners benefit from using genuine parts for their GMC Canyon because such parts fulfill factory requirements after undergoing thorough testing which makes the vehicle perform well and last longer.
GMC Canyon issues group into engine combustion, HVAC electrical, and evaporative emissions systems. In the engine bay, the Canyon may misfire, idle roughly, or hesitate during light throttle. Worn valve seats, often labeled valve deats in some catalogs, reduce compression and invite misfire codes on the Canyon after hot soaking. Repair can require a remanufactured cylinder head, valve reconditioning, and new stem seals. On the Canyon, ignition and fuel trims should be checked to confirm cause before head work. In the HVAC circuit, a failed blower motor resistor removes one or more blower speeds. Inspect the control switch, check connectors for heat damage, then install a quality resistor. On the Canyon evaporative system, a loose or worn gas cap often sets a check engine light. Replace the gas cap, inspect the filler neck seal, and complete a full drive cycle. Across these systems, GMC diagnostics use scan data, compression tests, and smoke testing to verify leaks. GMC service practice also calls for verifying grounds and battery voltage during HVAC checks. Finish with a warm road test so the Canyon shows a stable idle and consistent airflow. These steps help the GMC run cleanly, hold speed, and deliver reliable cabin comfort every day.
GMC Canyon Parts and Q&A
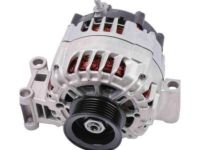
- Q: How to replace the alternator on GMC Canyon?A:In order to replace the generator, disconnect the battery negative cable, and take out the drive belt. Lay the A/C compressor, take off the left front wheel, and wheelhouse liner, and disconnect the A/C compressor. Disassemble the generator and place the new one, with all the connections and parts attached back in their places.
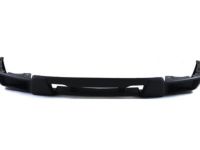
- Q: How to properly remove and install a bumper on GMC Canyon?A:In order to fit the front bumper fascia on a Canyon/Colorado, bring up the car and stabilize it after which the front bumper assembly is removed. Break the fascia by pulling the push-pins and pulling the fascia. Installation can be done by attaching the fascia, connecting it by use of push-pins, re-attaching the bumper assembly, and lowering the vehicle.
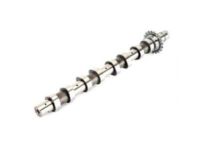
- Q: How to replace the camshaft on GMC Canyon?A:To replace the camshaft, remove the cover and CMP sensor, rotate the crankshaft to #1 TDC, secure the cams with J 44221 and J 44222, remove sprocket bolts, slide sprockets and chain off, loosen caps, and lift cams. Reinstall in reverse: oil journals, align marks, tighten caps, fit sprockets, torque new bolts, remove tools, reinstall sensor and cover.


