ChevyParts
My Garage
My Account
Cart
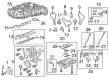
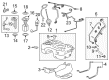
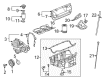
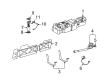
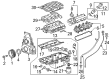
OEM Chevrolet Fuel Level Sensor
Gas Gauge Sensor- Select Vehicle by Model
- Select Vehicle by VIN
Select Vehicle by Model
orMake
Model
Year
Select Vehicle by VIN
For the most accurate results, select vehicle by your VIN (Vehicle Identification Number).
316 Fuel Level Sensors found


Chevrolet Fuel Gauge Sending Unit Part Number: 13504929
$60.28 MSRP: $123.88You Save: $63.60 (52%)Ships in 1-2 Business DaysProduct Specifications- Other Name: Sensor Kit-Fuel Level; Fuel Level Sensor; Fuel Sending Unit; Sensor Kit, Fuel Tank Meter/Pump


Chevrolet Fuel Gauge Sending Unit Part Number: 13512503
$39.59 MSRP: $114.81You Save: $75.22 (66%)Ships in 1-2 Business DaysProduct Specifications- Other Name: Sensor Assembly-Fuel Level; Fuel Level Sensor; Fuel Sending Unit; Level Sensor; Sensor Kit, Fuel Tank Meter/Pump
- Replaced by: 85639599
- Replaces: 19208886, 13505180, 13581648


Chevrolet Level Sensor Part Number: 19122011
$75.17 MSRP: $154.48You Save: $79.31 (52%)Ships in 1-2 Business DaysProduct Specifications- Other Name: Sensor Kit, Fuel Tank Meter/Pump; Fuel Level Sensor

Chevrolet Fuel Gauge Sending Unit Part Number: 84777088
$25.82 MSRP: $46.11You Save: $20.29 (44%)Ships in 1-3 Business DaysProduct Specifications- Other Name: Sensor Kit-Fuel Level; Fuel Level Sensor; Fuel Sending Unit; Level Sensor; Sensor Kit, Fuel Tank Meter/Pump
Chevrolet Fuel Gauge Sending Unit Part Number: 84212973
$38.78 MSRP: $107.87You Save: $69.09 (65%)Ships in 1-2 Business DaysProduct Specifications- Other Name: Sensor Kit-Fuel Level; Fuel Level Sensor; Fuel Sending Unit; Sensor Kit, Fuel Tank Meter/Pump

Chevrolet Fuel Gauge Sending Unit Part Number: 13581916
$57.75 MSRP: $160.63You Save: $102.88 (65%)Ships in 1-2 Business DaysProduct Specifications- Other Name: Sensor Kit-Fuel Level; Fuel Level Sensor; Fuel Sending Unit; Sensor Kit, Fuel Tank Meter/Pump
- Replaces: 13505233
Chevrolet Fuel Gauge Sending Unit Part Number: 84212967
$45.65 MSRP: $126.97You Save: $81.32 (65%)Ships in 1-2 Business DaysProduct Specifications- Other Name: Sensor Kit-Fuel Level; Fuel Level Sensor; Fuel Sending Unit; Sensor Kit, Fuel Tank Meter/Pump
- Replaces: 84089923


Chevrolet Fuel Gauge Sending Unit Part Number: 84692013
$29.56 MSRP: $52.79You Save: $23.23 (44%)Ships in 1-3 Business DaysProduct Specifications- Other Name: Sensor Kit-Fuel Level; Fuel Level Sensor; Fuel Sending Unit; Sensor Kit, Fuel Tank Meter/Pump
- Replaced by: 86598999

Chevrolet Fuel Gauge Sending Unit Part Number: 19206547
$66.41 MSRP: $184.72You Save: $118.31 (65%)Ships in 1-2 Business DaysProduct Specifications- Other Name: Sensor Kit, Fuel Tank Meter/Pump; Fuel Level Sensor; Fuel Sending Unit
- Replaced by: 19435138

Chevrolet Fuel Gauge Sending Unit Part Number: 13585450
$105.08 MSRP: $215.90You Save: $110.82 (52%)Ships in 1-2 Business DaysProduct Specifications- Other Name: Sensor Kit-Fuel Level; Fuel Level Sensor; Fuel Sending Unit; Level Sensor; Sensor Kit, Fuel Tank Meter/Pump
Chevrolet Level Sensor Part Number: 84829013
$37.26 MSRP: $66.53You Save: $29.27 (44%)Ships in 1-2 Business DaysProduct Specifications- Other Name: Sensor Kit-Fuel Level; Fuel Level Sensor; Sensor Kit, Fuel Tank Meter/Pump
- Replaced by: 19541042
- Replaces: 84174274

Chevrolet Fuel Gauge Sending Unit Part Number: 84084766
$75.01 MSRP: $215.14You Save: $140.13 (66%)Ships in 1-2 Business DaysProduct Specifications- Other Name: Sensor Kit-Fuel Level; Fuel Level Sensor; Fuel Sending Unit; Level Sensor; Sensor Kit, Fuel Tank Meter/Pump
- Replaces: 23240487, 22753589, 19167429

Chevrolet Level Sensor, Driver Side Part Number: 13504722
$79.90 MSRP: $142.69You Save: $62.79 (44%)Ships in 1-2 Business DaysProduct Specifications- Other Name: Sensor Kit, Fuel Tank Meter/Pump; Fuel Level Sensor
- Position: Driver Side

Chevrolet Fuel Gauge Sending Unit Part Number: 19210797
$87.75 MSRP: $180.33You Save: $92.58 (52%)Ships in 1-2 Business DaysProduct Specifications- Other Name: Sensor Kit, Fuel Tank Meter/Pump; Fuel Level Sensor; Fuel Sending Unit; Level Sensor
- Replaces: 19168388

Chevrolet Fuel Gauge Sending Unit Part Number: 19133499
$164.12 MSRP: $337.28You Save: $173.16 (52%)Ships in 1-2 Business DaysProduct Specifications- Other Name: Sensor Kit, Fuel Tank Meter/Pump; Fuel Level Sensor; Fuel Sending Unit
- Replaces: 88965424


Chevrolet Fuel Gauge Sending Unit, Passenger Side Part Number: 13504704
$77.47 MSRP: $138.36You Save: $60.89 (45%)Ships in 1-2 Business DaysProduct Specifications- Other Name: Sensor Kit-Fuel Level; Fuel Level Sensor; Fuel Sending Unit; Level Sensor; Sensor Kit, Fuel Tank Meter/Pump
- Position: Passenger Side

Chevrolet Fuel Gauge Sending Unit, Passenger Side Part Number: 13544260
$58.07 MSRP: $119.33You Save: $61.26 (52%)Ships in 1-2 Business DaysProduct Specifications- Other Name: Sensor Kit-Fuel Level; Fuel Level Sensor; Fuel Sending Unit; Level Sensor; Sensor Kit, Fuel Tank Meter/Pump
- Position: Passenger Side
- Replaced by: 19541049

Chevrolet Level Sensor Part Number: 19206570
Product Specifications- Other Name: Sensor Kit, Fuel Tank Meter/Pump; Fuel Level Sensor

Chevrolet Fuel Gauge Sending Unit Part Number: 19206530
$80.55 MSRP: $143.84You Save: $63.29 (44%)Product Specifications- Other Name: Sensor Kit, Fuel Tank Meter/Pump; Fuel Level Sensor; Fuel Sending Unit

Chevrolet Fuel Gauge Sending Unit Part Number: 88965792
$117.60 MSRP: $210.95You Save: $93.35 (45%)Product Specifications- Other Name: Sensor Kit, Fuel Tank Meter/Pump; Fuel Level Sensor; Fuel Sending Unit; Level Sensor
- Replaces: 25320536
| Page 1 of 16 |Next >
1-20 of 316 Results
Chevrolet Fuel Level Sensor
Want to cut long-term maintenance and repair costs? Choose OEM Fuel Level Sensor. Those parts deliver top durability you can trust. On our site, you'll find a huge catalog of genuine Chevrolet parts. Prices are unbeatable, so you can keep more in your pocket. Every OEM Chevrolet Fuel Level Sensor includes a manufacturer's warranty. You can also get an easy return policy that keeps buying risk free. Fast delivery, get your car on the road quickly. It's simple to search, compare, and order. Stop guessing about quality or fit. Order today and save with parts that last.
Chevrolet Fuel Level Sensor Parts Questions & Experts Answers
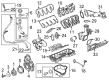
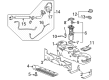
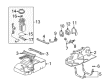
- Q: How to replace the fuel level sensor on Chevrolet Colorado?A:Start by sanitizing the fuel pipe attachments and hose fittings and nearby regions before commencing the Fuel Level Sensor replacement operation. The first step requires removing the Fuel Tank before disconnecting the evaporative emission (EVAP) line quick connect fittings between the module and vent valve. Besides this disconnecting step comes removal of the evap line from the Fuel Tank side clip and disassembly of its retention features. To begin remove the fuel feed line quick connect fitting from the module then remove it from its retaining feature which is molded into the Fuel Tank. The j 45722 (Fuel Sender Lock Ring Tool) needs installation onto the Fuel Pump module lock ring while also protecting the lock ring from damage and maintaining both hands away from the fuel pipes. The technician should use the j 45722 tool and breaker-bar to rotate the lock ring counterclockwise until it unlocks before removing the tool to raise the module from the tank. Tipping the module will allow clearance for the sensor arm and float. Remove and throw away the old Fuel Pump module seal before draining the fuel into an authorized container. Checking the sealing surface of the Fuel Pump module remains a necessary step before examining the lock ring for any signs of damage or estimating warpage beyond 0.41 mm (0.016 in). If such warpage is detected, a new lock ring needs to be installed. Installation requires cleaning the male port on the Fuel Pump module while applying new Fuel Tank module seal on the Fuel Tank before inserting the module making sure the sensor arm and float do not obstruct the opening. Begin by placing the module in position and setting the tang to fit the notch of the Fuel Tank before installing the lock ring. With the j 45722 turn the lock ring clockwise and fasten it before joining the fuel feed line quick connect to the module tank retention feature. The evap line quick connect fittings must be applied to the module and vent valve while fitting into the tank retaining features before placing them onto the Fuel Tank clip on the side wall.
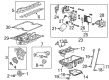
- Q: How to replace the Fuel Level Sensor assembly on Chevrolet Malibu?A:The j 45722 Fuel Level Sensor lock ring wrench alone should be used for disconnecting evap and fuel feed lines from the Fuel Level Sensor assembly to prevent damage to the lock ring. Secure the Fuel Tank to prevent rotation because only significant force will release the lock ring while handling of the Fuel Level Sensor assembly by fuel pipes must be avoided to maintain joint integrity. Apply the j 45722 to the Fuel Level Sensor lock ring followed by a long breaker-bar while rotating counterclockwise to unlock it then remove the Fuel Level Sensor assembly together with the seal and discard the seal. Wash the Fuel Level Sensor sealing areas while checking the lock ring for damage; change the lock ring if it shows warping greater than 0.41 mm (0.016 in). A new seal must be used for the Fuel Level Sensor assembly installation while the Fuel Pump Strainer remains horizontal and the float arm stays obstruction-free. Fit the Fuel Level Sensor assembly with the lock ring while utilizing the j 45722 tool to guide correct installation of clockwise rotation. The final step involves attaching the fuel feed along with evap lines to the sensor assembly then reinstalling the Fuel Tank.
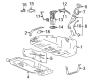
- Q: How to replace the fuel level sensor on Chevrolet Tahoe?A:The fuel level sensor replacement starts with unmounting the fuel sending unit. Start the replacement of the fuel level sensor by disengaging the electrical connector through retainer engagement before you take off the fuel level sensor electrical connector. Start by moving the locking tangs towards the inside of the sending unit bucket before extracting the fuel level sensor out from the bucket. The new fuel level sensor installation requires sliding the part down through the sending unit bucket with active locking tang engagement. Insert the fuel level sensor electrical connector into position before checking that the retainer does not have any gaps. Complete installation by putting in the fuel sending unit.


Related Chevrolet Parts
 Chevrolet Fuse Box
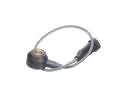 Chevrolet Knock Sensor
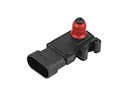 Chevrolet MAP Sensor
 Chevrolet Ignition Coil
 Chevrolet Crankshaft Position Sensor
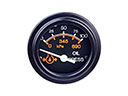 Chevrolet Oil Pressure Gauge
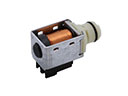 Chevrolet Shift Solenoid
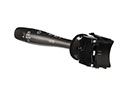 Chevrolet Turn Signal Switch
 Chevrolet Hazard Warning Switch
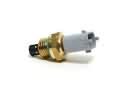 Chevrolet Intake Manifold Temperature Sensor
 Chevrolet Seat Heater Switch
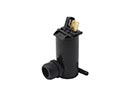 Chevrolet Washer Pump
Browse Chevrolet Fuel Level Sensor by Models
S10 Colorado C10 Tahoe Cruze Malibu Camaro Equinox Impala SS SSR Avalanche Silverado 1500 Silverado 2500 HD Caprice Classic Cobalt Suburban Traverse Blazer HHR Sonic Tracker Volt El Camino K10 Spark Trax Trailblazer Astro Cavalier Corvette C20 Beretta C1500 C2500 C30 C3500 Celebrity Chevette City Express Corsica Express 1500 Express 2500 Express 3500 G10 G20 G30 K1500 K20 K2500 K30 K3500 K5 Blazer Lumina Metro Monte Carlo P30 Prizm S10 Blazer Silverado 2500 Uplander Venture Silverado 3500 Suburban 1500 Trailblazer EXT Avalanche 1500 Avalanche 2500 C10 Suburban C1500 Suburban C20 Suburban C2500 Suburban Captiva Sport Cruze Limited Impala Limited K10 Suburban K1500 Suburban K20 Suburban K2500 Suburban Malibu Limited P20 R10 R10 Suburban R1500 Suburban R20 R20 Suburban R2500 R2500 Suburban R30 R3500 Silverado 1500 Classic Silverado 1500 HD Silverado 1500 HD Classic Silverado 1500 LD Silverado 1500 LTD Silverado 2500 HD Classic Silverado 3500 Classic Silverado 3500 HD Spark EV Spectrum Suburban 2500 Suburban 3500 HD V10 V10 Suburban V1500 Suburban V20 V20 Suburban V2500 Suburban V30 V3500