Popular OEM GMC Sierra 1500 Classic Parts
- Body & Hardware Parts View More >
- Steering Parts View More >
- Electrical Parts View More >
- Air & Fuel Delivery Parts View More >
- Charging & Starting Parts View More >
- Engine Parts View More >
- Belts & Cooling Parts View More >
- Suspension Parts View More >
- Driveline & Axles Parts View More >
- Emission Control & Exhaust Parts View More >
- Transmission Parts View More >
- Brakes Parts View More >
Why Buy Genuine GMC Sierra 1500 Classic Parts From ChevyPartsGiant.com
Looking for real GMC Sierra 1500 Classic parts? ChevyPartsGiant.com may be a better choice to find genuine parts at wallet-friendly prices. We sell only OEM GMC Sierra 1500 Classic parts, ensuring perfect fit, reliability, and long-term performance. With our website, you can easily get access to the same parts found at local GMC stores. All components are produced by GMC and are exclusively fitted on GMC Sierra 1500 Classic automobiles. By shopping at our store, you can enjoy the quality of the GMC factory without the high prices of brick-and-mortar facilities. We achieve this because we are an online store operating at lower costs, which we pass on to you. We also have a user-friendly platform where you can find and order genuine GMC Sierra 1500 Classic parts swiftly. We are here to make your process of restoring a GMC Sierra 1500 Classic or dealing with simple repairs quick and inexpensive. We also make it easy to obtain GMC Sierra 1500 Classic parts at competitive shipping prices and a team of knowledgeable staff ready to take your order. Choose ChevyPartsGiant.com to save time and money, as well as keep your GMC Sierra 1500 Classic in the good condition.
The GMC Sierra 1500 Classic operated as a separate production run from contemporary Sierra models to sustain business in the truck market. The GMC Sierra 1500 Classic offered three engine choices starting with a 195-hp 4.3L V6 followed by a 285-hp 4.8L V8 then a top-rated 295-hp 5.3L V8 that could run on E85. The GMC Sierra 1500 Denali Classic had two engine choices including an aluminum 5.3L V8 with up to 310 hp and a 6.0L V8 that could produce 345 hp. The GMC Sierra 1500 Classic provides two transmission choices that consist of 5-speed manual and 4-speed automatic gears. The driving experience improves thanks to dual drive train configuration options which include two-wheel and four-wheel systems where all-wheel drive appears exclusively in the Denali model. The hybrid powertrain available on SLE models provides double benefits through motorized stop/start engine shutdowns and electric energy distribution through various 120-volt outlets. The GMC Sierra 1500 Classic's Vortec V8 engine systems provide both power and economy benefits that help users achieve a better driving outcome. GMC created the Sierra 1500 Classic with multiple body configurations and selection levels thus making it useful in different situations including personal driving and intense industrial settings. Genuine GMC Sierra 1500 Classic parts deliver dependable performance which results in reduced expenses for maintenance together with reduced repair costs over an extended period.
GMC Sierra 1500 Classic concerns group into drivetrain, braking hydraulics, and electrical instrumentation. In the drivetrain, the Sierra 1500 Classic can lose second and fourth gear. It may slip on the 3 to 4 shift or shift harshly. Heat weakens the 3 to 4 clutch and strips the sunshell. Service the fluid, inspect the valve body, and add extra cooling. A rebuild with a beast sunshell and reset adaptives restores shift timing. For braking, the Sierra 1500 Classic develops rusted steel brake lines along the frame. Symptoms include a soft pedal and sudden fluid loss. Replace lines with NiCopp tubing, then bleed and flush. In the cabin, Sierra 1500 Classic can show erratic speed, fuel, or temperature readings. Failed instrument cluster stepper motors cause wandering needles and false warnings. Rebuild or replace the cluster and verify grounds and connectors. These steps keep the Sierra 1500 Classic safe and predictable. Sierra 1500 Classic towing or plowing duty raises heat, so earlier fluid service helps. Follow GMC diagnostic flow for transmission faults and cluster tests. Use GMC service information for line routing during brake repairs. Confirm brake repairs with a firm pedal and a careful road check on GMC platforms.
GMC Sierra 1500 Classic Parts Questions & Answers
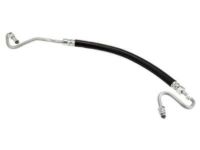
- Q: How to replace the power steering hose outlet (recirculating ball) on GMC Sierra 1500 Classic?A:The first step to replace a power steering gear outlet pipe/hose (Recirculating Ball) requires placing a drain pan under the vehicle. First disconnect the power steering gear outlet hose from its position on the steering gear and detach the clamp holding the hose to the Power Steering Pump . Then remove the hose from both pump and vehicle units. The power steering gear outlet hose required installation along the path where it was positioned before removal. Then secure this hose to the Power Steering Pump and fit the clamp on its end before proceeding. Tighten the outlet hose fitting to 28 nm (20 ft. Lbs.) when installing it to the power steering gear. To finish the job drain the pan and perform a bleeding operation of the power steering system.
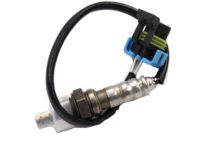
- Q: How to replace the Heated Oxygen Sensor (HO2S) for Bank 1 Sensor 2 on GMC Sierra 1500 Classic?A:A replacement operation on he heated Oxygen Sensor (HO2S) for bank 1 sensor 2 begins with vehicle support and proper elevation. When the vehicle has a manual transmission with 2-wheel drive (2WD) disconnect the ho2s connector from the crossmember followed by separating the connector position assurance (CPA) retainer and electrical ho2s connector from the harness. The procedure of disconnecting the ho2s connector from the crossmember then removing the cpa retainer and electrical connector must be repeated for vehicles with automatic transmission and 2-wheel drive. The vehicle installation process for 4-wheel drive (4WD) models includes removing the ho2s connector from the crossmember and disconnecting the cpa retainer and the electrical connector. When reinstalling the original bank 2 ho2s sensor the threads should receive an application of anti-seize compound gm p/n 12377953 or equivalent due to specialized gear designed to ease ho2s thread removal. Secure the bank 2 ho2s using torque to 42 n.m when installing (31 lb ft). Connect the ho2s electrical connector to both the harness and cpa retainer. 4wd vehicles require ho2s connector installation on the crossmember after which electrical connector and cpa retainer connections should be restored. First reinstall the ho2s connector to the crossmember while reconnecting both electrical connector and cpa retainer for vehicles with automatic transmission along with 2wd system. Before lowering the vehicle install the ho2s connector to the crossmember for manual transmission and 2wd and reconnect the electrical connector with the cpa retainer.
- Q: How to replace the endgate emblem and nameplate on GMC Sierra 1500 Classic?A:One needs a combination of tools to replace the endgate emblem and nameplate starting with these essential components: The technical tools required include a Heat Gun (J 25070) as well as a 3M TM Scotch Brite Molding Adhesive Remover Disk with part number 07501. First tape should be placed around the endgate emblem area for protection and alignment. Heat the emblem/nameplate using the heat gun (J 25070) with its nozzle 152 mm (6 in) from the surface for 30 seconds while moving in circular motions. To detach the endgate emblem/remove nameplate professionals should use a plastic flat-bladed tool then erase residual adhesive from both endgate surfaces and emblem/back using adhesive remover disks (3M(TM) P/N 07501). Wash the endgate surface using varnish makers and painters (VMP) naptha chemicals. Apply tape for guidance in unmarked areas. Use the heat gun (J 25070) to heat the endgate panel surface up to at least 21°C (70°F) without touching the emblem/nameplate adhesive layer. Press the front section of the emblem/nameplate onto the endgate panel as you proceed with removing its backing. Begin hand rolling the emblem/nameplate for adequate adhesion while checking for bonding until all tape enclosing the endgate emblem can be fully removed.
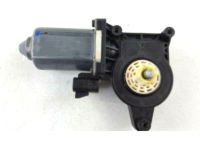
- Q: How to replace the rear side door window motor on GMC Sierra 1500 Classic?A:The procedure for rear side door Window Motor replacement starts with raising the window and proceeds to window removal for access when the Window Motor is nonfunctional. You should begin by eliminating the door trim panel alongside the water deflector and door speaker before applying support to the window. Detach the wiring harness from the motor before unbolting the 3 pieces (115 100 01) from its front side. The housing of the cable gear should not be dislodged because it can lead to the cable being removed from the spool. To remove the motor from the Window Regulator assembly disconnect it from its cable housing by observing motor orientation during gentle wiggling motion. The motor installation requires fitting the components through the cable housing before screwing the 3 bolts (115 100 01) tight to 5 n.m (44 lb in). The first step is to restore the window if removal occurred before reconnecting the wiring harness to the Window Motor and removing the window support. Use the wire connector to test the window operation through the switch before reinstalling the speaker followed by the water deflector and door trim panel.


