Popular OEM GMC Savana 1500 Parts
- Body & Hardware Parts View More >
- Steering Parts View More >
- Electrical Parts View More >
- Air & Fuel Delivery Parts View More >
- Charging & Starting Parts View More >
- Engine Parts View More >
- Belts & Cooling Parts View More >
- Suspension Parts View More >
- Driveline & Axles Parts View More >
- Emission Control & Exhaust Parts View More >
- Transmission Parts View More >
- Brakes Parts View More >
Why Buy Genuine GMC Savana 1500 Parts From ChevyPartsGiant.com
Looking for real GMC Savana 1500 parts? ChevyPartsGiant.com may be a better choice to find genuine parts at wallet-friendly prices. We sell only OEM GMC Savana 1500 parts, ensuring perfect fit, reliability, and long-term performance. With our website, you can easily get access to the same parts found at local GMC stores. All components are produced by GMC and are exclusively fitted on GMC Savana 1500 automobiles. By shopping at our store, you can enjoy the quality of the GMC factory without the high prices of brick-and-mortar facilities. We achieve this because we are an online store operating at lower costs, which we pass on to you. We also have a user-friendly platform where you can find and order genuine GMC Savana 1500 parts swiftly. We are here to make your process of restoring a GMC Savana 1500 or dealing with simple repairs quick and inexpensive. We also make it easy to obtain GMC Savana 1500 parts at competitive shipping prices and a team of knowledgeable staff ready to take your order. Choose ChevyPartsGiant.com to save time and money, as well as keep your GMC Savana 1500 in the good condition.
GMC introduced the Savana 1500 in 1996 as it replaced both the GMC Vandura and Chevrolet Van to become an essential North American full-size van. The vehicle exists in three fundamental versions which include passenger van and cargo van together with cutaway chassis designed for commercial uses. A 5.3L V8 engine in the GMC Savana 1500 generated 295 horsepower and 335 lb-ft torque to provide solid performance for everyday and business operations. A well-engineered automatic transmission teaming up with the engine enables efficient power delivery along with responsive acceleration making this vehicle famous for its stability and reliability. The GMC Savana 1500 received minor design enhancements with a new front-nose and added stability control safety features in 2003 and 2004. The upgrade to side-impact roof airbags in 2008 enhanced passenger safety measurement in the vehicle. The GMC Savana 1500 continues to be a preferred commercial vehicle option since its manufacturing ended in 2015. Genuine parts for GMC Savana 1500 vehicles can be easily acquired so owners can maintain their vans with high-quality components that fulfill GMC's strict standards.
GMC Savana 1500 concerns group into fuel delivery, transmission service, and ignition maintenance. On fuel delivery, the Savana 1500 can stall or crank long before starting. A clogged fuel filter strains the pump and drops rail pressure during heat soak. Measure pressure, command the pump, renew the fuel filter, and clean grounds. For power delivery, GMC Savana 1500 benefits from timely transmission service at set intervals. Delayed shifts or flare suggest varnish or wear within the valve body and solenoids. Replace the transmission filter, service fluid and adaptives, then verify line pressure and temperatures. Ignition maintenance keeps the Savana 1500 smooth during idle and acceleration. Aged spark plugs and tired spark plug wires increase misfire counts and fuel use. Check carbon tracking, check coil output, and place proper heat range plugs. After service, GMC Savana 1500 should start quickly, shift cleanly, and hold steady idle. Finish with a road test, then document readings so GMC Savana 1500 maintenance stays predictable.
GMC Savana 1500 Parts and Q&A
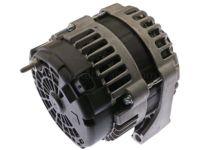
- Q: How to replace the alternator (KD9) on GMC Savana 1500?A:To install the auxiliary generator (KD9), disconnect the negative battery cable, disconnect the upper fan shroud and drive belt and disconnect the electrical connector. Carefully remove the positive battery cable and bolts to remove the generator. To install, place the generator, place bolts and reconnect.
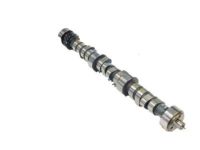
- Q: How to service and repair the camshaft on GMC Savana 1500?A:To maintain and repair the camshaft, we are required to disconnect the negative cable of the battery and remove different elements of the engine such as the engine cover and timing chain. Use bolts to pull off the camshaft, wipe it down and inspect and install a new camshaft with fresh oil. Install the engine again and re-connect the battery.
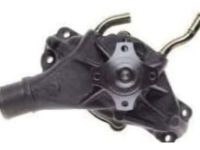
- Q: How to service and repair a water pump on GMC Savana 1500?A:In order to service and repair the water pump, disconnection of the negative battery cable, air cleaner assembly and draining the engine cooling system are undertaken. Take the different parts apart, dismount the water pump and gasket and wipe down the sealing surfaces. To install, use sealant, reconnecting hoses, and tightening bolts. Lastly, re-connect the battery, coolant refill, and leakages.


