Popular OEM GMC Envoy Parts
- Body & Hardware Parts View More >
- Steering Parts View More >
- Electrical Parts View More >
- Air & Fuel Delivery Parts View More >
- Engine Parts View More >
- Belts & Cooling Parts View More >
- Suspension Parts View More >
- Driveline & Axles Parts View More >
- Emission Control & Exhaust Parts View More >
- Transmission Parts View More >
- Brakes Parts View More >
- Headlights & Lighting Parts View More >
Why Buy Genuine GMC Envoy Parts From ChevyPartsGiant.com
Looking for real GMC Envoy parts? ChevyPartsGiant.com may be a better choice to find genuine parts at wallet-friendly prices. We sell only OEM GMC Envoy parts, ensuring perfect fit, reliability, and long-term performance. With our website, you can easily get access to the same parts found at local GMC stores. All components are produced by GMC and are exclusively fitted on GMC Envoy automobiles. By shopping at our store, you can enjoy the quality of the GMC factory without the high prices of brick-and-mortar facilities. We achieve this because we are an online store operating at lower costs, which we pass on to you. We also have a user-friendly platform where you can find and order genuine GMC Envoy parts swiftly. We are here to make your process of restoring a GMC Envoy or dealing with simple repairs quick and inexpensive. We also make it easy to obtain GMC Envoy parts at competitive shipping prices and a team of knowledgeable staff ready to take your order. Choose ChevyPartsGiant.com to save time and money, as well as keep your GMC Envoy in the good condition.
General Motors developed and manufactured the GMC Envoy SUV from 2002 through 2009 through the advanced GMT360 platform design. Introduced in 2002 the GMC Envoy brought a body-on-frame construction that kept the vehicle more structurally strong and improved driver behavior relative to historic SUV campers. General Motors revived the North American market production of the 4.2L Vortec 4200 inline six-cylinder engine after its 1984 discontinuation. In 2003 the available V8 engine reached 290 hp before the 5.3L V8 received Displacement on Demand system updates to 300 hp in 2005 as the main fuel efficiency upgrade. The GMC Envoy gave customers three different transmission configurations including rear-wheel drive, permanent two-wheel drive, along with "Shift On-Demand" 4WD that gave users options for diverse driving environments. The suspension system included two-stage independent front mounting with Bilstein shock absorbers and the five-link rear axle that could be equipped with air suspension for improved load balance capabilities. Standard safety improvements on the Envoy included Stabilitrak during 2006 alongside both cruise control and monitoring tire pressure systems. Owners of GMC vehicles should choose OEM GMC Envoy parts since they follow rigorous factory standards and extensive testing that maintains both performance quality and reliability.
GMC Envoy groups issues are raised to evaporative sealing, ignition power delivery, and fuel delivery control. In evaporative sealing, the Envoy regularly lights up after refueling or when making hot soaks. A loose or torn gas cap seeps vacuum and causes monitor malfunctions on this model. Check the cap gasket, wash the neck, check the gas cap, and make sure the EVAP on the Envoy is ready. The Envoy may lose gauge operation and display unpredictable warnings during driving in the ignition power. There is a defective ignition switch, which causes feeds to modules and accessories to drop in this GMC. Check the switch voltage with load, verify grounds, install new ignition switch and recheck. In fuel delivery, the Envoy can stall or crank without starting when the pump is weak. Limited flow overwhelms the pump and therefore changes the fuel filter after every 30000 miles. Confirm pressure rise, injector balance, and clean trims after the repair on the GMC again. Finalize a short loop with cities and a highway pass to ensure the smooth running of the Envoy. Record codes, voltage, and fuel information so that future GMC diagnostics are readable and reproducible.
GMC Envoy Parts Questions & Answers
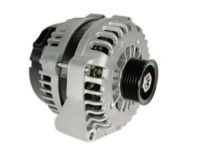
- Q: How to replace the alternator on GMC Envoy?A:Begin generator replacement by disconnecting the battery negative cable and driving off the belt. Begin by disconnecting the generator's positive Battery Cable nut followed by removing the a/c line mounting bracket bolt which represents the engine lift hook. Next remove the right engine lift hook bolts before removing the lift hook. Remove the generator by first disassembling its 3 mounting bolts. You should install the generator by placing it back into position then tightening the 3 bolt mounting points to 50 n.m (37 lb ft). Secure the generator to the battery positive cable using the nut then tighten it to 9 n.m (80 lb in). Secure the engine lift hook by installing 2 bolts while torquing them to 50 n.m (37 lb ft). Secure the a/c line bracket onto the lift hook by using the bolt and tightening it to 10 n.m (89 lb in). To conclude the installation process connect the battery negative cable and install the Drive Belt.
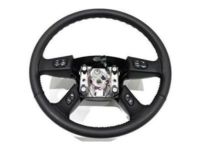
- Q: How to Replace a Steering Wheel Safely and Effectively on GMC Envoy?A:Starting to replace the Steering Wheel requires disabling the sir system. The inflator module needs to be removed before extracting the horn plunger from the Steering Column through a 90-degree rotation and stop-point press. Use a screwdriver to disconnect the Steering Wheel's electrical connection and afterward remove the retaining nut fastening the Steering Wheel to its shaft. A technician must use the specified j 1859-a (J 1859-A) Steering Wheel puller together with either the j-36541-a (J-36541-A) adapter or the j 42578 (J 42578) legs during Steering Wheel removal. Add the puller before taking out the Steering Wheel. To install the Steering Wheel simply set it onto the Steering Wheel shaft while tightening the retaining nut to a torque of 41 n.m (30 lb ft). Reconnect the Steering Wheel electrical connector while installing the horn plunger then reinstall the inflator module before activating the sir system.
- Q: How to Replace the Radiator Grille Emblem on GMC Envoy?A:In order to replace the Radiator Grille Emblem on one of the Envoy cars, take the grill off and lay it on a clean prepared surface. Then, undo the emblem retaining nuts, and pull off the emblem from grille. For the installation, attach the emblem to the grille but remember to read the Fastener Notice and then install the nuts which retain the emblem and tighten it to 3 N.m (27 lb in). Finally, reinstall the grille.
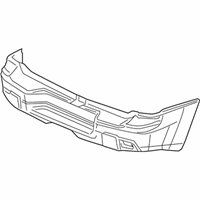
- Q: How to replace the front bumper fascia on GMC Envoy?A:Start the envoy fascia replacement by unfurling the grille before disassembling the fascia top fastenings at the headlamp housing and using a push-pin to detach it. When joining the replacement process begin by raising and supporting the vehicle while you eliminate the 3 push-pin devices that connect the fascia with its support rods then detach the fog lamps and cornering lamps. The removal process starts with discharging the air deflector and the four push-pins present on the fascia's bottom section. The fascia will become removable after pulling it straight forward once you release all body side attachment tabs. Set the fascia on the vehicle before securing its body side attachment tabs completely into position and fastening the 4 push-pins which anchor it to the headlamp housing panel. Begin by inserting the three fascia support rod push-pins and install the air deflector after that followed by the cornering lamps and fog lamps. The vehicle should be placed in the lowered position while two bolts at the top fascia face are tightened to 10 n.m (89 lb in) onto the headlamp housing panel. The last step involves inserting the push-pin to retain the fascia center followed by grilles attachment.


