ChevyParts
My Garage
My Account
Cart
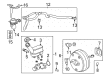
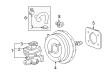
OEM GMC Brake Booster
Brake Power Booster- Select Vehicle by Model
- Select Vehicle by VIN
Select Vehicle by Model
orMake
Model
Year
Select Vehicle by VIN
For the most accurate results, select vehicle by your VIN (Vehicle Identification Number).
85 Brake Boosters found


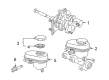
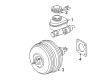
GMC Brake Booster Part Number: 84472897
$507.00 MSRP: $913.52You Save: $406.52 (45%)Product Specifications- Other Name: Booster, Hydraulic Power Brake Booster; Hydro-Boost Assembly; Booster Assembly; Power Brake Booster
- Replaces: 22872386, 84031701


GMC Brake Booster Part Number: 19371361
$391.30 MSRP: $701.88You Save: $310.58 (45%)Ships in 1-3 Business DaysProduct Specifications- Other Name: Booster, Hydraulic Power Brake Booster; Hydro-Boost Assembly; Booster Assembly; Power Brake Booster
- Replaces: 20940394


GMC Brake Booster Part Number: 19371354
$912.61 MSRP: $1644.37You Save: $731.76 (45%)Product Specifications- Other Name: Booster, Hydraulic Power Brake Booster; Hydro-Boost Assembly; Booster Assembly; Power Brake Booster
- Replaces: 15190585, 15706056, 15861643, 15126289, 15757280, 15813688, 15212823


GMC Brake Booster Part Number: 19371357
$621.92 MSRP: $1217.66You Save: $595.74 (49%)Ships in 1-2 Business DaysProduct Specifications- Other Name: Booster, Hydraulic Power Brake Booster; Hydro-Boost Assembly; Booster Assembly; Power Brake Booster
- Replaces: 15225283, 15218659, 15814983, 15870648
GMC Brake Booster Part Number: 19371359
$415.06 MSRP: $743.00You Save: $327.94 (45%)Ships in 1-3 Business DaysProduct Specifications- Other Name: Booster, Hydraulic Power Brake Booster; Hydro-Boost Assembly; Booster Assembly; Power Brake Booster
- Replaces: 15112793, 15870649, 15225284, 15814984, 25739959, 25749265

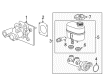
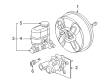
GMC Modulator Valve Part Number: 86820497
$916.13 MSRP: $1650.68You Save: $734.55 (45%)Ships in 1-2 Business DaysProduct Specifications- Other Name: Cylinder, Brake Master Cylinder; Booster Assembly
- Replaced by: 85736811

GMC Brake Booster Part Number: 19418519
$493.40 MSRP: $966.02You Save: $472.62 (49%)Ships in 1-3 Business DaysProduct Specifications- Other Name: Booster, Hydraulic Power Brake Booster; Power Booster
- Replaced by: 19432799

GMC Master Cylinder Part Number: 85105169
$135.29 MSRP: $264.88You Save: $129.59 (49%)Ships in 1-3 Business DaysProduct Specifications- Other Name: Cylinder, Brake Master Cylinder
- Replaces: 84397948, 84543808, 84680664, 84873078


GMC Master Cylinder Part Number: 85543518
$1227.26 MSRP: $2394.64You Save: $1167.38 (49%)Ships in 1-3 Business DaysProduct Specifications- Other Name: Cylinder, Brake Master Cylinder; Master Cylinder Assembly
- Replaces: 84926393, 85124747
GMC Brake Booster Part Number: 19371363
$418.97 MSRP: $813.13You Save: $394.16 (49%)Ships in 1-2 Business DaysProduct Specifications- Other Name: Booster, Hydraulic Power Brake Booster; Booster Assembly
- Replaces: 20941663, 25790710, 20774170

GMC Brake Booster Part Number: 25739959
$383.67 MSRP: $743.00You Save: $359.33 (49%)Ships in 1-2 Business DaysProduct Specifications- Other Name: Booster, Hydraulic Power Brake Booster
- Replaced by: 19371359

GMC Brake Booster Part Number: 19418518
$175.46 MSRP: $314.72You Save: $139.26 (45%)Ships in 1-2 Business DaysProduct Specifications- Other Name: Booster, Hydraulic Power Brake Booster; Booster Assembly
- Replaced by: 19432809
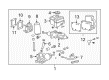
GMC Modulator Valve Part Number: 85548003
$860.94 MSRP: $1360.74You Save: $499.80 (37%)Ships in 1-3 Business DaysProduct Specifications- Other Name: Cylinder, Brake Master Cylinder; Booster Assembly
GMC Master Cylinder Part Number: 85543517
$912.86 MSRP: $1442.81You Save: $529.95 (37%)Ships in 1-3 Business DaysProduct Specifications- Other Name: Cylinder, Brake Master Cylinder; Master Cylinder Assembly
- Replaced by: 85697531


GMC Brake Booster Part Number: 15267004
Product Specifications- Other Name: Booster, Power Brake; Booster Assembly; Booster, Hydraulic Power Brake Booster
- Replaces: 19208151


GMC Booster Assembly Part Number: 15854060
Product Specifications- Other Name: Booster, Hydraulic Power Brake Booster; Brake Booster
- Replaces: 15814412, 15212481, 15126868, 19117203


GMC Brake Booster Part Number: 19371352
Product Specifications- Other Name: Booster, Hydraulic Power Brake Booster
- Replaces: 15150633, 15710166, 15757258, 15192200, 15003100

GMC Brake Booster Part Number: 19417218
$167.63 MSRP: $300.68You Save: $133.05 (45%)Product Specifications- Other Name: Booster, Hydraulic Power Brake Booster; Booster Assembly
- Replaced by: 19432800


GMC Brake Booster Part Number: 19432808
$312.98 MSRP: $561.39You Save: $248.41 (45%)Product Specifications- Other Name: Booster, Hydraulic Power Brake Booster; Booster Assembly; Booster, Vacuum Power Brake
- Replaces: 15276502, 19417224, 84164389, 15947019, 15856781


GMC Brake Booster Part Number: 19371365
$377.43 MSRP: $677.00You Save: $299.57 (45%)Product Specifications- Other Name: Booster, Hydraulic Power Brake Booster; Hydro-Boost Assembly; Booster Assembly; Power Brake Booster
- Replaces: 22745516
| Page 1 of 5 |Next >
1-20 of 85 Results
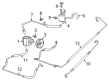
GMC Brake Booster
Want to cut long-term maintenance and repair costs? Choose OEM Brake Booster. Those parts deliver top durability you can trust. On our site, you'll find a huge catalog of genuine GMC parts. Prices are unbeatable, so you can keep more in your pocket. Every OEM GMC Brake Booster includes a manufacturer's warranty. You can also get an easy return policy that keeps buying risk free. Fast delivery, get your car on the road quickly. It's simple to search, compare, and order. Stop guessing about quality or fit. Order today and save with parts that last.
GMC Brake Booster Parts Questions & Experts Answers
- Q: How to replace the power vacuum brake booster on GMC Acadia?A:Park the vehicle on a flat spot and put the parking brake on before you began working. Before starting the replacement press and release the brake pedal until it becomes hard to use all the vacuum reserve. Take out the air filter assembly and the windshield washer solvents container from its compartment. Detach the master cylinder fluid level sensor electrical connection before removing the vacuum Brake Booster's check valve and hose units along with its vacuum sensor. Move the 2 brake pipes free from their routing clip on the frame rails. Then take off the bpmv valve's 2 nuts without disconnecting the pipes. Move the bpmv assembly forward when above the studs before removing its 2 master cylinder nuts yet keeping brake tubes connected. Set the master cylinder assembly on mechanics wire stands to maintain its upright position. Uninstall the left panel insulator and driver knee bolster from their places. Disconnect the brake pedal pushrod components by removing the clip and clevis pin. Take away the steering module and secure the 4 Brake Booster bolts. Shift the vacuum Brake Booster up and forward for the mounting studs to exit underneath the dash panel before you detach the vacuum Brake Booster. Check the vacuum Brake Booster gasket for damage against the dash panel and replace it when necessary. Thread the mounting studs of the vacuum Brake Booster onto the dash panel and fasten it with 4 nuts tightened to 25 nm (18 lb ft). Fit the intermediate Steering Shaft back in place and attach the brake pedal pushrod to its pedal base before setting the clevis pin with its retaining clip. Closely fit the driver knee bolster and left panel insulator so the master cylinder seal connects correctly with the vacuum Brake Booster while checking for damage. Check the Brake Master Cylinder seal connection to the vacuum booster unit and replace if detected damaged before installing both Brake Master Cylinder nuts at 20 nm torque. Carefully place the bpmv assembly over the studs while installing both bpmv nuts to their bracket. Tighten them to 20 nm (15 lb ft). Reattach the brake pipes through their path to the frame rail routing clip before reconnecting the master cylinder fluid level sensor power connection. You should attach the vacuum Brake Booster vacuum sensor and vacuum Brake Booster check valve and hose assembly to their proper positions on the vacuum Brake Booster. Put back the windshield washer solvent heater and the air cleaner unit last.
- Q: How to replace the vacuum brake booster on GMC Sierra 1500?A:The replacement process starts by applying the parking brake then blocking the wheels. Unplug the vacuum hose that connects the Brake Booster check valve as you disconnect the Brake Master Cylinder from its position. First remove the Pushrod retaining clip from the brake pedal stud then take off the stop lamp switch and the Pushrod from the same stud. Take out the vacuum booster while discarding its gasket by removing all four booster mounting nuts. Set a new gasket over the booster before installing the vacuum booster unit. Secure the 4 vacuum booster mounting nuts by tightening them to 33 nm (24 ft. Lbs.). Resume connection between Pushrod and the stop lamp switch through their matching point on the brake pedal stud while inserting the Pushrod retaining clip . Join the vacuum hose to the Brake Booster check valve then put back the master cylinder. End your process by letting go of the park brake then free the wheels.
- Q: How to replace the power vacuum brake booster on GMC Yukon?A:You need to apply the parking brake and exhaust the pressure in the vacuum reserve by pressing the pedal three times until it feels solid. Pull off the power vacuum Brake Booster electrical connections for dod sensor and active booster before removing the vacuum hose attached to the check valve as well as both master cylinder nuts with the original o-ring vacuum seal sticking to the master cylinder. Securely fasten the master cylinder in place using strong mechanics wire. Take out the Brake Booster pushrod retainer bolt followed by its retainer part and remove the stoplamp switch. Unplug the Brake Booster pushrod from its spot at the Brake Pedal and uninstall the Brake Booster nuts before removing the power vacuum Brake Booster along with the discarded gasket. One person should insert the new Brake Booster gasket while another helper joins in to install the power vacuum Brake Booster properly. First bolt the Brake Booster nut on its top right side then install all Brake Booster nuts to 33 nm (24 lb ft). Put the Brake Booster pushrod onto the Brake Pedal pivot pin while adding the stoplamp switch and brake pushrod retainer. Secure the retainer bolt with 10 nm of torque. Click the vacuum hose to its preinstalled check valve and join electrical wires to both the dod sensor and booster connector. Put the master cylinder back into position before tightening both master cylinder nuts to 33 nm (24 lb ft).


Related GMC Parts
 GMC Wheel Hub
 GMC Wheel Speed Sensor
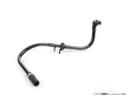 GMC Brake Booster Vacuum Hose
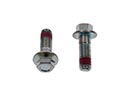 GMC Brake Caliper Bolt
 GMC Brake Caliper Bracket
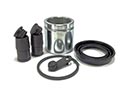 GMC Brake Caliper Repair Kit
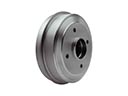 GMC Brake Drum
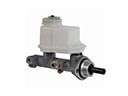 GMC Brake Master Cylinder
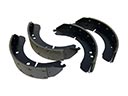 GMC Brake Shoe
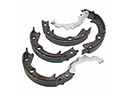 GMC Parking Brake Shoe
 GMC Spindle Nut
 GMC Wheel Hub Bolt
Browse GMC Brake Booster by Models
Acadia Sierra 1500 Yukon Canyon Sierra 2500 HD Terrain Envoy Sonoma Typhoon Syclone Caballero C1500 Envoy XL Envoy XUV Jimmy K1500 S15 S15 Jimmy Safari Savana 2500 Savana 3500 Sierra 2500 Sierra 3500 Yukon XL Acadia Limited C2500 C3500 G2500 K2500 K3500 Savana 1500 Yukon XL 1500 C1500 Suburban C2500 Suburban G1500 G3500 Hummer EV Pickup K1500 Suburban K2500 Suburban P2500 R1500 R1500 Suburban R2500 R2500 Suburban R3500 Sierra 1500 Classic Sierra 1500 HD Sierra 1500 HD Classic Sierra 1500 Limited Sierra 2500 HD Classic Sierra 3500 Classic Sierra 3500 HD V1500 V1500 Suburban V2500 V2500 Suburban V3500 Yukon XL 2500