Popular OEM GMC Yukon XL 2500 Parts
- Body & Hardware Parts View More >
- Steering Parts View More >
- Electrical Parts View More >
- Air & Fuel Delivery Parts View More >
- Charging & Starting Parts View More >
- Engine Parts View More >
- Belts & Cooling Parts View More >
- Suspension Parts View More >
- Driveline & Axles Parts View More >
- Emission Control & Exhaust Parts View More >
- Transmission Parts View More >
- Brakes Parts View More >
Why Buy Genuine GMC Yukon XL 2500 Parts From ChevyPartsGiant.com
Looking for real GMC Yukon XL 2500 parts? ChevyPartsGiant.com may be a better choice to find genuine parts at wallet-friendly prices. We sell only OEM GMC Yukon XL 2500 parts, ensuring perfect fit, reliability, and long-term performance. With our website, you can easily get access to the same parts found at local GMC stores. All components are produced by GMC and are exclusively fitted on GMC Yukon XL 2500 automobiles. By shopping at our store, you can enjoy the quality of the GMC factory without the high prices of brick-and-mortar facilities. We achieve this because we are an online store operating at lower costs, which we pass on to you. We also have a user-friendly platform where you can find and order genuine GMC Yukon XL 2500 parts swiftly. We are here to make your process of restoring a GMC Yukon XL 2500 or dealing with simple repairs quick and inexpensive. We also make it easy to obtain GMC Yukon XL 2500 parts at competitive shipping prices and a team of knowledgeable staff ready to take your order. Choose ChevyPartsGiant.com to save time and money, as well as keep your GMC Yukon XL 2500 in the good condition.
The GMC Yukon XL 2500 is a heavy duty, three-quarter-ton SUV, engineered for maximum towing towing and payload capabilities and with their spacious interior comforts and advanced utility, the GMC Yukon XL 2500 is a tow vehicle that you would not want to miss out on. This GMC model was introduced in 2000 together with the Yukon XL 1500 but did not substitute GMC Suburban, providing its customers with a more durable alternative for those that needed extra strength and performance. Based on the GMT800 platform and then updated with the GMT900 platform in 2007, the GMC Yukon XL 2500 has reinforced frames, upgraded suspensions systems, larger axles, and powerful Vortec V8 engines, including the 6.0L V8 for challenging workloads. In North America it has its key distributional point, the GMC Yukon XL 2500 is available in selected international markets. The GMC Yukon XL 2500 is equipped with an electronic transfer case having a dashboard range; hence, it gets smooth transition from two-wheel and four-wheel drive mode, enhancing off-road ability and towing ability. In contrast, the GMC Yukon XL 2500 is oriented to intensive uses, qualifying it even for towing trailers and carrying big loads of cargo. The 2007 redesign received the aerodynamic upgrades as well as the new powertrain while conserving the still-bulky frame and drivetrain a necessity within its class of performance. For long-term durability and optimal performance, you should at all times use the genuine OEM GMC Yukon XL 2500 parts that have been designed to meet the requirements of the vehicle as well as be able to withstand the strains of heavy-duty work.
GMC Yukon XL 2500 issues group into fuel measurement and delivery, HVAC air distribution, and exhaust noise control. On the fuel system, the Yukon XL 2500 often shows an erratic gauge and occasional hard starts. A failing sender within the module confuses readings and strains the fuel pump on hot restarts. Compare cluster values with scanner data, check grounds, and replace the module when pressure sags. For climate control, the GMC Yukon XL 2500 may lose temperature accuracy or blow from the wrong vents. A failed AC mode door actuator stalls travel, sets codes, and leaves airflow stuck during recalibration. Command the actuator, verify movement and feedback, then replace the unit and perform a relearn. In the exhaust system, the Yukon XL 2500 can pop or rattle as the exhaust heat shield loosens. Inspect fasteners and weld points, install the updated retainers, and confirm no contact after heat soak. After confirmed fixes, the GMC Yukon XL 2500 should report fuel level accurately and cool the cabin consistently. Road test the Yukon XL 2500, listen for shield noises, and recheck fuel trims and mode operation. Follow GMC torque and sealing procedures during rechecks.
GMC Yukon XL 2500 Parts and Q&A
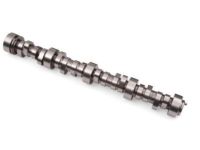
- Q: How to Replace a Camshaft on GMC Yukon XL 2500?A:To change the camshaft, one must lift up the hood and take off the hinge bolts. Then take off the radiator support, front cover and valve lifters. Position the timing marks, remove the bolts of the camshaft sprocket. Use bolts to extract camshaft as handles, clean them as necessary, and lubricate them prior to installing. Assemble parts and make sure that they are tight.
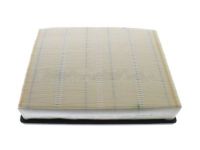
- Q: How to replace the air filter on GMC Yukon XL 2500?A:Removal of the air cleaner outlet duct and disconnection of the MAF/IAT sensor connector are required to remove the air filter. Give the screws of the housing a little looseness, then take off the cover and get at the filter. Install a new filter, reconnect the cover, screws, reconnect the sensor and re-apply the outlet duct.
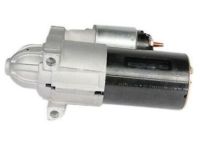
- Q: How to replace the starter motor on GMC Yukon XL 2500?A:In order to change the starter motor, one will have to disconnect the negative battery cable and lift the vehicle. Take out the transmission cover bolt, then, 4WD, loosen the front axle mounting bracket. Take off the starter bolts, uncheck the oil level sensor, and move the starter. Installment Reversing the steps and reconnecting the battery.


